How to Charge a Battery from Solar Panels
How to Charge a Battery from Solar Panels
Unless the solar panel is tiny, it is strongly advised to utilize a solar charge controller when connecting a solar panel directly to a battery. Generally speaking, a 5-watt solar panel can be directly attached to the battery terminal, but anything more significant requires a solar regulator to prevent the battery from being overcharged.

Before we begin, it is essential to note that replenishing used energy is only sometimes possible with solar power. For instance, some people desire to recharge batteries for a trolling motor, boat, RV, house, electric scooter, remote cottage, etc., very quickly, typically in only a few days. Consider using a 30-watt solar panel to recharge a 100-amp-hour battery under the perfect summertime lighting conditions. The battery will be almost entirely charged after an entire week. You can see from this example that it will require a minimum of 100 watts of solar energy to recharge a 100-amp-hour battery in a few days fully.
The energy gathered from your solar panels is stored in solar batteries. The more solar energy your battery can hold, the better its capacity. It would be best if you had solar panels,a charge controller, and an inverter to use batteries as part of your solar installation. This article provides examples of how to charge a battery with solar panels and how long they last.
The Solar Panel Wiring Diagram
Solar panels can be used in two ways to charge batteries: directly or indirectly. An indirect connection occurs when the solar panel is connected to charge equipment connected to the battery. In contrast, a direct link occurs when the solar panel is connected to the battery directly.
Connect the solar panel's positive lead to the charge controller's positive terminal. After that, join the solar panel's negative lead to the charge controller's negative terminal. Connect the positive battery terminals of the batteries to the charge controller's positive battery terminals. After that, join the negative terminals of the batteries and the charge controller. Placing the solar panel in the sun should cause your charge controller to signal that the battery is charging. In most cases, while the battery is charged, typically, it has a light that flashes.

Image Credit: https://footprinthero.com/how-to-connect-a-solar-panel-to-a-charge-controller
How to Charge A Battery from Solar Panels?
Method 1: DIY Battery to Charge from Solar Panel
Using a solar panel to charge your batteries is a fantastic method to generate clean, sustainable energy. Installing a charge controller, which controls the voltage from the solar panel as it is delivered to the battery, is necessary before you can begin.
Step 1: Install Charge Controller
Mount the charge controller away from the elements and on a solid surface. Even if your solar panels are firmly fixed, charge controllers should be installed if they are weather-proof. Instead, install the charge controller in a remote location and run cables from the panel to the controller.
Step 2: Connect to Your Battery
Your battery needs a positive and a negative wire connected to it. Either use cables with ring connections that fit the battery posts or wrap bare wires over them and attach them to the bars to secure them. It's best to be cautious if you can identify the positive and negative cables apart.
For example, you could use a black wire for the negative and a solid red wire for the positive. Alternatively, you could use a solid red wire for the positive and a black wire with writing on it for the negative.
Of course, you won't need to add new wires to the battery first if your battery bank already has them connected.
Step 3: Input Ports on Charge Controller
Slide the wire ends into the charging controller's input ports. Typically, there is no need to attach any connector to the ends of the wires that plug into the charge controller. Instead, insert the bare positive and negative wire ends into the relevant ports, then tighten the screws holding the wires in place with a screwdriver.
Make sure to connect the positive and negative cords to the correct ports to avoid shorting out your controller or battery.
Use 10-gauge or 16-gauge wire if you're attaching a 12V battery.
Step 4: Connect Wires to Charge Controller
The wires should be connected to the charging controller using MC4 connectors. MC4 connections are lengthy cylindrical fittings with a male and a female side and are often used to connect the output wires on solar panels. Fit MC4 connectors to the wires from your charging connector to ensure they bond properly. Similar to how you joined the output wires, slip the bare ends of the input wires into the input ports of the charging connection and tighten the screws using a screwdriver.
Step 5: Connect Controller to Solar Panel
Connect the controller's cables to the solar panel. After attaching the input wires to the charge connector, you should have two loose lines with MC4 connectors at either end. Snap the MC4 connectors into place by aligning the male and female ones with the corresponding ones from the solar panel. The connectors should "click" when they are firmly in place.
Make that the male connector is attached to the female connector and vice versa.
When working with electricity, you can always be careful. Check that the positive and negative cables are linked up correctly by rechecking them.
Step 6: Output on Charge Controller
Check it to make sure the charge connector's output is functional. Most charge connectors have a digital display that lets you see how much current is going to the battery. Double-check that everything is connected correctly if the readings are 0. Thanks to some charge connectors that can even talk with an app, you can check the voltage from your smartphone or tablet.
Step 7: Charge Battery from Solar Panel
Till it is charged, keep the battery connected to the connector. The size of the battery, the solar panel's wattage, and even the weather that day will all influence how long it takes to charge your battery. Your digital display will be helpful in this situation. The battery is almost fully charged when you see a decrease in output. It's okay to keep the battery on the charger until you need it because the charging connector will stop the battery's energy flow once it has been charged.
Method 2: Use MPPT Charge Controller
Solar panels can be a terrific method to recharge your batteries if appropriately used. Because it controls the power coming from the solar panel, a charge controller is crucial for using solar panels to charge batteries. Your batteries could suffer overcharging damage or even be ruined without a charge controller.
Step 1: Check the Solar Panel Wattage
The wattage should be visible on the panel's back. Your solar panel should often have a sticker on the back indicating the wattage it will generate. For instance, if your panel has 300W mentioned on the back, the array can output 300 watts of power.
Use a multimeter to calculate the wattage output of your solar panel while it is exposed to the full sun if you don't have one of those or you build your solar array.
The power output of solar panels is intended to exceed the voltage at which they are rated. For instance, a solar panel meant to produce 12V of power may make 17V. That is because they will only generate their maximum voltage in optimal circumstances.
The battery may overcharge and get damaged if the solar panel generates more power than the battery can store. A charge controller can assist in avoiding this.
Step 2: Solar Watt Rating
Although most solar chargers are 12 VDC-only, we provide a small selection of 24-volt panels. Solar panels are typically wired in series when 24 volts or more are required. We can order solar panels specifically designed to deliver higher DC voltages, such as 24 volts, 36 volts, 48 volts, etc.
Subtract the battery voltage from the solar panel's watt rating. The wattage was mentioned on the solar panel's back and divided this amount by that value. In order to securely charge the battery, your charge controller must be able to manage the amps that are provided by this. If your number is in multiples of 30 amps, round it up to the next highest rating because charge controllers are frequently rated in multiples of 30 amps. You would reduce 300 by 12 to get 25 amps, for instance, if there is a 300W solar panel and you want to charge a 12V battery. You would then purchase a charging controller with a 30 amp rating.
Step 3: Choose an MPPT Charge Controller
For greater effectiveness, pick an MPPT charge controller. Charge controllers come in two primary categories: PWM and MPPT (Maximum Power Point Tracking) (Pulse Width Modulation). Both will manage the maximum voltage the solar panel can deliver to the battery. However, MPPT charge controllers have a 30% greater energy storage and transfer capacity than PWM ones. Additionally, PWM charge controllers cannot be used with strings of solar panels, while MPPT charge controllers can. The higher cost of these choices compared to PWM devices can be quickly offset by greater energy efficiency.
What Is The Charge Controller?
A charge controller controls the current from the solar panel to the battery. It functions as an on/off switch. Additionally, it guarantees that the battery is charged at the proper voltage.
Typically, a 12-volt solar panel produces more than that, providing more electricity than the battery requires. Only the necessary current will be allowed to flow to the battery via the charge controller, which will manage the voltage supplied.
The charge controller will also turn off the energy after the battery is fully charged. Preventing overcharging, which can harm the battery or reduce its lifespan, safeguards the battery. Once the battery begins to deplete, the controller will only start letting the current flow once more.
The Types of Charge Controller
MPPT (Maximum Power Point Tracking)
The MPPT controller, the more advanced and expensive one, may couple a solar panel system with a battery of a varied voltage. In essence, this controller will monitor the voltage the battery requires and the panel output. To ensure that the battery is constantly charging optimally, that is, that the maximum amps are applied to the battery, it then matches the panel's output with that voltage.
PWM (Pulse Width Modulation)
The less expensive and more common PWM charge controller is the better choice. The voltage of the battery and solar panels must match when utilizing a PWM. By delivering charge pulses to the battery, the PWM operates. The battery sends a long, nearly continuous pulse to recharge the battery when it is discharged. It sends brief pulses that keep the battery charged when it is nearly fully charged. These controllers do not fully utilize the maximum power output of a solar panel system and are better suited to smaller solar panel operations.
On/Off Charge Controller
The most straightforward and affordable type are on/off charge controllers. When the battery is full, they simply stop the flow from the solar panel to the battery to avoid overcharging. A mechanical switch or keeping an eye on the battery voltage can do this. Off-off charge controllers are widely used by consumers to reduce costs, but they are less effective than MPPT systems. The effectiveness of a common off-off charge controller is roughly 85%.
Types of Charge Controllers
Pros
Cons
MPPT
Increase in charging efficiency
Sizes up to 80 amps
Flexibility
Higher costs
PWM
Inexpensive, sizes up to 60 amps
Not UL listed
Without fittings for conduit
On/Off Charge Controller
Most affordable
Less effective
What Are The Batteries for Solar Panels?
Deep Cycle Batteries
Of the three main types of secondary batteries, lead acid is the most popular and often used in the automotive industry. Batteries that contain nickel are used far less often. The use of lithium has become prevalent for secondary batteries, and many consumer products, like laptops and phones, use lithium-ion batteries.
The Types of Batteries for Solar Panels
The lead-acid secondary battery is the most often used and is one of the three primary, secondary battery kinds. Nickel-based batteries are used much less frequently. Many consumer goods, like computers and phones, employ lithium-ion batteries, which have become increasingly popular for secondary batteries.
Lithium-ion Batteries
One of its main drawbacks is the need for a battery to store solar panels' energy. The most common battery for solar panel systems is a lithium-ion battery. However, charging one can be challenging. But using a solar panel to charge a lithium battery is relatively easy if you take a little time and care.
Lead-acid Batteries
Deep Cycle Batteries
Types of Batteries
Pros
Cons
Lithium-ion Batteries
0 maintenance
Longer run time & lifespan
Higher costs
Require inspection
Lead-acid Batteries
Cheap
Easily rechargeable
Heavy
Low energy density
Deep Cycle Batteries
Repeat rechargeable
Harmless
Regular maintenance
What Are The Solar Panels?
The Types of Solar Panels
Types of Solar Panels
Pros
Cons
Monocrystalline Solar Panels
High efficiency and performance
Higher costs
Polycrystalline Solar Panels
Lower costs
Lower efficiency and performance
Thin-film Solar Panels
Portable and flexible
Lower efficiency and performance
Solar Panel Charging Considerations
Guidelines for maximizing solar battery charging:
How Long Do Solar Panels Last?
Solar Panel Battery Type
Solar Panel Usage
Solar Battery Temperature
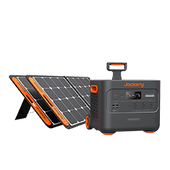
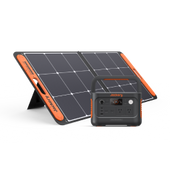
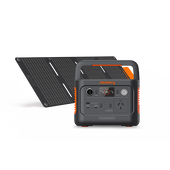
Jackery Portable Solar Panels

Solar Panels Series
Specialty
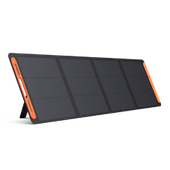
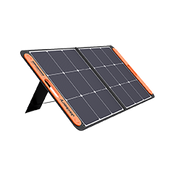
Jackery SolarSaga 100W Solar Panel
24.3% conversion efficiency
Compatible with Jackery Explorer 300/500/1000/2000
Equipped with 1*USB-C, 1*USB-A, 1*DC
Jackery SolarSaga 80W Solar Panel
25% conversion efficiency
Lightest weight
Foldable & portable
Jackery SolarSaga 100W Solar Panel
Bundles
Recharging Time
Explorer 1000 + 2*SolarSaga 100
8Hrs
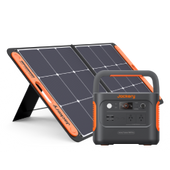
Explorer 500 + SolarSaga 100
9.5Hrs
Explorer 240 + SolarSaga 100
4.5Hrs
Final Thoughts
Best-selling Jackery Solar Generator
PAGE CONTENTS
New Arrival
Hurry up! Sale ends once the timer hits zero

