


|
Key Takeaways: |
|
- Typically constructed of cast iron or spun steel, a camp oven is a multipurpose outdoor cooking pot that needs to be seasoned to reduce rust and enhance cooking efficiency. - Seasoning involves coating the oven with oil and heating it until the oil polymerises into a non-stick, protective layer. - Always thoroughly clean your new camp oven with hot, soapy water before seasoning to remove factory coatings or residues. - Choose oils with a high smoke point, such as vegetable, canola, or rice bran oil, for effective seasoning. Never store your camp oven while damp - dry it thoroughly and lightly oil it to prevent rust. - We recommend the Jackery Explorer 1000 v2 or 1000 Plus portable power station to power the camp oven outdoors. |
What Is a Camp Oven and Why Does It Need Seasoning?
An essential piece of outdoor cooking equipment in Australia is a camp oven, often known as a cast iron or spun steel pot. Because they can be used over hot coals or open fires, these multipurpose ovens are ideal for outdoor activities like backyard cooking or camping.
A camp oven's sturdy design makes it capable of withstanding high temperatures, and its capacity to hold and disperse heat allows it to be used for cooking a wide range of foods. Whether you're roasting meat, baking a classic damper bread, or slow-cooking a stew, the camp oven is a necessary outdoor cooking gear.
Why Does Camp Oven Need Seasoning?
Seasoning is one of the most critical camp oven maintenance procedures. Applying cooking oil to the oven's surface and heating it until the oil joins the metal to create a solid, protective layer is known as seasoning. This is an important step for a number of reasons.
Prevents Rusting: Preventing rust is one of the primary advantages of seasoning a camp oven. When exposed to moisture, cast iron and steel are prone to rust, particularly when not in use for prolonged periods of time.
A protective barrier that seals the metal, stops moisture from coming into touch with it and causing corrosion is produced by heating a thin oil coating. This coating protects your investment and guarantees that your camp oven will continue to work well for many years to come.
Enhances Non-Stick Properties: Additionally, seasoning gives your camp oven a naturally non-stick surface. A well-seasoned camp oven facilitates cooking by decreasing the possibility of food adhering to the top. This is particularly crucial when preparing foods like stews or roasts that need lengthy cooking times or have a tendency to stick. You may cook with less oil or fat when you use a seasoned surface, which makes your food a little healthier and much easier to clean up afterwards.
Improves Flavor: A well-seasoned camp oven will enhance the flavour of the food you cook over time. The flavours from your cooking are absorbed by the seasoning layer as it forms, improving the overall flavour of your food. Particularly when making classic campfire meals that depend on the seasoning in the cooking vessel to enhance the flavour, this can produce a richer, more complex flavour profile. A key component of your cooking experience is that the seasoning improves with each use of your camp oven.
Basically, seasoning your camp oven is a crucial aspect of the camp oven care routine because it not only prolongs its lifespan but also improves its cooking efficiency. Your cooking experience will be as successful and pleasurable as possible if you take the time to properly season your camp oven, whether you're breaking in a new one or fixing an old one.
Step-by-Step Guide: How to Season a Camp Oven
One of the most important steps to take to guarantee that your camp oven functions properly and lasts for many years is to season it. Based on the recommendations of outdoor shops in Australia, the following is a step-by-step guide:

Step 1: Clean the Camp Oven Thoroughly
Any factory coatings or residues must be removed before seasoning. Scrub the camp oven's outside and interior with a strong brush and hot, soapy water. This cleaning procedure guarantees that there are no impurities on the surface that can obstruct the seasoning procedure.
Step 2: Dry the Oven Completely
To prevent rusting, the camp oven should be thoroughly dried after it has been cleaned. In order to remove all of the moisture, you can use a clean cloth or paper towel. During the seasoning process, it is essential to make sure that there is no trace of water left behind, as any moisture can lead to the formation of rust.
Step 3: Apply a Thin Layer of Oil
Select an oil with a high smoke point, like rice bran, canola, or vegetable oil. Using a paper towel or lint-free rag, lightly and evenly cover the outside and inside of the camp oven with oil. It's important to avoid using too much oil as this could leave a sticky residue.
Step 4: Heat the Camp Oven
Preheat your oven or barbecue to roughly 392 degrees Fahrenheit (200 degrees Celsius). Assume that the camp oven is inverted and placed in the middle of the oven, with the lid positioned in an inverted position on the rack that is located above. The arrangement of the oven prevents oil from accumulating inside the appliance. Bake for approximately one hour. The heat will induce the oil to polymerise, resulting in the formation of a long-lasting and non-stick coating.
Step 5: Allow the Oven to Cool
The camp oven should be allowed to gradually drop down to room temperature when the baking process has been completed. It is through this process of progressive cooling that the seasoning layer is able to set properly.
Step 6: Repeat the Seasoning Process
Repeat steps 3 to 5 around two to three times to achieve the best possible results. Additionally, the camp oven's non-stick qualities and resistance to rust are improved with each new coat of seasoning that is applied. There are multiple levels that contribute to a seasoning that is more robust and long-lasting.
Step 7: Maintain the Seasoned Surface
For the purpose of preserving the seasoning, the camp oven should be cleaned with hot water and a sharp brush after each use. Soap should be avoided. Before putting it away, make sure it is completely dry and then apply a thin layer of oil. Your camp oven will have a longer lifespan if you perform routine maintenance on it, which will also preserve the seasoning.
How Often Should You Season a Camp Oven?
Seasoning your camp oven is an essential step in ensuring that it continues to function properly and lasts for a long time. Despite the fact that the first seasoning generates a coating that is non-stick and protective, continual maintenance is required in order to maintain it in the best possible condition. You should season a camp oven:
After Each Use: After each usage, it is advised that a thin layer of oil be applied to the interior of the camp oven at the very least. This helps to preserve the seasoning and will prevent rust from forming. If you want to oil the oven, make sure it is clean and dry first.
When rust Appears: Should you come across any rust spots, it is recommended that you remove them as soon as possible and re-season the areas that have been impacted. In order to accomplish this, the rusted areas must be cleaned, oil must be applied, and then the oven must be heated in order to polymerise the oil and create a new protective coating.
Periodic Deep Seasoning: Performing a thorough re-seasoning every 6 to 12 months can be advantageous even with routine maintenance, particularly if the oven is used regularly. This procedure ensures a robust, long-lasting seasoning coating by completely cleaning the oven, adding oil, and heating it.
Camp Oven Seasoning Tips
Proper seasoning is essential to a camp oven's durability and efficiency. We've compiled professional advice on how to season your camp oven for maximum performance so you can get the greatest results. In addition to improving its non-stick qualities, these doable suggestions will shield it from rust and prolong its useful life for many years of outdoor cooking.

Tip 1 Choose the Right Oil: It is recommended that you use oils that have a high smoke point, such as rice bran oil, canola oil, or vegetable oil. These oils are able to preserve their integrity even when subjected to the high temperatures that are necessary for seasoning.
Tip 2 Apply Thin, Even Layers: Applying a relatively thin layer of oil to the whole surface of the camp oven should be done with a cloth that does not contain lint or with a paper towel of excellent quality. It is important to avoid over-oiling, as this can result in a sticky residue.
Tip 3 Utilise a Hooded BBQ or Oven: Invert the camp oven and place it inside a hooded oven or barbecue that has been preheated. Any surplus oil can drain off using this configuration, preventing it from accumulating inside the oven.
Tip 4 Heat to the Smoking Point: Bring the camp oven up to temperature until the oil starts to smoke. This is an indication that the oil has reached its polymerisation temperature, which results in the formation of a coating that is long-lasting and non-stick.
Tip 5 Cool Gradually: The camp oven should be allowed to cool down to room temperature gradually. It is through this process of progressive cooling that the seasoning layer is able to set properly.
Tip 6 Repeat for Optimal Results: Repeating the procedure of oiling and heating two to three times will result in a stronger seasoning layer. Each cycle builds upon the one that came before it, so improving the oven's resistance to rust and its ability to prevent food from sticking.
Tip 7 Regular Maintenance: For the purpose of preserving the seasoning, the camp oven should be cleaned with hot water and a sharp brush after each use. Soap should be avoided. Before putting it away, make sure it is completely dry and then apply a thin layer of oil.
Common Mistakes to Avoid
Proper seasoning is absolutely necessary when it comes to preserving the functionality and durability of your camp oven. Be cautious of the following typical errors in order to achieve the best possible results:

Skipping the Initial Cleaning
Your cooking may contain manufacturing oils or residues if you use your camp oven without first cleaning it. Before seasoning, always wash your new camp oven with hot, soapy water and a sharp brush to get rid of any manufacturing coatings. To avoid rust, make sure everything is completely dry after washing.
Over-Oiling the Surface
When an excessive amount of oil is applied, the resulting seasoning layer may be uneven or sticky. To apply a thin layer of oil that is uniform throughout the entire surface, both on the inside and the outside, use a paper towel or a cloth that does not contain lint. The accumulation of excess oil might result in uneven seasoning and pooling.
Inadequate Heating
It is possible that the oil will not effectively adhere to the metal if the camp oven is not heated to a temperature that is high enough. For the polymerisation process to occur, it is necessary to ensure that the oven reaches the oil's smoking point. This procedure results in a coating that is long-lasting and non-stick.
Ignoring the Lid
You should place equal importance on the base of your camp oven as you do on the lid. To avoid oil from accumulating inside the oven while you are seasoning, place the lid on the rack that is located above the oven in an inverted position. In this way, a uniform layer of seasoning is achieved across all surfaces.
Using Harsh Cleaning Agents
When cleaning your camp oven after seasoning, you should avoid using soap or harsh detergents because these products can potentially remove the seasoning layer. If you want to eliminate food leftovers, use hot water and a stiff brush instead. If there are any tough parts, you can dislodge them by boiling water in the oven.
Storing While Damp
Cast iron and spun steel are both susceptible to damage from moisture. In order to avoid rust from forming on your camp oven, you should always make sure that it is absolutely dry before burying it. After cleaning it, make sure it is completely dry, and then before putting it away, apply a thin layer of oil.
Neglecting Regular Maintenance
Even after the initial seasoning has been done correctly, your camp oven still has to be maintained. It should be cleaned as soon as possible after each use, completely dried, and then a small coat of oil should be applied to it in order to preserve the seasoning and prevent rust. Maintaining your camp oven on a regular basis will ensure that it continues to be in pristine condition for many years to come.
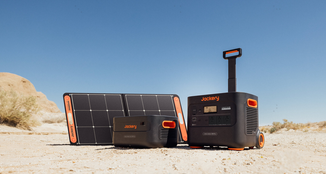
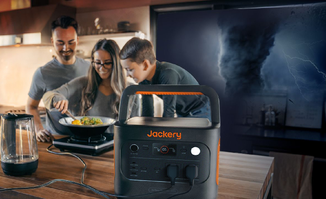
How to Power Camp Oven with Jackery
Choosing a Jackery Portable Power Station to power your camp oven offers several compelling advantages for enhancing your outdoor cooking experience. Still, it's crucial to understand the power requirements of your specific oven.

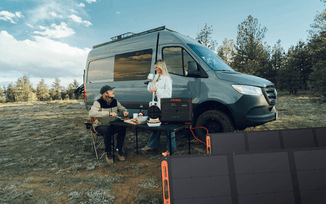
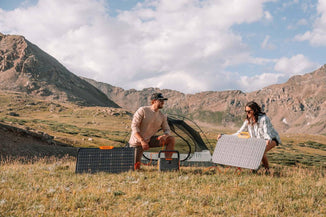
It allows you to use an electric camp oven in locations without access to traditional power outlets, such as remote campsites, tailgates, or overland adventures. This opens up more versatile cooking options beyond propane stoves or campfires.
Electric ovens often offer more precise temperature control compared to open flames, leading to more evenly cooked meals and baked goods. A Jackery provides a stable power source for this consistent heating. Eliminates the need for open flames inside or near your tent or cooking area, potentially reducing fire hazards.
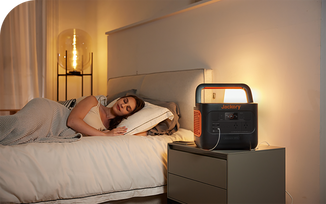
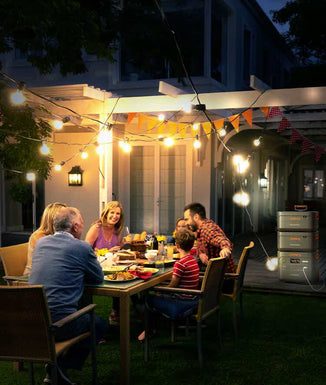
Operates silently and produces no fumes, unlike propane or wood-burning ovens, making your cooking environment more pleasant and environmentally friendly. The Jackery can also power other essential camping gear simultaneously, such as lights, charging phones, and even small refrigerators (depending on the model). Here, we recommend Jackery Explorer 1000 v2 and 1000 Plus portable power stations.
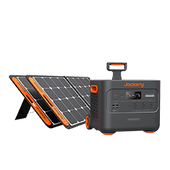
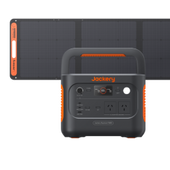
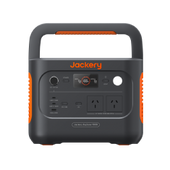
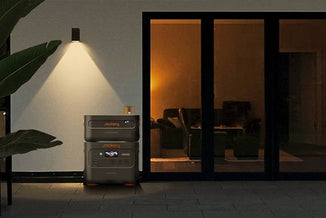
Jackery Explorer 1000 Plus
The Jackery Explorer 1000 Plus is a compelling choice for powering a camp oven due to its capacity, output, and portability balance. Here's a breakdown of why it's a good option:

Sufficient Capacity for Moderate Use: With a 1264Wh capacity, the Explorer 1000 Plus can store a decent amount of energy to run a camp oven for a noticeable duration, especially for shorter cooking times or if you're mindful of power consumption. Besides, the Explorer 1000 Plus has an expandable capacity of 5kWh with addable battery packs, which can power a larger camp oven.
High AC Output: It boasts a 2000W continuous AC output with a 4000W peak, which is crucial for powering most electric camp ovens. Camp ovens can draw significant power, and this output level should handle the demands of many models. Always verify your camp oven's wattage to ensure it's below 2000W.
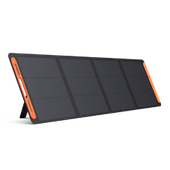
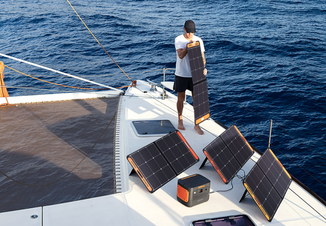
Versatile Recharging Options: You can quickly recharge it at home before your trip. Compatible with Jackery SolarSaga 100W or 200W solar panels, allowing you to replenish power off-grid. You can significantly extend your cooking capabilities with sufficient sunlight and the right number of panels. You can also charge it using your car's 12V outlet while travelling.
LiFePO4 Battery for Longevity and Safety: The Explorer 1000 Plus often uses a LiFePO4 battery, known for its longer lifespan, stability, and safety compared to traditional lithium-ion batteries, providing reliable power for many camping trips.
|
Jackery Explorer 1000 Plus Running Time |
|
|
Small Camp Oven (12W) |
34.5-333H |
|
Common Camp Oven (100W) |
8.8-40H |
|
Chef Camp Oven (1000W) |
1-4H |
|
Portable Grill (800W) |
1.3-5H |
(*The working hours are only for reference; the actual working hours depend on your usage.)
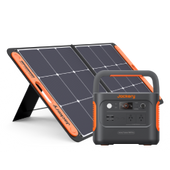
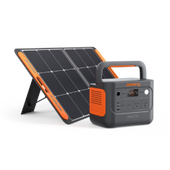
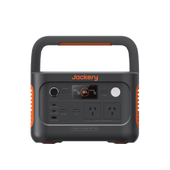
Jackery Explorer 1000 v2
The Jackery Explorer 1000 v2 is a strong contender for powering a camp oven. With a 1070Wh capacity, it offers a significant amount of stored energy, allowing you to run a camp oven for a noticeable duration, especially for shorter cooking times or with mindful power management.

High AC Output: Its 1500W continuous AC output (with a 3000W surge peak) is a key advantage. Many standard electric camp ovens fall within this wattage range. This higher output makes it more likely to handle the power demands of your oven without tripping overload protections. However, always double-check the specific wattage of your camp oven to ensure it's below 1500W.
Portable Design: Despite its considerable power, the Explorer 1000 v2 is designed to be relatively portable with a convenient foldable handle, making it easier to transport to your campsite compared to larger power stations.
Versatile Recharging Options: You can quickly and fully recharge the Explorer 1000 v2 from a standard wall outlet in about 95 min, ensuring it's ready for your cooking needs before you leave. It's compatible with Jackery SolarSaga 100W solar panels, allowing you to replenish power while off-grid. With enough sunlight and solar panels, you can significantly extend your cooking capabilities on longer trips. You can also recharge it using your car's 12V outlet while driving.
Multiple Output Ports: Beyond the necessary AC outlets for your camp oven, it features USB-A and USB-C ports to charge other devices simultaneously, adding to its utility at your campsite. The USB-C port offers up to 100W Power Delivery for faster charging of compatible devices.
|
Jackery Explorer 1000 v2 Running Time |
|
|
Small Camp Oven (12W) |
32.5H |
|
Common Camp Oven (100W) |
7.6H |
|
Chef Camp Oven (1000W) |
0.9H |
|
Portable Grill (800W) |
1.1H |
(*The working hours are only for reference; the actual working hours depend on your usage.)
FAQs about Camp Oven
The following are the frequently asked questions about how to season a camp oven.
1. How do you season a new camp oven?
A new camp oven should be carefully cleaned with hot, soapy water to get rid of any manufacturer residues before being completely dried before seasoning. Cover the lid and all other surfaces with a thin, even coating of high-smoke-point oil, such as vegetable or canola oil. With the cover on top, place the oven upside down in a hooded barbecue or prepared oven set to roughly 200°C. Bake for approximately an hour. To create a long-lasting, non-stick coating, let it cool gradually before doing the oiling and heating procedure twice more.
2. What is the best oil to season a camp oven?
High-smoke point oils, including rice bran, canola, or vegetable oils, are ideal for seasoning in a camp oven. These oils provide a long-lasting, non-stick coating because they can tolerate the high temperatures needed for seasoning without degrading. Oils with low smoke points, such as olive oil, should be avoided since they may not build a suitable seasoning layer and can leave a sticky residue.
3. How to season a camp stove?
Generally speaking, seasoning a camp stove means seasoning its cast iron parts, like the griddles or grates. After thoroughly cleaning and drying the cast iron components, lightly coat them with high-smoke-point oil. To enable the oil to polymerise and create a protective, non-stick coating, heat the ingredients until the oil reaches its smoke point. To preserve the seasoning, repeat this procedure as necessary.
4. How to season a camp cooker?
Cleaning, drying, and putting a thin coating of high-smoke-point oil are the steps involved in seasoning a camp cooker, particularly if it has cast iron components. To enable the oil to polymerise and form a protective, non-stick coating, heat the oiled components until the oil reaches its smoke point. To intensify the seasoning, repeat the heating and oiling steps as needed.
5. How do you season a new oven?
Seasoning is usually not necessary for modern ovens. To eliminate any manufacturing residues, it is advised to operate the oven empty for 30 minutes at a high temperature (around 200°C) to complete an initial burn-in. In order to guarantee that your oven is prepared for cooking, this procedure helps remove any protective coatings or residues from the manufacturing process.
Final Thoughts
The key to fun and hassle-free camp cooking is a well-seasoned camp oven. Understanding the importance of seasoning, following the right procedures, and avoiding typical mistakes will guarantee that your oven is a dependable companion on all of your outdoor excursions.
Long-term rust resistance and the development of a naturally non-stick surface are possible with consistent care, the proper oil, and a little attention. Using this guidance, which is based on reliable Australian sources, can help you get the most out of your camp oven every time you cook outside, regardless of your level of experience.


