


Guide to Camper Van Solar System: How to Choose & Install
Guide to Camper Van Solar System: How to Choose & Install
Australian campers know the cost of nightly powered charges in campgrounds and have resorted to reducing prices by utilizing solar to power camper vans. Solar panels collect sunlight and channel it through a charge controller, which recharges the batteries in your camper van's electrical system.

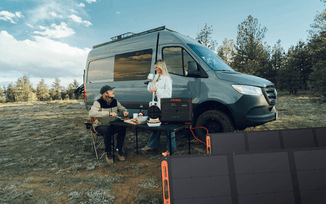
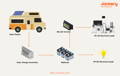
If you're new to camper van electrics, finding the correct solar panel can seem like a never-ending maze of questions and unknowns. You've arrived at the right location! You will learn everything there is to know about camper van solar systems, including their working principles, fundamentals, and how to choose and install one. Alternatively, the Jackery Solar Generator, which combines solar panels with a portable power station, provides a continuous and stable solar energy power supply to camper van equipment.
Key Takeaways:
When light particles reach the solar panel, they knock the electrons within the silicon loose, causing electricity to be generated. Because the voltage and current from a solar panel vary, a charge controller is always required to filter the electricity. Then, the batteries store the electricity for later use.
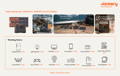
A camper van solar system typically consists of solar panels, a battery, a charge controller, and an inverter (some may require a DC-DC charger). There are different standards to choose each component.
When sizing a camper van solar system, you should figure out the total power consumption, the energy needed, and how to size a solar charge controller.
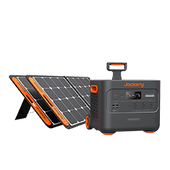
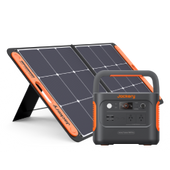
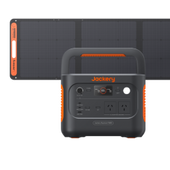
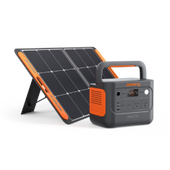
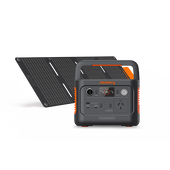
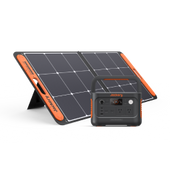
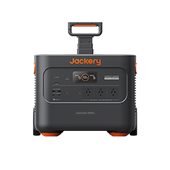
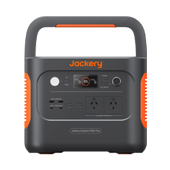
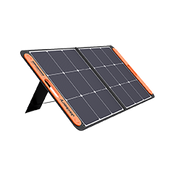
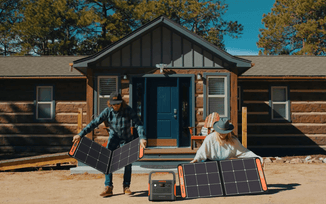
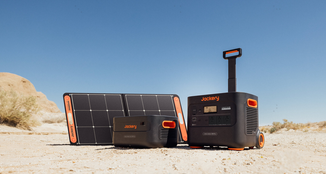
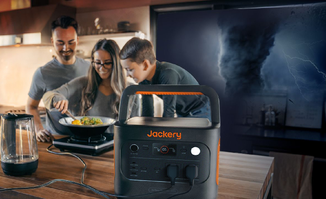
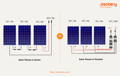
We highly recommend Jackery Solar Generators as your portable camper van solar system, significantly Solar Generator 2000 Plus and 2000 Pro, to charge most outdoor appliances with higher capacities.
There are three steps to install a camper van solar system. Firstly, you should wire the solar system in series or parallel, then put the solar panels and install them with care.
What Is A Camper Van Solar System?
Alternative energy sources remain popular as the world becomes more aware of environmental challenges. Solar panels are a popular and practical way to use renewable energy at home and when traveling in your camper van.
Before we get into the specifics of how a campervan solar system works, let's look at the various components of a campervan solar unit. Individual units may differ slightly from one another. However, the following components are typically found in a camper van solar system:
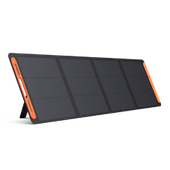
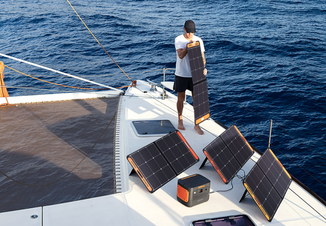
- Solar Panels: Solar panels for campervans sit atop the van and gather energy from the sun, converting it into power that can be used in the campervan. Solar panels are classified into two types: polycrystalline and monocrystalline.
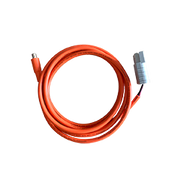
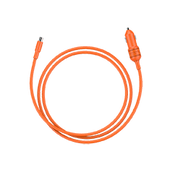
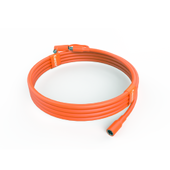
- Wiring: The campervan solar panel wiring transports electricity from your panels to your recreational batteries. There are two ways to connect your solar panels: parallel and series.
- Charge Controller: A charge controller is a piece of equipment that regulates the voltage of the electrical current flowing into your campervan's battery.
- Battery: This is where you store the power to run your campervan's numerous loads. The solar panels on the van will replenish your battery.
- Inverter: A device that converts direct current (DC) to alternating current (AC) for use with standard household appliances.
How Does A Camper Van Solar System Work?
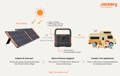
A camper van solar system typically consists of solar panels, a battery, a charge controller, and an inverter (some may require a DC-DC charger). Using solar panels to recharge the battery in a campervan is a common and eco-friendly practice. Solar panels can take your campervan off-grid with the correct electrical system and some excellent sunshine, allowing you to relax in your favorite camping area, explore your home country, or even travel the world without worrying about hooking into an electric hookup.
A solar panel comprises a series of photovoltaic cells linked together and constructed of a semiconductor such as silicon. When light particles (photons) reach the solar panel, they knock the electrons within the silicon loose, causing electricity to be generated. The greater the light's intensity, the larger the flow of electricity.
Because the voltage and current from a solar panel vary, a charge controller is always required to filter the electricity before connecting it to your battery. A charge controller will manage the voltage from the panel and pull the optimal current to charge a recreational battery efficiently.
Your battery bank stores 12 volts of power. If you have a coffee machine, an instant pot, or anything else, you will need 110 volts, the standard household socket. The inverter turns the 12v power stored in the batteries into 110v, allowing you to power your household appliances.
How to Choose A Camper Van Solar System?
If you're new to solar power and the prospect of customizing every component of your system seems daunting, purchasing a camper van solar system kit, such as Jackery Solar Generators, can be an excellent way to reduce decisions and stress. As per your demands, you can choose a Jackery Solar Generator with a capacity ranging from 240Wh to 12 kWh.
You need more flexibility to customize your components, which is usually only problematic if you have particular requirements. If a solar panel kit isn't for you, keep reading for information on selecting individual components for your camper van solar system.
1. Solar Panels
Solar panels are available in three different configurations, and there are several types of solar cells to be aware of. First, consider the form factors:
- Rigid Solar Panels: Rigid solar panels are less expensive, more durable, and have a longer lifespan (20-25 years) than other varieties. They are, however, more challenging to install, particularly on vehicles with sloped roofs.
- Flexible Solar Panels: These solar panels are less conspicuous and more accessible to install on curved or irregular rooftops. They are, however, more expensive, less durable, and have a shorter lifetime (3-5 years).
- Portable Solar Panels: Portable solar panels are easy to carry and do not require installation. Portable solar panels often offer superior quality and longer lifespans but may be more expensive.
Solar panels for camper van solar systems are classed into three varieties based on their solar cells: monocrystalline, polycrystalline, and thin-film solar panels. For the majority of consumers, we recommend monocrystalline solar panels. They are more efficient than other varieties and have a longer lifespan. Polycrystalline solar panels are less effective, but they are significantly less expensive. Thin-film solar panels are used in flexible solar panels. However, their performance could be better.
Monocrystalline
Polycrystalline
Thin-Film
Quality
High
Low
Medium
Lifespan
High
Low
Medium
Efficiency
20%+
15%
7-10%
Price
High
Medium
Low
2. Solar Batteries
There are various varieties of batteries for a camper van solar system, but the most important ones to understand for van life electrical are LFP (lithium iron phosphate or LiFePO4) and AGM (absorbed glass matt, a lead-acid battery).
LFP batteries are lighter, charge faster, and can be entirely depleted without causing damage. Because they can be fully finished, sizing is much easier, and you don't have to worry as much about the health of your batteries daily. LFP batteries are more expensive at first but less expensive over time since they last much longer.
AGM batteries are somewhat heavier, and you must be careful not to overcharge them. Because they cannot be discharged past 50% regularly, you must continually monitor them and be cautious with your electrical usage while running low. AGM batteries are less expensive upfront but more in the long run because they need to be replaced more frequently.
Choose lithium batteries since they are lighter, easier to handle, and perform better. AGM batteries are only appropriate for highly low-budget applications because they cause more hassles, and the initial cost advantages over LFP soon erode over time.
3. Solar Charge Controller
- PWM Charge Controllers(pulse width modulation): They quickly lower solar voltage by switching on and off. While this works for charging your batteries, it wastes a significant amount of solar power - up to 30% of your solar output.
- MPPT Charge Controllers (maximum power point tracking): These devices convert extra solar voltage into current, then routed to your house batteries. This saves energy, charges your home faster, and works better with higher-voltage solar arrays.
4. Inverter
Inverters are classified into pure sine wave (PSW) and modified sine wave (MSW). Although modified sine wave inverters are less expensive and can function adequately, we recommend using a pure sine wave inverter for your van's AC power system.
Pure sine wave inverters produce a cleaner electrical signal, similar to what you would get from the power grid. This implies that delicate devices like computers are safer to power, and loads like motors, microwaves, and induction cooktops will function much more efficiently. A modified sine wave inverter's "dirtier" signal can shorten the life of specific AC equipment. Some appliances will also not operate on a modified sine wave. Simultaneously, the Jackery Portable Power Station includes a pure sine wave inverter to power most camper van appliances.

How to Size A Camper Van Solar System?
Calculate your gadgets' power consumption to determine how much solar generation you require from the sun. A basic understanding of your equipment and panel will keep you from purchasing the incorrect regulator, battery, or solar panel type. List the items you'll need for your camping trip to calculate your solar power requirements and equipment consumption. Here's a basic calculator for converting solar energy to electricity. The steps for sizing a camper van solar system are as follows:
Step 1: Power Consumption Calculation
You may calculate how much power is required by using your leisure battery and seeing how long it lasts. You'll also need to know your battery's Ah rating (which will most likely be 110 or 200Ah). If your 200AH battery, for example, powered everything you wanted it to for two days, your computation would be 200 / 2 = 100Ah each day.
Consider the power consumption of all the electrical gadgets you will use while camping to estimate how much power you need for your camper. Calculate this using the table below:
Appliances
Wattage
Amperes in 12V
Hours
Amp-Hour
Watt-Hour
Light
16W
1.3A
4H
5.2Ah
64Wh
Fan
20W
1.7A
1H
1.7Ah
20Wh
Water Pump
40W
3.3A
0.3H
9.9Ah
12Wh
TV
50W
4A
2H
8Ah
100Wh
Radio
25W
2A
1H
2Ah
25Wh
Total
26.8Ah
221Wh
Because your battery produces around 12 Volts, use the power rating of your appliances to calculate how much your devices drain the battery. To calculate power consumption, use the formula below.
Power (W) = Current (A) x Voltage (V)
A television, for example, has a power rating of 60 Watts, so:
60W / 12V = 5A
Then, multiply that quantity by how many hours it will be utilized. In the case of television, for example, 5 hours:
5A x 6H = 30 Ah
This signifies that 30Ah of the battery's capacity is used to power the appliance.
Step 2: Solar Energy Needed
Now that you know what type of solar panel you require, you must decide on the size or, more accurately, the power rating. A solar panel's power rating, or wattage (W), indicates how much power it will provide to charge your battery bank. The energy you require from your solar panels will be determined by the size of your battery bank and how long you intend to be off-grid. However, it may be constrained by your budget and the amount of space available on your roof.
To calculate the amount of charging power required to recharge your batteries fully, you must first determine your battery bank's total 'usable capacity' in watt-hours. The quantity of your battery bank you can access is called usable capacity. For example, you should regularly discharge LFP batteries at most 80%. As a result, the functional capacity of a 200Ah LFP battery is 200Ah * 80% = 160Ah.
The amp hours (Ah) can then be converted to watt hours (Wh) by multiplying the battery voltage: 160Ah x 12V = 1920Wh.
The sun's angle must be considered because solar panels on a campervan will be positioned level with the roof. In the summer, this will only have a minor impact on efficiency. However, this will have a considerably more significant influence in the winter.
Step 3: How to Size The Charge Controller
Solar charge controllers are a vital component of any camper van solar system. The first thing you'll need to figure out is what size charge controller you'll need. Charge controllers are classified according to amp ratings and come in various sizes.
The total wattage of your solar array determines the controller size required. The more watts your solar panels produce, the more current (A) will be supplied to your batteries for charging. Regardless of the power output capacity of the solar array, if the charge controller's limitation is 10A, then it will restrict the supply of current to the batteries. The rest is a waste of time. The table below shows the amp ratings for charge controllers.
Solar Panel Size (W)
Charge Controller Amp Ratings (A)
0-130W
10A
131-200W
15A
201-270W
20A
271-400W
30A
401-540W
40A
541-680W
40A
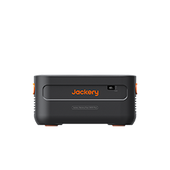
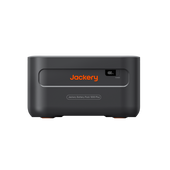
Jackery Solar Generators for Campervans
Product
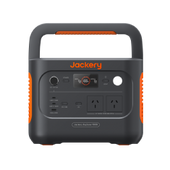
Explorer 2000 Pro Portable Power Station
Capacity
2160Wh (43.2V/50Ah)
Life Cycle
1000 cycles to 80%+ capacity
Dimension
30.75x26.9x38.4cm
Recharging Methods
Explorer 2000 Pro + 6*SolarSaga 100W: 5.5H
AC Adapter: 2H
12V Car Adapter: 24H
Output Ports
2*AC Output: 230V, 2200W (peak 4400W); 2*USB-A: Quick Charge 3.0x2, 18W Max; 2*USB-C: 100W Max, (5V, 9V, 15V, 12V, 20V up to 5A); 1*Carport: 12V⎓10A
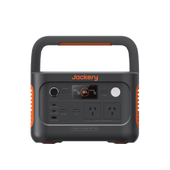
Product
Jackery Solar Generator 2000 Plus
Capacity
2042.8Wh (13A/638.4Ah)
Life Cycle
4000 cycles to 70%+ capacity
Battery Cell
LiFePO4 battery
Dimension
37.36x35.94x47.3cm
Recharging Methods
Explorer 1000 Pro + 6*SolarSaga 100W: 6H;
AC Adapter: 1.7H;
12V Car Adapter: 25H
Output Ports
3*AC Output: 230V~ 50Hz, 3000W Max, 6000W surge peak; 2*USB-A: Quick Charge 3.0, 18W Max; 2*USB-C: 100W Max, (5V, 9V, 15V, 12V, 20V up to 5A); 1*Carport: 12V⎓10A
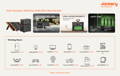
How to Install A Camper Van Solar System?
Step 1: How to Wire A Camper Van Solar System
Step 2: How to Mount Solar Panels
Step 3: How to Install Solar System
Final Thoughts
Best-selling Jackery Solar Generator
PAGE CONTENTS
New Arrival
Hurry up! Sale ends once the timer hits zero