


![How Do You Tie a Fishing Hook? [Fishing Hook Guide]](http://au.jackery.com/cdn/shop/articles/how_do_you_tie_a_fishing_hook_guide.png?v=1750413799&width=800)
|
Key Takeaways: |
|
- Properly tying fishing hooks increases your catch rate and reduces line breakage. - Different fishing knots suit various line types and fishing conditions, so choose wisely. - Handling hooks carefully and using protective gear minimises the risk of injury while tying. - Proper disposal of broken lines and damaged hooks protects both anglers and the environment. - During your fishing trip, you can consider taking a portable power supply, such as Jackery Explorer 300 Plus, to power your electronics and devices outdoors, especially for some overnight trips. |
What You Will Need to Tie Fishing Knots?
To tie fishing knots effectively, especially if you are just starting out, having the right tools and gear can make the process much easier and more efficient. Here are some essential items you should have to help you master knot-tying:
Essential Tools for Tying Fishing Knots
To begin with, fishing knot-tying equipment is intended to make the procedure easier, assuring consistent and secure knots while limiting the possibility of errors. These accessories frequently cover the hook to protect your fingers and allow you to tie different knots more quickly and properly. This is especially important if you have limited dexterity or are new to fishing.
Quality Fishing Line
The type of fishing line you choose significantly impacts the strength and durability of your knots. Choosing a line with enough knot strength for your fishing environment—whether freshwater or saltwater—will assist in retaining the integrity of your knot and lessen the likelihood of line breaking when reeling in a catch.
Having the right hooks and rods will help your fishing and complement your knot-tying abilities. Versatile hooks that work well with various baits and fishing styles provide versatility. In contrast, a dependable rod and reel combination tailored to your preferred fishing style ensures superior control and performance on the water.
Storage Solutions
Organising your knot-tying equipment and fishing gear is critical for convenience and efficiency. A tackle box or storage container with sections helps you carefully organise your hooks, lines, and tools, making everything easy to find and ready when you need it.
Gathering these essential tools and gear will make learning and tying fishing knots much more manageable and enjoyable. Practising with the right equipment will improve your skills and increase your chances of success on the water.
Step-by-Step Guide: How Do You Tie a Fishing Hook?
Tying a fishing hook correctly ensures a strong, dependable connection that will not slip or weaken under strain. Here's a step-by-step guide to tying a simple but reliable fishing knot, commonly known as the Improved Clinch Knot, which is ideal for securely attaching your hook:

What You'll Need:
Fishing line (monofilament, fluorocarbon, or braided)
Fishing hook of your choice
Scissors or line cutters
Clean water or saliva to moisten the knot
Step 1: Thread the Line Through the Hook Eye
Pass the end of your fishing line through the eye of the hook. Pull roughly 15-20 cm (6-8 inches) of line through to ensure you have enough tag end to tie the knot.
Step 2: Wrap the Tag End Around the Standing Line
Wrap the tag end around the standing (main) line 5–7 times. The number of wraps depends on the thickness of your line; smaller lines may necessitate more wraps to produce a secure knot.
Step 3: Pass the Tag End Through the Loop Near the Eye
After wrapping, pass the tag end through the little loop that forms adjacent to the hook eye. This is the first loop you made when you started the wraps.
Step 4: Pass the Tag End Back Through the Larger Loop
Next, take the tag end and send it back through the larger loop you just made in the previous step. This step binds the wraps to the standing line.
Step 5: Moisten the Knot
Before tightening the knot, wet it with water or saliva. This lubricant decreases friction and allows the knot to cinch firmly without breaking the fishing line.
Step 6: Pull the Knot Tight
Slowly pull on the standing line while holding the tag end to secure the knot against the hook eye securely. Make sure the wraps are tidy and do not overlap or bunch up.
Step 7: Trim the Excess Tag End
Clip the tag end near the knot using scissors or line cutters, leaving around 3-5 mm (1/8 inch) of line to avoid slippage.
Additional Tips:
1. Always inspect your knot before casting to ensure it is tight and secure.
2. Practice tying your knots regularly to build confidence and speed.
3. Different knots may be better suited depending on your line type and fishing conditions, so experiment with a few types.
The Most Popular Fishing Knots and When to Use Them
Mastering a few essential fishing knots can significantly enhance your fishing experience. Each knot has distinct qualities that make it appropriate for a variety of fishing conditions and line types. Here are some of the most popular fishing knots that any angler should know:

1. Improved Clinch Knot
The Improved Clinch Knot is popular among anglers due to its simplicity and dependability. It is ideal for tying hooks, lures, and swivels to monofilament or fluorocarbon lines. This knot tightens around the hook or lure's eye as you pull the line, forming a solid hold that resists sliding. It is suited for monofilament and fluorocarbon lines and is effective in both freshwater and saltwater fishing. It's especially effective for small- to medium-sized fish living in Australian rivers and coastal waterways.
When to Use
When fishing with lighter to medium lines.
For freshwater species like Australian bass or Murray cod.
Suitable for saltwater fishing targeting species such as bream or whiting.
Why It Matters
This knot provides a strong, secure hold with minimal line weakening, making it a dependable choice for everyday fishing.
How to Tie It
1. Pass the line through the eye of the hook.
2. Wrap the tag end around the standing line 5-7 times.
3. Thread the tag end through the small loop near the eye.
4. Then pass it back through the larger loop you just created.
5. Moisten the knot with water or saliva, then pull tight.
6. Trim the excess tag end.
2. Palomar Knot
The Palomar Knot retains nearly 100% of your line's original strength, making it excellent for heavy-duty situations. It creates a double line loop over the hook's eye before tying a basic overhand knot that secures the hook. It works well with braided and monofilament lines and is preferable when strength is required, such as when hunting tough fish like Australian snapper or barramundi.
When to Use:
When using braided lines, which are becoming popular in Australian fishing.
For targeting strong fighters like Barra or Snapper.
When you need a knot that's quick to tie under pressure.
Why It Matters:
Because it retains line strength, the Palomar Knot lowers the likelihood of line breakage during strong fights, enhancing your chances of landing big fish.
How to Tie It:
1. Double about 20cm of line and pass the loop through the eye of the hook.
2. Tie a loose overhand knot with the doubled line.
3. Pass the hook through the loop.
4. Moisten the knot, then pull both the standing line and tag end to tighten.
5. Trim the tag end.
3. Uni Knot (Duncan Loop)
The Uni Knot is one of the most useful knots in an angler's repertoire. It is suitable for attaching hooks and lures and joining two lines. It forms multiple wraps around the standing line, which tightens under tension to create a secure knot. It works well with most line types and is particularly handy in both freshwater and saltwater fishing across Australia.
When to Use:
For both freshwater and saltwater fishing.
When switching between different types of terminal tackle.
When you want a reliable knot that's easy to learn and tie quickly.
Why It Matters:
Its versatility saves time and ensures strong connections, which is invaluable during long fishing sessions or changing conditions.
How to Tie It:
1. Pass the line through the hook eye and double back alongside the standing line.
2. Make 5-7 wraps with the tag end around the doubled line.
3. Pass the tag end back through the loop near the eye.
4. Moisten and tighten by pulling on the standing line while holding the tag end.
5. Trim excess.
4. Loop Knot (Non-Slip Loop Knot)
The Loop Knot forms a fixed loop at the end of your line, allowing your lure or bait to flow more freely and naturally through the water. Unlike knots that tighten against the eye, the loop knot keeps the lure free, resulting in better action and presentation. It is ideal for topwater lures or live bait that require natural movement to attract fish such as flathead or bream.
When to Use:
For topwater lures and soft plastic baits.
When fishing, species that are sensitive to unnatural bait presentation, like flathead or tailor.
In clear water conditions, presentation is key.
Why It Matters:
Better bait movement increases the likelihood of attracting strikes, particularly from wary or pressured fish.
How to Tie It:
1. Tie an overhand knot in the line, leaving a 10-15cm tag end.
2. Pass the tag end through the eye of the hook.
3. Pass the tag end back through the overhand knot.
4. Wrap the tag end around the standing line 4-5 times.
5. Pass the tag end back through the overhand knot.
6. Moisten and tighten the knot.
7. Trim the tag end.
5. Blood Knot
The Blood Knot is perfect for connecting two lines of comparable diameter and is frequently used to make leaders. Intertwining the ends of two lines results in a smooth, robust connection that readily slides through rod guides. Ideal for tying monofilament or fluorocarbon leaders while fishing for trout or cod in freshwater streams in Australia.
When to Use:
When you need to extend your line or build a leader with different line types.
For finesse fishing situations like targeting trout or cod.
When using monofilament or fluorocarbon leaders.
Why It Matters:
A smooth, strong connection helps your rig pass through rod guides easily without snagging, maintaining sensitivity and control.
How to Tie It:
1. Overlap two line ends about 10-15cm.
2. Wrap one end around the other line 5-7 times, then pass the tag end back through the middle.
3. Repeat with the other line end in the opposite direction.
4. Moisten and pull both standing lines to tighten.
5. Trim tag ends.
6. Snell Knot
The Snell Knot secures the line directly to the hook shank, keeping the hook straight for optimal hook-setting. It creates a straight pull on the hook, improving the chances of hooking fish securely. Commonly used with bait fishing and circle hooks, especially when targeting species like whiting or flathead.
When to Use:
When bait fishing with live or dead bait.
For circle hooks and certain specialty hooks.
When targeting species like whiting, flathead, or other bottom feeders.
Why It Matters:
Direct alignment improves hook penetration, leading to better hook sets and fewer missed fish.
How to Tie It:
1. Pass the line through the hook eye from the front, then wrap the tag end around the shank 5-7 times.
2. Pass the tag end back through the first loop near the eye.
3. Moisten and pull tight, ensuring the wraps stay neat.
Trim the tag end.
Why Choosing the Right Knot Matters in Australian Fishing?
Australia has a tremendously diverse fishing habitat, ranging from saltwater reefs to freshwater billabongs, so your knot choice can significantly impact your success. The improper knot can cause weak connections, lost fish, and ruined gear, whilst the right knot ensures:
Optimal knot strength and line integrity, preventing break-offs during fights with strong native species.
Proper bait or lure presentation is crucial in clear water or pressured fishing spots.
Efficient gear management, saving time and frustration on the water.
Environmental responsibility, by reducing lost tackle which can harm marine life.

Common Mistakes to Avoid When Tying Fishing Hooks
Even expert fishers can get into problems if their fishing knots are not done correctly. Small errors can result in lost fish, broken lines, and frustration on the water. To help you fish smarter and more successfully in Australian waters, here are some typical fishing hook-tying mistakes to avoid based on expert advice and best practices.
Forgetting to Moisten the Line
Almost every trustworthy instruction, including those from fishing tackle specialists and Australian outdoor enthusiasts, emphasises the significance of moistening the line before tightening the knot. Dry knots cause friction and heat, weakening or destroying your fishing line. Moistening minimises friction, allowing the knot to tighten easily without cutting into the line. Before tightening the knot, apply clean water or saliva.
Using the Wrong Knot for Your Line Type
Different fishing lines—monofilament, fluorocarbon, or braided—need different knots for best performance. For example, the Palomar Knot is ideal for braided lines because of its strength and simplicity, whereas the Improved Clinch Knot works well with monofilament lines. Using an inappropriate knot can cause slippage or breakage. Always match your knot to the line type for maximum reliability.
Insufficient Tag End Length
Many beginners cut the tag end too short, risking the knot loosening under strain. Australian fishing experts highlight the importance of leaving an extra tag end to tighten the knot adequately. A tag end that's too short compromises knot security, increasing the chance of losing a catch. Leave about 3 to 5 mm of tag end after trimming.
Poor Wrapping Technique
Uneven or overlapping wraps during knot tying can create weak spots where the line may break. Proper wrapping distributes tension evenly and strengthens the knot's hold.
Tightening the Knot Too Quickly
To properly seat the coils, Australian fishers frequently advise tightening the knot slowly and carefully, as pulling it too quickly or with too much power might cause damage to the fishing line. Gradual tightening prevents line damage and ensures a compact, secure knot.
Not Checking Knots During the Day
Knots may loosen after casting or catching fish, particularly if the line is wet or dirty. Local experts recommend that you test your knots on a frequent basis throughout your fishing expedition. Early detection of a slipping or damaged knot allows you to retie before losing fish or gear.
Cutting Tag Ends Incorrectly
Cutting too close can result in knot failure, whilst leaving tag ends too long can cause tangling or snags. Clipping the tag end carefully, leaving a tiny gap for security.
Skipping Practice
Knot tying takes practice to master. Practice tying knots at home so they're confident and quick on the water. Well-practiced knots reduce errors and build confidence during real fishing scenarios. By avoiding these common mistakes and following best practices, you'll improve your fishing success and protect your gear while fishing in Australia's rivers, lakes, and coastal waters.
Tips to Prevent Injuries While Tying Hooks
Tying fishing hooks can be difficult and, if not done correctly, can cause painful injuries such as cuts or punctures. Whether you're a beginner or an experienced angler, following safe techniques when tying hooks is critical—especially when fishing in Australia, where conditions can be difficult and quick reactions are required. Here are some crucial suggestions to help you tie hooks correctly and avoid finger injuries:

Tip 1: Use Proper Lighting and a Stable Work Area
Always tie your hooks in a well-lit area, preferably on a level and firm surface. Good lighting allows you to see the hook, line, and knot properly, reducing mistakes and inadvertent pricks.
Tip 2: Handle Hooks Carefully and Mind the Point
Fishing hooks are sharp and meant to penetrate. When tying, try not to make direct contact with the point or bar. If you have needle-nose pliers or a hook holder, use them to keep the hook firm and protect your fingertips.
Tip 3: Keep Fingers Clear While Tightening
Keep your fingertips away from the hook's sharp point when tightening your line to tie a knot. Pull gently and methodically, and if necessary, use a cloth or glove to provide more grip and protection.
Tip 4: Use Appropriate Knot-Tying Tools
If you have trouble with fine motor skills or find the line slick, consider using knot-tying aids available at fishing gear stores. These can help you maintain control and reduce the danger of damage.
Tip 5: Maintain Sharp, Well-Organised Gear
Dull or rusted hooks can cause additional damage if they slip. Keep your hooks sharp and organised to prevent inadvertent touch. Keep hooks safely stored in tackle boxes or containers when not in use.
Tip 6: Practice Safe Disposal of Broken Lines and Hooks
Properly discard broken lines and damaged hooks to avoid injuring yourself, another fisherman, or wildlife. Australia's fishing standards promote responsible tackle disposal to safeguard the environment and people.
If you are interested in fishing, and wondering where to go, here is a list:
Best Fishing Spots in Melbourne
Best Fishing Spots in Adelaide
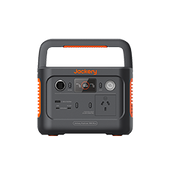
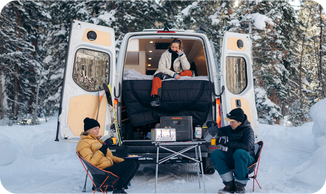
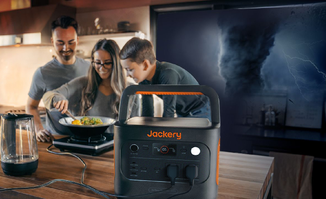
Jackery Portable Power Station for Fishing
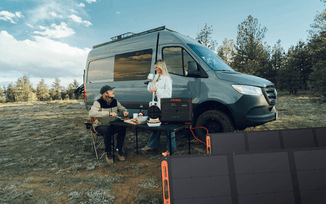
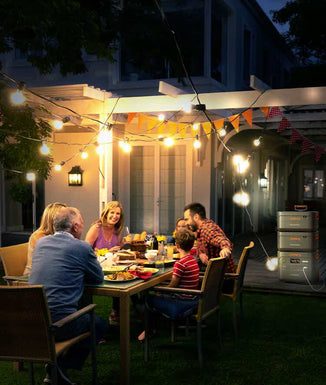
For anglers who spend time by the water, whether it's a peaceful day by a lake, a serious session of carp fishing, or an ice fishing expedition, a Jackery Portable Power Station is becoming an indispensable piece of gear. These are arguably the most power-hungry gadgets in a modern angler's arsenal. A Jackery can provide reliable, consistent power for your fish finder, ensuring you have a clear view of underwater structures and fish without worrying about your dedicated battery dying. This is especially crucial for ice fishing, where portability and reliable power are key.
A charged GPS unit or smartphone is essential for navigating to remote fishing spots, marking waypoints, or finding your way back in low light. A Jackery keeps these devices topped up. Many modern fishing tools, such as headlamps, waterproof lanterns, electric filleting knives, portable aerators for bait buckets, and even heated gloves for cold-weather fishing, are rechargeable via USB. A Jackery can keep all these ready to go.
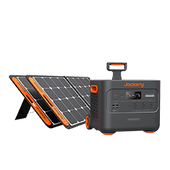
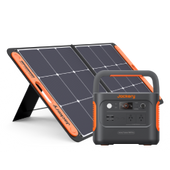
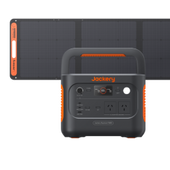
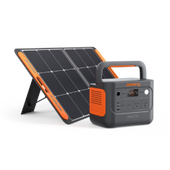
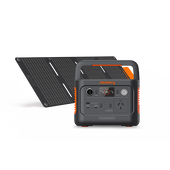
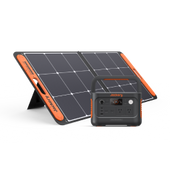
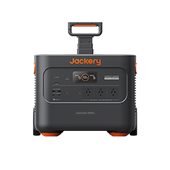
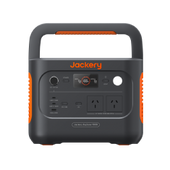
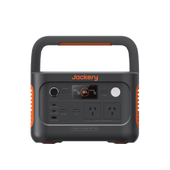
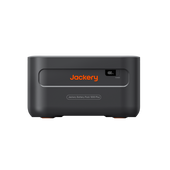
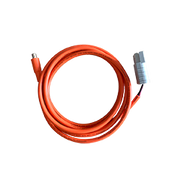
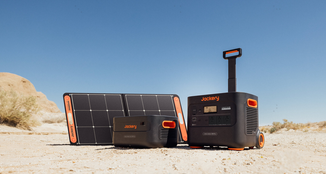
Jackery Explorer 300 Plus - Ideal for Fishing
The Jackery Explorer 300 Plus is an excellent choice for fishing in Australia, particularly given the vast, remote, and often rugged landscapes.

Powering Essentials in Remote Locations: Australia is known for its immense, often remote fishing spots - from the Outback's billabongs to pristine coastal areas and high country rivers. Grid power is frequently unavailable. The Explorer 300 Plus (288Wh capacity) provides the crucial energy to keep your vital gear running far from civilisation.
Modern fishing heavily relies on these. The 300 Plus can power a typical fish finder for extended periods, allowing you to effectively locate fish and underwater structures in lakes, estuaries, or offshore. Whether you're navigating to a remote fishing hole or tracking your path on a vast lake, reliable GPS on your phone or dedicated device is critical. The 300 Plus ensures these stay charged.
Extreme Durability: The LiFePO4 battery chemistry is known for its robustness and stability, making it ideal for the bumps, vibrations, and temperature fluctuations often experienced in Australian outdoor environments, especially during transport. With thousands of charge cycles, the 300 Plus will withstand years of frequent use, a significant benefit for avid anglers.
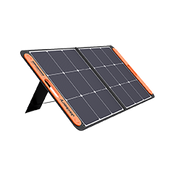
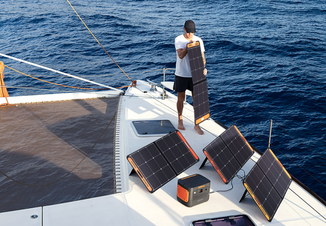
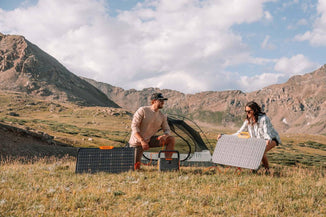
Flexible Recharging Options: Australia's abundant sunshine makes solar recharging a highly efficient and sustainable option. Pair the 300 Plus with a Jackery SolarSaga 100W solar panel to continuously top it up while you're fishing, extending your stay in remote spots indefinitely. Recharging from your car's 12V outlet while driving between fishing locations is a convenient way to keep the unit charged. When you do find mains power (at a caravan park, pub, or home), the 300 Plus recharges quickly (around 2 hours), minimising downtime.
|
Jackery Explorer 300 Plus Running Time |
|
|
Portable Cooler (90W) |
2.5H |
|
Electric Fish Finder (20W) |
8.2H |
|
GPS Device (30W) |
6.1H |
|
Phone (29W) |
13 Times |
|
VHF/UHF Radios (80W) |
2.7H |
(*The working hours are only for reference; the actual working hours depend on your usage.)
FAQs
The following are the frequently asked questions about tying a fishing hook.
1. How to tie a fisherman's knot for beginners?
The Fisherman's Knot, also known as the Improved Clinch Knot, is a solid option for novices. To tie it, thread the line through the hook's eye, wrap the tag end five to seven times around the standing line, and then pass the tag end through the loop near the hook's eye and back through the huge loop. Moisten the knot and pull it tightly.
2. What is the best fishing line knot?
The Palomar Knot is well-known for being one of the strongest and most adaptable fishing knots. It works exceptionally well with braided lines, retaining approximately 100% of the line's original strength. Its simplicity and dependability make it popular among anglers.
3. How to tie a rope onto a hook?
The Uni Knot is an effective way to firmly knot a rope to a hook. Pass the rope through the hook's eye, then double it back along the standing line. Make several passes around the doubled line, wet it, and draw tight. This knot is versatile and strong under tension.
4. How to rig a fishing line for beginners?
The Running Sinker Rig is a simple rig suitable for beginners. Slide a sinker onto the mainline, tie a swivel beneath it, and attach a leader line with a hook at the end. This design lets the bait move organically and works well for a variety of fish species in Australian waters.
5. How do you tie a simple fishing hook knot?
The Improved Clinch Knot is a basic but effective technique. Thread the line through the hook's eye, then wrap it five to seven times around the standing line before passing the tag end through the loop near the hook eye and back through the large loop. Moisturise and tighten the knot.
Final Thoughts
Mastering fishing knots and safe hook-tying procedures is essential for having a good and injury-free fishing experience in Australia. By selecting the appropriate knot for your line and fishing conditions, practising good tying techniques, and avoiding common mistakes, you may increase your chances of landing more fish while safeguarding your gear.


![How to Fly Fishing in Australia [Fly Fishing Guide]](http://au.jackery.com/cdn/shop/files/how_to_fly_fishing_guide.png?v=1739413724&width=90)

![10 Best Fishing Spots in Sydney [With Fishing Tips]](http://au.jackery.com/cdn/shop/files/fishing_spots_sydney.png?v=1727578538&width=90)