|
Key Takeaways: |
|
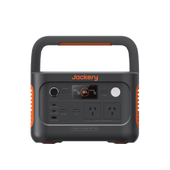
- Knowing how to set up a fishing rod is essential for enjoying a safe and successful fishing experience. - The main parts of a fishing rod include the butt, reel seat, guides, blank, and tip—all working together to cast and retrieve effectively. - Spinning rods and reels are the most beginner-friendly and versatile setup for most fishing conditions. - Choosing the right rod involves considering your target species, fishing location, rod length, power, action, and material. - Depending on species and water clarity, lures mimic natural prey and come in forms like soft plastics, hard-bodied, and surface lures. - We recommend the Jackery Explorer 300 Plus portable power station for charging electronics and devices during fishing trips, especially overnight outings. |
How To Set Up A Fishing Rod: Step-By-Step Guide
Starting a fishing adventure in Australia? A successful and pleasurable experience depends on knowing how to set up a fishing rod. Whether you're casting lines in tranquil freshwater creeks or battling the surf along the shore, a well-prepared rod is your ticket to a profitable outing.

Step 1: Select the Appropriate Rod and Reel Combo
The rod and reel you choose should match your target species and fishing environment. A spinning rod and reel combination is frequently suggested for novices because of its adaptability and simplicity of usage. This arrangement works well for bream, flathead, and whiting in Australian waters. Consider the following when selecting your gear:
Rod Length and Power: A 6'6 to 7'2 rod with light to medium-light power is ideal for estuary and inshore fishing.
Reel Size: A 2500-size spinning reel is appropriate for a range of species and complements the previously listed rod requirements.
Step 2: Assemble the Rod
If you have a multi-piece rod, position the guides (the rings the line travels through) and push the parts together firmly to join them. Make sure the guides are in a straight line to enable smooth casting.
Step 3: Attach the Reel
Secure the reel to the rod by:
Opening the Reel Seat: Located above the handle, unscrew or slide open the reel seat.
Positioning the Reel Foot: Place the reel foot into the reel seat.
Tightening the Reel Seat: Secure the reel by tightening the seat, ensuring it's firmly in place without over-tightening.
Step 4: Spool the Reel with Line
Spooling your reel correctly is crucial:
Open the Bail Arm: Flip up the bail arm to allow the line to be threaded.
Thread the Line: Pass the line through the rod guides, starting from the tip.
Attach the Line to the Spool: Use an arbour knot to secure the line to the reel spool.
Spool the Line: Close the bail arm and reel in the line, maintaining slight tension to ensure even winding.
Monofilament lines are advised for novices because of their strength and ease of handling. As you get more expertise, you might experiment with braided lines because of their casting distance and sensitivity; they are frequently combined with a fluorocarbon leader for stealth.
Step 5: Tie the Appropriate Knot
Securing your hook or lure with a reliable knot is essential:
|
Improved Clinch Knot |
Ideal for monofilament lines and simple to tie. |
|
Uni Knot |
Versatile and strong, suitable for various line types. |
Practice tying these knots to ensure they hold under tension.
Step 6: Attach Terminal Tackle
Depending on your fishing method:
Bait Fishing: Attach a hook, sinker, and swivel as needed.
Lure Fishing: Tie on your chosen lure directly or via a snap swivel for quick changes.
Ensure all components are securely fastened and appropriate for your target species.
These measures will ensure that your fishing rod is suitable for Australian waters. As you hone your setup and methods, remember that patience and practice are essential.
Different Parts of the Fishing Rod
You must first understand its basic components to comprehend how to set up a fishing rod properly. Each element of the rod has a unique purpose in casting, hooking, and pulling in fish. Whether you're preparing for a weekend on the Murray River or casting from a seaside jetty, this knowledge will guarantee you're getting the most out of your gear. Here's a breakdown of the major components of a fishing rod and reel:

Rod Blank
The fishing rod's long, tapered shaft is the rod blank. It serves as the setup's backbone and is typically made of graphite, fibreglass, or a combination of the two. The rod blank determines the rod's power (strength) and action (flexibility), influencing how it casts and handles fish.
Handle / Grip
The handle is located near the base of the rod and is used to hold it when fishing. Handles are often composed of EVA foam or cork, which provide comfort and grip during extended workouts. Some rods feature split or complete grips, depending on casting style and personal choice.
Reel Seat
This is where your reel is mounted. It's a locking mechanism located right above the handle. Secure the reel into the seat and tighten it to establish a secure and balanced connection between the rod and reel.
Guides / Line Guides
These are the little rings that run along the length of the rod. The fishing line passes through the guides, which help distribute tension and control during casting and retrieving. The first guide (closest to the reel) is typically the largest, diminishing in size towards the tip.
Tip and Tip-Top Guide
The rod tip is the most flexible and sensitive component, making it excellent for identifying bite marks. The tip-top guide is the final ring at the end of the rod, where the line departs. It must be smooth and well-aligned to avoid line friction or tangling.
Butt Cap
The butt cover, located at the very end of the handle, protects the rod when it is laid on the ground or rested against a surface. It also offers leverage while fighting larger fish.
Ferrules (for Multi-Piece Rods)
If your rod is collapsable or comes in numerous sections, ferrules are the connection points where each segment fits together. A tight fit helps maintain rod integrity and performance.
Different Types of Rods and Reels
Knowing the different kinds of fishing rods and reels is crucial when learning how to put one up. Whether you're trolling offshore in Western Australia, drifting down an estuary in Victoria, or casting off a beach in Queensland, the correct combination can make all the difference.
In Australia, different target species and fishing situations call for different equipment. The most popular rod and reel types and how they fit into regional fishing methods are covered in this easy-to-follow guide:

Spinning Rod and Reel (Open-Faced)
Best for: Beginners, estuary fishing, lake fishing, light tackle setups
Suitable for Catching: Bream, flathead, whiting, trout
The most common and approachable combination is the spinning rod and reel arrangement. The reel, which is positioned beneath the rod, releases and retrieves the line using a fixed spool and bail arm. It's perfect for long-distance casting of light baits or lures with little tangling.
Pros:
Easy to use and versatile
Good for both bait and lure fishing
Great control for light tackle setups
Baitcaster Rod and Reel
Best for: Experienced anglers, precision casting, heavy cover
Suitable for Catching: Barramundi, Murray cod, bass
Usually employed in circumstances when precise casting is more crucial than distance, bait casters provide strength and accuracy. The reel uses a rotating spool and is positioned atop the rod. It's perfect for pursuing larger species in confined areas, such as beneath mangroves or snags.
Pros:
Great accuracy and control
Handles heavier lines and lures
Excellent for casting into structure
Cons:
Steeper learning curve
More prone to backlash (tangled line)
Spin-casting (Closed-Faced) Rod and Reel
Best for: Kids and absolute beginners
Suitable for Catching: Small freshwater species
This kind has a push-button release and a reel that is encased in a nose cone. Although it is fairly easy to use, its restricted casting range and poor durability prevent it from being widely utilised in Australia.
Pros:
Very easy to use
Great for children and casual fishers
Cons:
Less accurate and powerful
Limited drag systems
Surf Rod and Reel
Best for: Beach fishing, long-distance casting
Suitable for Catching: Australian salmon, tailor, mulloway
When fishing from the sand in coastal Australia, surf rods are the preferred setup since they are longer (usually 10 to 15 feet) and come with larger spinning reels. They are made to handle heavier sinkers and bait rigs and cast beyond the breaks.
Pros:
Great casting distance
Handles large fish and heavy rigs
Trolling and Overhead Rods and Reels
Best for: Offshore and boat fishing
Suitable for Catching: Tuna, kingfish, snapper
Trolling from a boat usually involves overhead installations. The reel's strong drag gear is mounted atop a robust rod for deepwater or high-resistance fishing. These are perfect for blue water excursions, which are frequently found in the waters of northern Australia.
Pros:
High line capacity
Strong drag systems
Ideal for big-game fishing
How to Choose the Proper Fishing Rod?
One of the most important steps in learning how to set up a fishing rod is choosing the appropriate one. The right rod boosts your odds of making a catch, improves lure presentation, and improves casting accuracy. Choosing a rod that suits your needs is crucial in Australia's varied fishing settings, which range from serene freshwater streams to vast coastlines.

Step 1: Determine Your Fishing Environment
Your fishing location significantly influences the type of rod you should choose:
Estuaries and Rivers: Choose a light to medium spinning rod that is around 7 feet long and appropriate for catching bream, flathead, and whiting.
Beach and Surf Fishing: To reach species like Australian salmon and tailors, longer rods (10 to 12 feet) are most suited for casting past the breakers.
Offshore and Boat Fishing: Snapper and kingfish are examples of deep-sea animals that require heavier rods with strong backbones.
Step 2: Understand Rod Specifications
Key rod attributes to consider include:
Length: For shore fishing, longer rods (7-9 feet) provide a longer casting distance. For boat or kayak fishing, shorter rods (6-7 feet) offer superior control.
Power: The strength of the rod is indicated. While medium-to-heavy power rods may handle larger fish, light power rods are best suited for smaller species.
Action: Describes the point at which the rod bends while under pressure. Fast-action rods provide sensitivity for identifying bites by bending close to the tip. Slow-action rods provide you with more flexibility while fighting fish since they bend closer to the handle.
Step 3: Match Rod to Target Species
Different fish species require specific rod characteristics:
Bream and Whiting: Light power, fast action rods around 7 feet are ideal for these smaller, cautious feeders.
Flathead and Snapper: Medium power rods with moderate action provide the strength needed for these stronger fish.
Barramundi and Murray Cod: Due to the size and fighting ability of this powerful species, heavy-power and fast-action rods are required.
Step 4: Consider Rod Material
The construction material affects the rod's performance:
Fiberglass: Durable and flexible, suitable for beginners due to its forgiving nature.
Graphite: Lightweight and sensitive, offering better feedback for detecting bites, preferred by experienced anglers.
Composite: Combines the benefits of both materials, providing a balance between sensitivity and durability.
Step 5: Test for Comfort and Balance
A well-balanced setup minimises fatigue and improves control during casting and retrieving, so make sure the rod is comfortable in your hands and balances well with the reel of your choice.
Mastering Fishing Rigs: Lines, Knots, Sinkers, and Lures
For every fisherman learning how to set up a fishing rod, it is imperative to comprehend the parts of a fishing rig. A properly constructed rig presents your bait or lure in an efficient manner, increasing your chances of a successful catch. Let's examine the essential components: sinkers, lures, fishing lines, and knots.

Fishing Lines: The Backbone of Your Rig
Selecting the appropriate fishing line is essential since it links you to your catch. Anglers in Australia frequently use:
Monofilament Line: It is perfect for novices because it is adaptable and tolerant. It is appropriate for both freshwater and mild saltwater fishing, among other types of fishing circumstances.
Braided Line: Casting distance and sensitivity are both increased using this material, which is well-known for its strength and narrow diameter. On the other hand, it has less flexibility; therefore, it needs to be handled with caution.
Fluorocarbon Line: Since it is almost undetectable underwater, it is an ideal choice for settings in which the water is clean. Additionally, it is resistant to abrasion, making it appropriate for use in rocky or reef environments.
Knots: Securing Your Connections
Tying strong, reliable knots ensures your rig holds together during the fight. Essential knots include:
Improved Clinch Knot: Perfect for attaching lures, swivels and hooks to your line in a secure manner. When it comes to monofilament and fluorocarbon lines, it is both straightforward and efficient.
Palomar Knot: Recognised for its durability, particularly when braided lines are present. It can be tied in a short amount of time and has a high knot strength.
Uni Knot: Capable of connecting lines of varying diameters or tying terminal tackle, this versatile and dependable tool is ideal for various applications.
Consider resources like the AFN Complete Book of Fishing Knots and Rigs for a comprehensive guide on tying these knots.
Sinkers: Controlling Your Bait's Depth
Sinkers add weight to your line, allowing your bait or lure to reach the desired depth. Common types include:
Running Sinkers: Slide along the line, letting fish take the bait without feeling resistance. Ideal for species like bream and flathead in estuaries.
Pyramid Sinkers: Hold well in sandy or muddy bottoms, perfect for surf fishing.
Split Shot Sinkers: Small and easily adjustable, used for fine-tuning bait depth, especially in freshwater fishing.
Make sure the sinkers you attach are suitable for the depth and current. For instance, stronger sinkers are needed to keep your bait in place in strong currents.
Lures: Attracting the Catch
Lures mimic the appearance and movement of prey, enticing fish to strike. Popular lure types in Australia include:
Soft Plastics: Adaptable and efficient for a variety of species, including flathead and snapper. They can be rigged in a variety of different ways to accommodate a wide range of situations.
Hard-Bodied Lures: These lures are designed to mimic baitfish and can be used for trolling or casting. Pelagic animals such as tuna and mackerel are an excellent target for their use.
Surface Lures: For the purpose of attracting species such as barramundi and trevally, they are designed to float and provide disturbed surface conditions.
A number of variables, including fishing technique, water clarity, and target species, influence the choice of lure. Trying out several lures will help you figure out which ones perform best under particular circumstances.
If you are interested in fishing, and wondering where to go, here is a list:
Best Fishing Spots in Melbourne
Best Fishing Spots in Adelaide
Jackery Portable Power Station for Fishing
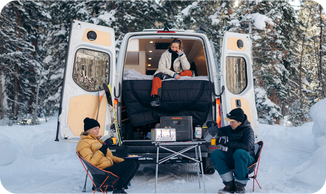
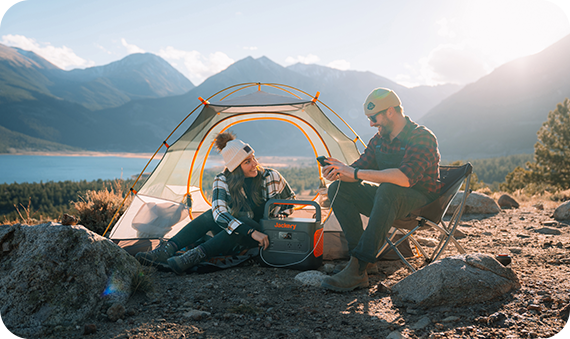
For anglers who spend time by the water, whether it's a peaceful day by a lake, a serious session of carp fishing, or an ice fishing expedition, a Jackery Portable Power Station is becoming an indispensable piece of gear. These are arguably the most power-hungry gadgets in a modern angler's arsenal. A Jackery can provide reliable, consistent power for your fish finder, ensuring you have a clear view of underwater structures and fish without worrying about your dedicated battery dying. This is especially crucial for ice fishing, where portability and reliable power are key.
A charged GPS unit or smartphone is essential for navigating to remote fishing spots, marking waypoints, or finding your way back in low light. A Jackery keeps these devices topped up. Many modern fishing tools, such as headlamps, waterproof lanterns, electric filleting knives, portable aerators for bait buckets, and even heated gloves for cold-weather fishing, are rechargeable via USB. A Jackery can keep all these ready to go.
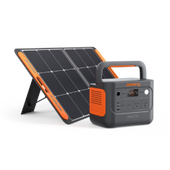
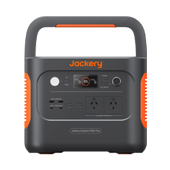
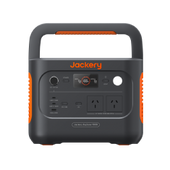
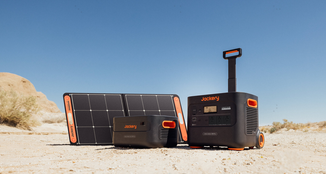
Jackery Explorer 300 Plus - Ideal for Fishing
The Jackery Explorer 300 Plus is an excellent choice for fishing in Australia, particularly given the vast, remote, and often rugged landscapes.

Powering Essentials in Remote Locations: Australia is known for its immense, often remote fishing spots - from the Outback's billabongs to pristine coastal areas and high country rivers. Grid power is frequently unavailable. The Explorer 300 Plus (288Wh capacity) provides the crucial energy to keep your vital gear running far from civilisation.
Modern fishing heavily relies on these. The 300 Plus can power a typical fish finder for extended periods, allowing you to effectively locate fish and underwater structures in lakes, estuaries, or offshore. Whether you're navigating to a remote fishing hole or tracking your path on a vast lake, reliable GPS on your phone or dedicated device is critical. The 300 Plus ensures these stay charged.
Extreme Durability: The LiFePO4 battery chemistry is known for its robustness and stability, making it ideal for the bumps, vibrations, and temperature fluctuations often experienced in Australian outdoor environments, especially during transport. With thousands of charge cycles, the 300 Plus will withstand years of frequent use, a significant benefit for avid anglers.
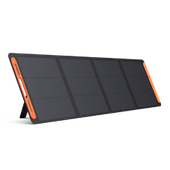
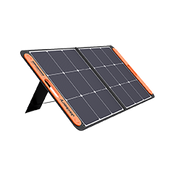
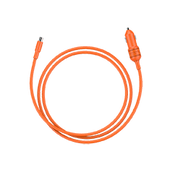
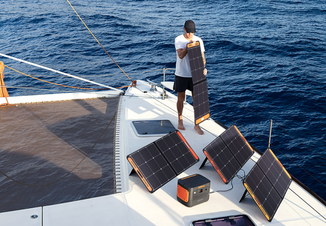
Flexible Recharging Options: Australia's abundant sunshine makes solar recharging a highly efficient and sustainable option. Pair the 300 Plus with a Jackery SolarSaga 100W solar panel to continuously top it up while you're fishing, extending your stay in remote spots indefinitely. Recharging from your car's 12V outlet while driving between fishing locations is a convenient way to keep the unit charged. When you do find mains power (at a caravan park, pub, or home), the 300 Plus recharges quickly (around 2 hours), minimising downtime.
|
Jackery Explorer 300 Plus Running Time |
|
|
Portable Cooler (90W) |
2.5H |
|
Electric Fish Finder (20W) |
8.2H |
|
GPS Device (30W) |
6.1H |
|
Phone (29W) |
13 Times |
|
VHF/UHF Radios (80W) |
2.7H |
(*The working hours are only for reference; the actual working hours depend on your usage.)
FAQs
The following are the frequently asked questions about setting up a fishing rod.
1. How to set up a fishing rod for beginners?
When setting up a fishing rod, you should first secure the reel to the reel seat, thread the fishing line through the guides of the rod, starting at the tip and working down to the reel, tie a suitable hook with a dependable knot, like the improved clinch knot, and add terminal tackle, such as sinkers or swivels, depending on your target species and fishing location. For novices, a 4-6 kg monofilament line is suitable for both bait and lure fishing in a variety of Australian waters.
2. How do you rig up a fishing rod?
The process of rigging a fishing rod is putting together the parts that efficiently display your bait or lure. The running sinker rig is a popular, easy-to-use arrangement for beginners. Simply slide a sinker onto your main line and fasten it with a swivel. Tie your hook to the end of a 40-50 cm leader that is attached to the swivel. This rig works well for a variety of species in freshwater and saltwater settings by letting the bait flow freely.
3. What is the best fishing setup for beginners?
The best combination for novices is a light spinning rod and a reel between 2500 and 3000 size. In estuaries and rivers, this combination provides adaptability for pursuing species such as whiting, flathead, and bream. Use a flexible, 4-6 kilo monofilament line that can be used in a variety of situations. This is an easy-to-use arrangement that is highly recommended for Australian beginning anglers.
4. How do you set up a fishing rod hook and weight?
Threading a sinker onto your main line and tying on a swivel to avoid line twists is how you set up a hook and weight. Tie your hook to the end of the leader line that is attached to the swivel. The weight of the sinker should be appropriate for the fishing conditions; it should be heavier in strong currents and lighter in calm seas. This arrangement guarantees that your bait reaches the target depth and continues to be fish-attractive.
5. What is the proper way to cast a fishing rod?
Holding a spinning rod in your dominant hand, open the bail arm to cast it. Hold the line against the rod with your index finger. Release the line at the top of the forward cast and swing the rod tip smoothly backward and then forward. To avoid a line twist, manually close the bail arm after the cast. Over time, using this approach will increase your casting distance and accuracy.
Final Thoughts
At first, setting up a fishing rod could seem overwhelming, but with the correct instruction, it becomes effortless. You may improve your chances of success on the water by learning the many types of rods and reels, selecting the appropriate gear for your area, and being proficient in fundamental rigging techniques.
Every journey enhances your experience, whether you're casting into a serene estuary or navigating the waves. Thanks to this beginner's guide based on Australian fishing methods, you now have the necessary information to get started. You just need to go out, throw your line and relish the excitement of making a catch.

