


|
Key Takeaways: |
|
- Keeping food warm at a picnic is essential to avoid bacteria. For most meat like beef, pork, and lamb, this threshold is above 145°F. For ground meat, it's above 160°F. - You can preheat your containers before the picnic, which is convenient and highly efficient. - There are various methods to keep food warm, such as Aluminum Foil, Insulated Thermos, Thermal Cooker, and Crockpot. - Without electricity, Portable heating appliances are a good option to keep food warm. - We recommend Jackery Explorer 1000 Plus and 600 Plus to charge warming appliances or portable coolers during your picnic. |
Why Do You Have to Keep Food Warm at a Picnic?
Before packing for your journey, you must comprehend why food must be kept warm. It goes beyond the simple fact that food tastes much better when heated. Poor food handling practices might negatively impact your health.
Most hot food has a temperature at which bacteria cannot thrive. This cutoff is higher than 145°F for most meats, including lamb, hog, and beef. It's more than 160°F for ground beef. It also depends on the kind of seafood. However, it is generally advised to exceed 140°F.
You can store food for as long as you'd like if you have a reliable source of heat that maintains it above the acceptable temperature. However, the meal will gradually lose warmth without a continuous heat source, so you must eat it within one to two hours.
For the sake of your family's safety and the health of your clients, it is strongly advised that you select one of the following techniques according to the distance and duration of the trip.
Keep Food Warm Before Picnic: Preheat Your Containers
The quality and freshness of your food may be significantly affected by the easy yet effective method of preheating your containers before keeping warm or hot items in them. With this procedure, heat the containers in boiling water before putting your meal inside.
This extensive guide will walk you through every stage of the procedure, including a supply list, a discussion of the advantages of preheating, and professional advice on maximising this technique.

Supplies Needed
Make sure you have all the required materials on hand before starting the preheating process:
- Containers: Select the foods you want to keep warm. These might be airtight-lidded plastic or glass containers;
- Pot or Kettle: A kettle or saucepan big enough to hold the water needed to fill your containers will be needed;
- Timer: To precisely track the preheating time, have a stopwatch or timer close to hand;
- Oven Mitts or Towels: Use oven mitts or towels to shield your hands from hot liquids and containers.
Step-by-Step Preheating Process
Step 1: Get all of the materials listed above before you begin. Having everything ready in advance will expedite the procedure and avoid needless delays.
Step 2: Ensure you have enough water in your saucepan or kettle and that the containers you want to use can hold the water you need. Put the saucepan or kettle on the burner and turn the heat high. When the water reaches a rolling boil, let it.
Step 3: Make sure your containers are dry and clean before you put them in the boiling water. If they have been kept in a cold environment, such as the refrigerator, let them come to room temperature before preheating to prevent unexpected temperature swings.
Step 4: Very slowly and carefully pour the hot water into the containers. Pour enough liquid into each container to cover the bottom, or approximately 1/3 full. The hot water will warm the container, creating an atmosphere for heat retention.
Step 5: Seal each container quickly using the lid or cover that corresponds to it. You must act promptly to keep the heat inside. Choose a timer that will last for a few minutes, usually three to five, depending on the size and thickness of the container. During this waiting period, the container can absorb the heat and get sufficiently heated.
Step 6: After the predetermined amount of time, carefully remove the hot water from the containers. Because the water and containers will be hot, avoid burning. Use a sink or another container to dispose of the hot water securely.
Step 7: Put your warm dishes into the hot containers right away. Completing this step as soon as possible will optimise heat retention. Seal the containers once again to establish an airtight atmosphere that will help maintain the food's temperature for more time.
Benefits of Preheating Containers
Preheating your containers offers numerous advantages when it comes to food storage:
|
Benefits of Preheating Containers |
|
|
Enhanced Heat Retention |
By keeping your meal hotter for longer, the heated container lowers the chance of quick cooling. |
|
Minimised Temperature Shock |
Temperature shock can result from putting hot food in a cold container, which could lower the dish's quality. Preheating avoids this problem. |
|
Extended Freshness |
The food's flavour, texture, and general quality may be preserved thanks to the heat-retaining environment inside the warmed container. |
|
Convenience |
Container preheating is a simple procedure that doesn't call for any specific tools. It's an easy way to maintain the freshness and warmth of your food. |
|
Reduced Bacterial Growth |
Preheating containers can increase the safety of your stored food by reducing bacterial development by starting at a higher temperature. |
Other Pre-Picnic Preparation Tips
Preparation and preheating are essential to keep food warm at picnics.
The Wrap Game
In this situation, aluminium foil is your friend. However, you may increase insulation even more by covering the foil-covered plates with thick towels or newspapers. It's traditional yet quite efficient at maintaining warmth.
Making a small effort before leaving might be the difference between consuming cold pasta salad and relishing every hot piece of Mac' n 'Cheese when the sun is shining since nobody asked for cold lasagna at their picnic.
Serve Wisely
Because every layer of temperature matters, move food onto serving plates that have already been pre-warmed. These simple measures will keep your picnic fare wonderfully toasty and win marks for flavour and texture—after all, who likes cold chilli or soggy sandwiches?
Starting with adequately warmed nibbles, your next outdoor feast deserves to be remembered for all the right reasons. So gather your blankets, use these packing suggestions, and observe how a little planning pays off immensely.
How To Keep Food Warm at a Picnic?
It's a fact that hardly everyone enjoys a cold burger unless they are specifically drawn to it. For the rest of us, however, we must ensure our picnic fare stays warm.
Why, then, is this so crucial? Besides avoiding a culinary blunder, it's about enjoying every bite warm and tasty, as intended. They also protect against microorganisms, guaranteeing our meals are enjoyable and safe.

But beneath the open sky, how can we keep food warm at picnics? There are choices. No, they don't all involve hurriedly carrying hot plates to and from your automobile.
1. Innovation Is Your Friend—Have you ever used insulated carriers? If not, you have to try them once. Covering your casseroles with warm blankets will keep them toasty and warm even after you remove them from the oven. They keep your food warm from the oven by retaining heat inside.
2. The Classic Thermos—Not only are thermoses useful for coffee. Soups and stews may be kept hot in a quality thermos until you're ready to serve them outside in nature's dining room.
3. DIY Heat Packs—It's incredible how effective making your own rice and cloth heat packs can be. Pop them in the microwave before you leave the house and slip them into an insulated bag around your plates.
ep Food Warm at Picnic
The following are the tips and tools to keep food warm at a picnic.
Aluminum Foil (+ A Towel)
Since nearly every home has aluminium foil, the first advice is arguably the simplest. Aluminium foil is a standard food preservation method. Due to aluminium's exceptional heat-absorbing properties, it is also employed in cooking. This is why rotisserie chicken is ideal for keeping warm when wrapped in aluminium foil. Don't overlook this technique if you want your food to remain warm.
Step 1: Grab a sheet of foil and carefully wrap it around your sandwich or hamburger.
Step 2: Transfer your casserole or pasta dish onto a tray, cover the top with an aluminium sheet, and bake. Make sure there are no gaps left.
Step 3: Once wrapped, the meal will stay warm for around thirty to sixty minutes.
Step 4: Furthermore, since very little, if any, aluminium is leaking into your meals, you shouldn't be concerned about aluminium poisoning.
Insulated Thermos
Do you need a smaller container to transport food? I've got this item for you. A thermos is a metal food container with an insulating covering to keep food warm. Since this layer is composed of vacuum space, heat cannot enter or exit it.
All you have to do to utilise the thermos is to pour freshly prepared food into the container. After that, close it tightly with a unique rubber sealing mechanism. After making sure everything is tightly wrapped:
Step 1: Place the thermos inside your bag.
Step 2: Use two towels or a layer of aluminium foil to keep the thermos heated longer. These may be encircled around the thermos.
Step 3: Avoid putting cold food or beverages near your hot thermos.
Step 4: Over four hours might pass while the thermos stays heated.
Thermal Cooker
A thermal cooker is a much larger and more tightly sealed version of a thermos. The idea of cooking food with its heat has been around for a while; it was first used in the Middle Ages with a basic clay pot.
Nonetheless, the invention of the thermal cooker has allowed for the ultimate refinement of this idea. Since its launch, it has amassed a significant following in China. The thermal cooker is a combination of two pots. There is nothing except a void amid two pots.
The vast storage area that most thermal cookers provide allows you to store much food. If you buy a cast iron thermal cooker, you won't have to worry about meals for several hours.
Crockpot
The purpose of the crockpot is to cook meals on low heat for an extended period, which explains why the pot's inside temperature is so low. The crockpot is ideal if you don't have a thermal cooker to warm your meal at a picnic.
Moreover, large crockpots offer a dependable means of maintaining food warmth throughout gatherings. Food may be safely kept in a crockpot since its maximum temperature often reaches 199°F (93°C). But unlike many other slow cookers on the market, the crockpot lacks a sealing mechanism that would allow the heat to be maintained even without electricity.
Eat the dish within two hours as the pot's temperature progressively declines. If you wish to take the pot with you, also be sure to close the lid securely.
Cooler
If you lack the money to buy a crockpot, thermos, or thermal cooker, the cooler provides a far more cost-effective alternative. The first iteration of the contemporary cooler was introduced in the 1950s. Older cooler versions were built of metal rather than plastic.
The cooler produces a layer of thick foam insulation instead of a vacuum. The foam absorbs heat or cold from the outside, so the temperature of the food or anything else you place within the cooler will remain constant.

How to Keep Food Warm at Picnic in Winter?
Always keep your food warm when packing for an outside picnic. The meal had to be reheated to 140 degrees Fahrenheit before being transported to the picnic. When the temperature drops below 140 degrees Fahrenheit, there is no issue. It should be consumed within two hours if this happens.
Cooler Bags: Coolers or backpack coolers are essential for any picnic. They keep food and beverages cold and may also keep food warm. You need to add a couple of bottles of hot water! See our analysis of the top backpack coolers by clicking this link.
Insulated Food Containers: These are lifesavers for keeping food warm during gatherings. Every purpose has a size and form, so you will find one that suits you.
Portable Heating Appliances: If you lack access to power sources, portable heating equipment is an excellent choice. This equipment ranges from hot plates to stoves and will keep your meal warm no matter where you are.
Blankets and Towels: Towels and blankets are an easy and reasonably priced way to reheat food. Covering your meal with a blanket or towel will stay warm until it's time to eat.
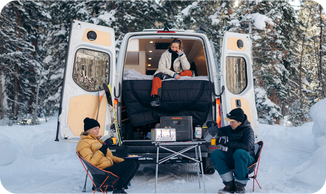
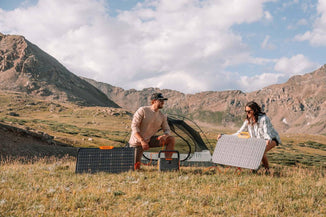
How to Charge Warming Appliances at a Picnic?
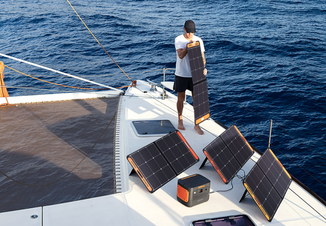
Keeping food warm at a picnic can be challenging, particularly on chilly days. To keep your meals at the ideal temperature, Jackery Portable Power Stations make power heating pads, slow cookers, and electric food warmers simple to keep your meals at the ideal temperature. Jackery's solutions are perfect for outdoor parties because they are lightweight and portable. Savour the ease of portable energy while enjoying hot, delectable cuisine at your picnic.
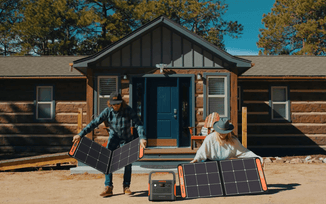
With a portable power station (PPS), you can restore power to your home when the power goes out. You can also use them in your workshops or on building sites. But many people don't know how useful portable power sources are for picnicking.
Jackery Portable Power Stations, ranging from 300Wh to 12 kWh, are powerful enough to charge food-warming appliances. Their multiple output ports enable charging several appliances simultaneously to keep food warm and charge your game console during a picnic.
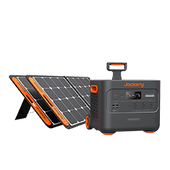
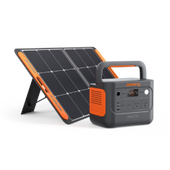
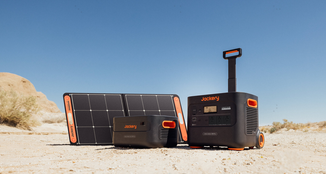
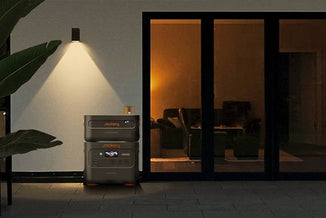
Jackery Explorer 1000 Plus
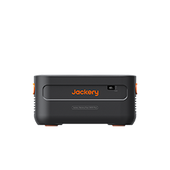
The Jackery Explorer 1000 Plus is the ideal compact power station for picnics because it has the highest output. It covers many situations and can help with picnicking and more outdoor activities. This compact power station can power your food-warming appliances and can be expanded to 5 kWh to hold more power.

- Expandable Power for Food Warming Appliances: The 1000 Plus has a 2000W output and a 1264 Wh capacity, the highest solar product output in the same price range. It can power 99% of devices, including food-warming appliances. Adding up to five battery packs can become a 5 kWh expandable capacity. It's not just for picnics; you can even take it camping, caravaning, or off-grid living.
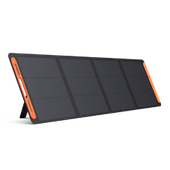
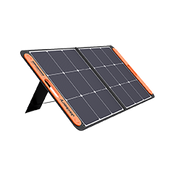
- Refueling Power Station in Multiple Ways: Our improved technology lets you charge more efficiently than ever. You can quickly charge your gadgets and use them for longer. No matter where you go, stay charged and linked. Charges that are reliable and work well, customised to your needs. Connect 1000 Plus with four pieces of SolarSage 100W solar panels for 4.5 hours if you choose solar charging. If this method takes too long, wall charging only needs 1.7 hours.
- Whisper-Noise for Peace Picnics: Our ultra-quiet, emission-free technology will give you the utmost peace. Help us change how people think about sustainability as we proudly introduce the world's first 100% eco-friendly packaging. Jackery can help you improve your energy answer.
The following are the working hours for using Jackery Explorer 1000 Plus to charge food-warming appliances:
|
Jackery Explorer 1000 Plus Working Hours |
|
|
Thermal Cooker (700W) |
1.5-6.1H |
|
Crockpot (65W) |
16.3-65.4H |
|
Portable Cooler (200W) |
5.3-21.3H |
|
Countertop Food Warmer (1000W) |
1.1-4.25H |
|
Electric Grill (1800W) |
0.5-2.4H |
(*The working hours are only for reference; the actual working hours depend on your usage.)
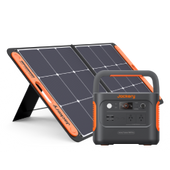
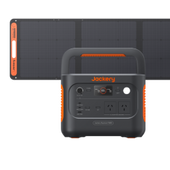
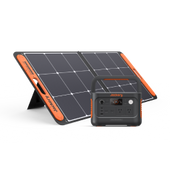
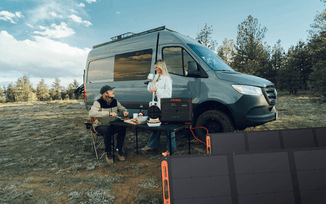
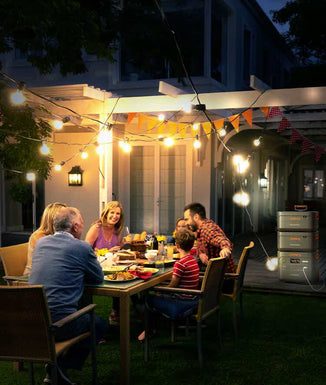
Jackery Explorer 600 Plus
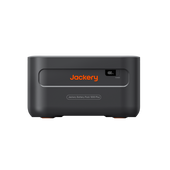
Compared to the Explorer 1000 Plus (which has expandable capacity), the Jackery Explorer 600 Plus Portable Power Station has lower capacity but is compact enough for picnic gatherings conveniently. Its 800W output and 632Wh capacity power from outdoor gear to household essentials. Its durable LFP battery guarantees 4000 cycles, maintaining high performance for over a decade.
- Charge Food Warming Appliances & Electronics: The Jackery Explorer 600 Plus can meet outdoor entertainment needs. With its 800W output and 632Wh storage, it can power many different outdoor entertainment devices. Its dual PD fast charging can go up to 100W, so your devices will be charged quickly. It is suitable for charging small warming appliances, such as portable coolers and cooktops, or powering personal electronics, like phones, game consoles, and portable speakers.
- Portable & Easy to Take at Picnics: The Jackery Explorer 600 Plus is the best compact power station for all outdoor activities. It's intended to be as convenient as possible and easy to store, weighing only 7.3 kg (16.1 lbs) and very small. The handle folds up, making it easy to take with you. You can always get power to stay connected and charged no matter where your travels take you.
- Fast & Quiet Charging: A full recharge 600 Plus in 1.6 hours, 30% longer battery life, and designed for long-term dependability. Charge from 0% to 100% in one hour, always ready for emergencies. Note: The app turns on the Emergency Super Charging mode. The fast and quiet charging modes protect the battery better.
The following are the working hours for using Jackery Explorer 600 Plus to charge food-warming appliances and personal electronics:
|
Jackery Explorer 600 Plus Working Hours |
|
|
Crockpot (65W) |
7.8H |
|
Portable Cooler (200W) |
2.5H |
|
Phone (10W) |
50.6H |
|
Game Console (200W) |
2.5H |
|
Portable Speaker (30W) |
16.9H |
(*The working hours are only for reference; the actual working hours depend on your usage.)
How to Choose Food Warming Appliances?
When picking a kitchen warming appliance, think about its size, how well it controls temperature, how much energy it uses, how it looks, what it will be used for (e.g., big meals, side dishes), how well it fits with your current kitchen layout, and features like humidity control or pre-set warming modes. Choose a warming drawer built into your oven, and always look for a reputable brand with a warranty.
Capacity: Determine how much food you usually need to keep warm at once and choose a warming gadget that can handle that amount. Also, consider the amount of counter or cabinet space you have for the appliance.
Temperature Control: Look for precise temperature settings to keep your food warm without cooking it too much. Some models may have different warming settings for various types of food.
Design: Choose a warming gadget with the rest of your kitchen's design and finishes.
How to Keep Food Warm at Picnic FAQs
The following are the frequently asked questions about how to keep food warm at a picnic.
1. How do you keep food warm without a cooler?
First, transfer your meal into an airtight container. Next, enclose the meal in a thick layer of tin foil, being cautious not to create gaps that may allow warm air to escape. Lastly, firmly cover the food and foil with two to three towels. This may keep meals warm for thirty minutes to two hours, depending on what it is made of.
2. What can I use instead of foil to keep food warm?
Using aluminium foil to cover food. Is your family arriving late for supper? Do you have leftovers because you prepared too much food? Fortunately, there are many alternatives to covering your food with aluminium foil. You may shield your food from heat and cold using screw-top jars, preserving jars, or lids.
3. What is the cheapest way to keep food warm for a party?
Use those crock pots to prepare meals; they can be purchased cheaply. Borrow from friends, neighbours, and relatives coming over if you're throwing a party. So you have additional serving ware to keep everything warm.
Final Thoughts
Including hot food in your picnic menu will give the excursion a new meaning. Cuisine items must be insulated to avoid heat from escaping to pack for a picnic that will enjoy hot cuisine that is still warm. To ensure your food stays warm and comfortable until you're ready to eat it, always start with freshly prepared food and then load and seal your carrier.