


|
Key Takeaways: |
|
- Before making a camping fire, always check local fire bans and park regulations to ensure fires are permitted. - Choose a flat, open area at least three metres from flammable objects to build your fire pit safely. - Organise tinder, kindling, and firewood before starting your fire to ensure an efficient ignition. Never leave a campfire unattended; supervise children and pets closely when flames are active. - Respect the environment by using designated fire rings, bringing your own firewood, and practising Leave No Trace ethics. - We recommend the Jackery Explorer 1000 v2 portable power station to power the camping appliances, except for the electric lighter. |
How Does Camping Fire Work?
The first step to learning how to make a camping fire safely and successfully is understanding its operation. Heat, fuel, and oxygen—collectively referred to as the "fire triangle"—are essential components of a well-constructed campfire. A steady, regulated flame ideal for cooking, warmth, or just establishing a traditional camping environment is produced when these elements are in balance.
Tinder, which is made up of small, dry, and easily flammable materials like dried grass, bark shavings, or cotton wool, is the foundation of any campfire. Tinder helps light kindling, the next layer, by capturing the first spark or flame. Fuel wood, which are larger logs that sustain a long-lasting fire, is prepared by kindling, which consists of small sticks and twigs that burn hotter and longer than tinder.
The teepee, log house, and lean-to techniques are some of the popular buildings used to build a fire. Depending on factors like wind, weather, and firewood kind, each offers advantages. For example, a log house design encourages long, even burns, which are perfect for cooking or prolonged warming, while a teepee construction is best for rapidly starting a fire.
A campfire burns in phases after it is ignited. After ignition, the process enters the fiery combustion phase, which is when the strongest visible flames occur. It eventually enters the smouldering phase, during which the embers emit constant heat with less flame. Effective and safe management of these phases is essential, particularly in Australia, where fire control is of the utmost importance.
Ultimately, being a responsible camper greatly depends on knowing how a fire behaves—from spark to ember. Understanding how to build a camping fire ensures that you can take advantage of its advantages while honouring safety regulations and the environment, whether you're using it for cooking dinner or telling stories beneath the stars.
How to Set Up a Fire Pit?
One of the most important steps in learning how to make a camping fire is setting up a secure and functional fire pit. Setting up a fire pit correctly is not just good practice but also necessary, where bushfire risk and fire safety are of utmost importance.

Step 1: Choose the Right Spot
Choose a level, open space that is protected from the wind and at least three metres clear of trees, tents, and overhanging branches to begin. Use the authorised fire pits or fire rings that are available in established campgrounds.
Clear a circle of a metre in diameter, removing grass, leaves, and combustible debris all the way down to the earth if you're in a more isolated location where fires are allowed. Before starting a campfire, make sure to check park regulations and local fire bans. Many Australian parks implement No Open Flame or Total Fire Bans during high-risk seasons.
Step 2: Gather Your Materials
To build a successful campfire, you'll need the following three layers of fuel:
Tinder: Dry, flammable material that ignites easily. This can include:
Dry grass
Bark shavings (especially from eucalyptus or paperbark)
Cotton balls or dryer lint
Firelighters or newspaper (as a backup)
Kindling: Small sticks and twigs, ideally no thicker than a pencil. Collect enough to build up a small pile; dry hardwood kindling is ideal in Australia’s damp coastal regions.
Firewood/Fuel Wood: Larger logs or split wood, preferably from local, permitted sources. Look for dry, seasoned wood—wet or green wood creates more smoke and burns inefficiently.
To prevent harming native plants, always bring your own firewood or use approved firewood collecting zones when camping in rural or backcountry areas.
Step 3: Build a Safe Fire Pit
In order to limit the fire, you can dig a shallow dip and surround it with rocks to make your own fire ring if one doesn't already exist. Steer clear of river boulders since their inherent dampness can cause them to explode when heated. Instead, pick dry stones from the earth. Maintain a bucket of water and a shovel close by for emergency control and eventual extinguishing, and clear a safety zone around your pit, preferably with sand or bare ground.
How to Make a Camping Fire: Step-by-Step Guide
It's time to start making your camping fire when your fire pit has been carefully assembled. Whether you're cooking over coals, boiling water, or warming up on a chilly night, following a methodical process guarantees that your fire will start simply, burn effectively, and remain under control. Here's a detailed guide on how to build a camping fire:

Step 1: Prepare Your Fire Pit
If you are going to use a well-designated fire pit or ring, you need to make sure that it is free of ash, garbage, and any remaining food scraps. It is important to make sure that the area where you have constructed your own pit is encircled by soil or stones and that it is at least three metres away from any tents or combustible objects. The presence of a shovel, a bucket of water, or a fire extinguisher should always be kept close at hand.
Step 2: Gather Your Fuel
Organise your materials into three distinct piles before you begin:
Tinder: Dry grass, paperbark curls, leaves, dry pine needles, or cotton balls.
Kindling: Pencil-thin sticks or twigs. These catch quickly and support the flame from the tinder.
Firewood: Split logs or branches no thicker than your wrist. Aim for dry, seasoned wood for a cleaner burn.
Please refrain from utilising green wood or timber that has been derived from protected habitats. In many of Australia's national parks, visitors are required to provide their own firewood in order to avoid causing damage to the natural environments that are found there.
Step 3: Choose Your Fire Structure
There are a few classic fire-building structures to choose from, each suited to different purposes:
Teepee Fire: Excellent for rapidly igniting fires. Lean kindling in a cone or teepee shape around your tinder, which should be in the centre. To light the tinder, leave a tiny gap. Add bigger sticks and firewood in the same form once it's burning. (Ideal for cooking, warmth, and lighting in calm conditions.)
Log Cabin Fire: After placing the tinder in the centre, arrange two pieces of parallel kindling on either side. Create a square by adding a second layer at a 90-degree angle. Add fuel wood and build up layers like a cabin as the fire spreads. (This burns steadily and is great for long-term fires and cooking over coals.)
Lean-To Fire: Stick a longer piece of wood into the ground at an angle over your tinder, then lean kindling against it. (Good for windy conditions and quick lighting.)
Step 4: Light the Tinder
To allow the flame to spread throughout the pile naturally, light the tinder with a match or lighter from the windward side or the side the wind is blowing into. A waxed cotton ball or firelighter can be useful if you're in a damp environment. Avoid using accelerants such as gasoline or aerosol cans since they are hazardous and unpredictable.
Step 5: Feed the Fire Gradually
When the tinder catches, the kindling will begin to burn. Before proceeding to larger fuel chunks, gradually increase the amount of kindling. Avoid the urge to place hefty logs on top of the flame since airflow is essential. Because the fire needs oxygen to survive, make sure there is space between the wood pieces.
Step 6: Maintain and Monitor
Once established, you can adjust your fire depending on your goals:
For cooking, let the fire burn down to glowing coals.
For warmth, feed it slowly with larger logs for a steady flame.
Never leave your fire unattended, even for a minute.
Use a long stick or metal tool to manage the structure as it burns, and always supervise children around the fire.
Different Types of Campfires and How to Build Them
Not every campfire is the same. The best fire-building techniques for you will depend on your camping objectives, such as cooking, warmth, or wood conservation. Knowing these differences enables you to make a camping fire effectively, safely, and sustainably. Here are five popular types of campfires and how to build each one:

Lean-To Fire
Best for: Windy conditions and quick ignition.
How to Build:
Step 1: Place a generous pile of dry tinder on the ground.
Step 2: Take a long piece of kindling or a small log and stick it into the ground at a 30–45° angle so it rests above the tinder.
Step 3: Lean smaller kindling sticks against the support log, forming a “roof” over the tinder.
Step 4: Light the tinder from the open side.
This construction is a dependable way to start a fire in erratic weather since it protects the flame from the wind while allowing for adequate airflow.
Log Cabin Fire
Best for: Even long-burning fires are great for cooking and warmth.
How to Build:
Step 1: Start with a small teepee of tinder and kindling in the centre.
Step 2: Stack two pieces of firewood parallel on opposite sides of the teepee.
Step 3: Add another layer on top at a 90°angle, like building Lincoln Logs.
Step 4: Continue stacking in alternating layers, 2–4 levels high.
Step 5: Light the tinder in the centre.
Ideal for grilling or cooking camp meals, the log cabin form encourages ventilation and stability while burning evenly and producing little smoke.
Star Fire
Best for: Conserving wood and long-duration fires.
How to Build:
Step 1: Place your tinder and kindling in the centre of your fire pit.
Step 2: Arrange 4 to 6 large logs in a star shape, with the ends meeting at the centre over the tinder pile.
Step 3: Light the centre. As the fire burns, slowly push the logs inward as needed.
This approach is popular among minimalist and leave-no-trace campers since it requires less wood and makes it simple to adjust the burn rate.
Swedish Torch (or Swedish Candle)
Best for: Cooking and portable campfires.
How to Build:
Step 1: Use a single dry log, standing upright.
Step 2: Cut an “X” shape into the top, about halfway down the log, using a saw or axe. This creates air channels.
Step 3: Stuff tinder and kindling into the centre of the cuts at the top.
Step 4: Light the top.
The Swedish torch turns into a natural stovetop as it burns from the inside out, making it perfect for setting a pan or billy directly on top. This fire is effective and emits very little smoke. In Australia, camping stores occasionally carry pre-cut Swedish fire logs.
How to Put Out a Campfire Safely
It is equally as important to know how to put out a campfire as it is to know how to build one. A fire that is facing outward can be rekindled by a breeze, which poses a significant risk.
Let the Fire Burn Down: Stop adding wood and allow the flames to die back naturally.
Spread the Coals: Use a stick or shovel to spread the hot coals out, exposing them to air and speeding up cooling.
Douse with Water: Pour water slowly and thoroughly over the fire. Listen for hissing and make sure no embers remain glowing.
Stir and Repeat: Stir the wet ashes with a shovel, then add more water until everything is cool to the touch.
Check for Heat: Carefully hover the back of your hand over the ashes - if it's still warm, it's not safe to leave.
Never Bury a Fire: It may smoulder underground and then rekindle. And never disregard local fire safety regulations, especially in regions that are subject to a total fire ban or during bushfire season.
Campfire Safety: Essential Tips for a Safe Camping Experience
It's not enough to know how to make a campfire. In Australia, where dry weather and strong winds may quickly turn a tiny campfire into a hazardous blaze, it is extremely important to practice good campfire safety. Whether you're off-grid, in a caravan park, or in a national park, using safe campfire methods safeguards the environment, wildlife, and humans.

Tip 1: Know the Fire Rules Before You Go
To find out if campfires are allowed at your destination, always check for Total Fire Bans, Fire Danger Ratings, or local park rules before you go. These regulations, which differ throughout Australia, are essential for averting bushfires.
Tip 2: Use Designated Fire Rings or Pits
If a fireplace or fire pit is available, use it. If none are offered, pick a level, unobstructed spot away from dry grass, overhanging branches, tents, and equipment, making sure there is a minimum of three metres of safety space surrounding the fire.
Tip 3: Keep Fires Small and Controlled
A little, properly maintained fire offers sufficient light and warmth without being dangerous. Steer clear of starting big or excessive flames since they can rapidly grow out of control, especially in national parks or public campgrounds.
Tip 4: Always Supervise Your Fire
Never leave a campfire unattended, not even for a short period of time. Keep kids and dogs away from it at all times, and have someone responsible watch it.
Tip 5: Have Fire-Extinguishing Tools Nearby
A shovel, some sand or dirt, and a pail of water should be kept nearby. When necessary, these instruments will assist you in promptly controlling flare-ups or totally putting out the fire.
Tip 6: Avoid Lighting Fires in Windy or Dry Conditions
Strong winds can blow embers into surrounding bushland, increasing the risk of accidental fires. If the weather is too windy or dry, skip the fire and use a gas stove or other alternative.
Tip 7: Never Use Accelerants Like Petrol
Avoid using gasoline, aerosols, or other accelerants to start or keep your fire going. Because of their extreme flammability and hazard, these compounds are frequently forbidden to use in camping areas.
Tip 8: Fully Extinguish Your Fire Before Leaving
After you finish, let the fire burn to ash and douse the coals with water until the hissing stops. Until everything is cool to the touch, stir the ashes, add more water, and repeat.
Tip 9: Never Bury Your Campfire
Do not bury a campfire; the heat can remain trapped underground and reignite hours later. Always extinguish fires above ground using water and thorough stirring.
Tip 10: Respect Nature and Other Campers
By using existing fire sites, avoiding destroying nearby vegetation, and leaving the place as you found it, you can practice Leave No Trace. Keep your fire well-managed and smoke-free, and take it out of consideration for other people.

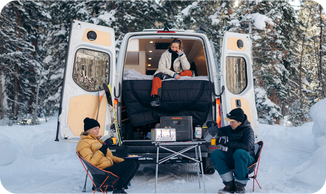
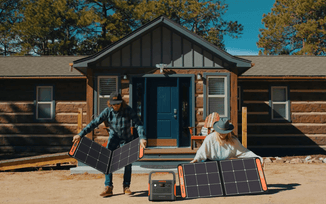
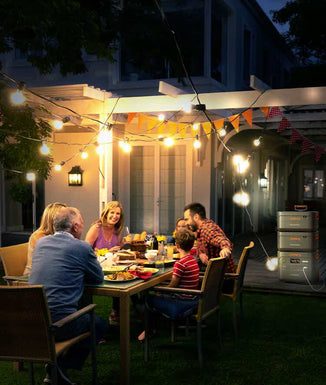
Jackery Portable Power Station for Camping
Taking a Jackery Portable Power Station camping offers a multitude of benefits that significantly enhance your outdoor experience, providing convenience, comfort, and a touch of modern living in the wilderness.
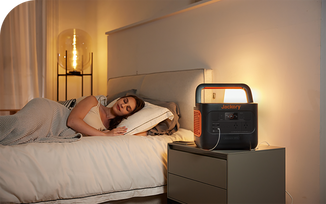
The primary reason is to have a dependable power source when you're camping in locations without access to traditional electrical outlets. This opens up a wider range of camping spots and allows for a more comfortable experience in remote areas.
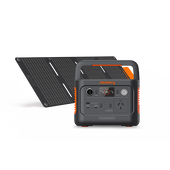
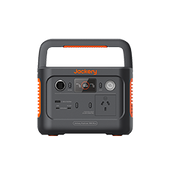
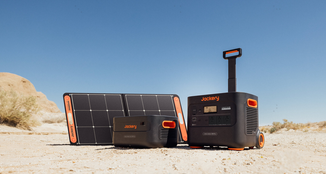
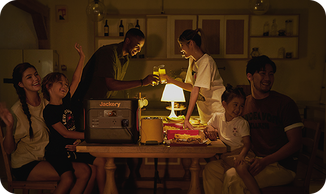
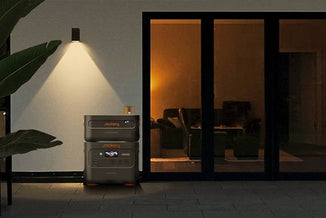
Unlike gasoline-powered generators, Jackery power stations operate silently and produce no fumes, allowing you to enjoy the peace and quiet of nature without disturbing wildlife or fellow campers. Besides powering the electric lights or other tools to make a camping fire, Jackery can also power more outdoor appliances. Here, we recommend Jackery Explorer 1000 v2 for camping.
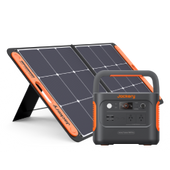
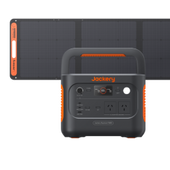
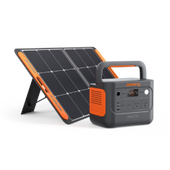
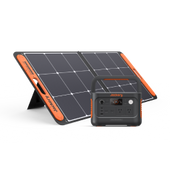
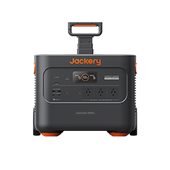
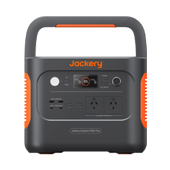
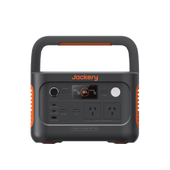
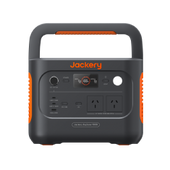
Jackery Explorer 1000 v2
Choosing a Jackery Explorer 1000 v2 for camping offers a significant upgrade in power and versatility compared to smaller models, making it an excellent companion for a comfortable and convenient outdoor experience.

Ample Power Capacity for Extended Trips: With a 1070Wh capacity, the Explorer 1000 v2 provides substantial power to run multiple devices for extended periods. This is ideal for longer camping trips where you might not have access to recharging sources daily. You can keep lights on, charge phones and tablets multiple times, power cameras, and even run small appliances for a noticeable duration.
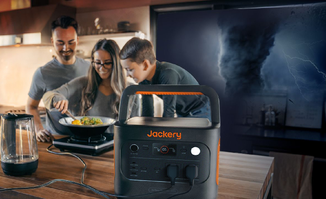
High AC Output for Versatile Use: The 1500W continuous AC output (with a 3000W surge peak) allows you to power a wider range of devices that you might bring camping, including:
Small Refrigerators/Coolers: Keep food and drinks cold without relying solely on ice.
Electric Kettles (for short use): Enjoy hot beverages conveniently.
Laptops: Stay connected or enjoy entertainment.
CPAP Machines: Essential for those with sleep apnea.
Small Appliances: Portable fans, projectors, or even some low-wattage cooking devices (check wattage carefully).
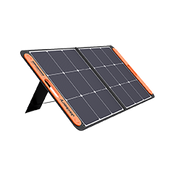
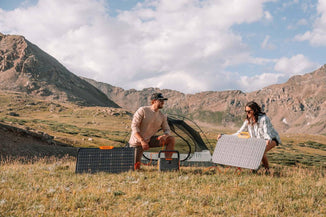
Efficient and Flexible Recharging Options: Recharge the Explorer 1000 v2 quickly at home before your trip. Pair it with Jackery SolarSaga 100W or 200W solar panels to harness solar energy for off-grid recharging, extending your power independence for longer stays. The 1000 v2 often features an MPPT controller for efficient solar charging. Recharge using your car's 12V outlet while travelling.
LiFePO4 Battery for Safety and Longevity: Many Explorer 1000 v2 models utilise a LiFePO4 (Lithium Iron Phosphate) battery, which offers significant advantages in terms of safety, lifespan (more charge cycles), and stability compared to traditional lithium-ion batteries. This ensures reliable power for many camping trips to come.
|
Jackery Explorer 1000 v2 Running Time |
|
|
Portable Fridge (60W) |
15H |
|
Coffee Maker (550W) |
1.5H |
|
Projector (100W) |
8H |
|
Phone (29W) |
34 Times |
|
Laptop (80W) |
13 Times |
(*The working hours are only for reference; the actual working hours depend on your usage.)
FAQs about Camping Fire
The following are the frequently asked questions about how to make a camping fire.
1. How to make a fake camping fire?
A safe and enjoyable method to mimic the atmosphere of a real fire is to make a fake one, especially for indoor activities or kid-friendly events. One technique is to simulate the glow using items like tissue paper for fires, cardboard tubes for logs, and LED lights. Some do-it-yourself installations use tiny fans to flutter orange and red streamers, creating the illusion of flickering flames for a more dynamic image. These arrangements are perfect for themed events, theatre plays, and educational settings.
2. How do you make homemade fire starters for camping?
For campers, homemade fire starters are an economical and environmentally responsible option. One common technique is to use sawdust or dryer lint to fill the compartments of a cardboard egg carton and then cover them with molten wax. You can cut the carton into separate pieces after the wax has solidified. These fire starters are ideal for outdoor adventures because they are portable, lightweight, and ignite rapidly.
3. What is the best formation for a campfire?
Most people agree that one of the greatest constructions for constructing a campfire is the teepee configuration. This technique places tinder in the middle of a cone-shaped arrangement of small twigs and kindling resembling a teepee. Because of the design's superior airflow, the fire may ignite and burn effectively. It works very well for heating and cooking.
4. What is the simplest type of campfire to build?
One of the easiest campfire structures to build is the lean-to fire. In order to create a shelter over the tinder, a big log or boulder is used as a windbreak, while smaller sticks and kindling are leant against it. This design is perfect for novices or situations where time and resources are limited because it is easy to assemble and performs well in windy conditions.
5. How to make campfire DIY?
The first step in building a DIY campfire is to find a safe spot away from combustible objects and clean the area of any trash. To restrict the fire, dig a small hole and cover it with rocks. Collect fuelwood (logs), kindling (slightly larger sticks), and tinder (tiny, easily ignitable materials).
Build a log house or teepee structure with the kindling around the tinder, then set the fuelwood on top of it. As needed, add more wood gradually after lighting the tinder. A fire extinguisher or water should always be close by, and before you leave, make sure the fire is fully out.
Final Thoughts
Learning how to make a camping fire is about more than just sticks and sparks; it's about protecting the environment, adhering to local laws, and remaining safe while taking advantage of one of the best things about camping. You may create unforgettable camping experiences while contributing to the preservation of Australia's natural beauty by selecting the appropriate fire style, utilising safe materials, and being aware of fire safety.
Making a responsible fire, whether at a family vacation park, the beach, or the bush, fosters a connection between people and the natural world. It's time to get your equipment together, light up, and take in the glow now that you know how.