


|
Key Takeaways: |
|
• A garden shed is a sturdy, adaptable little building frequently positioned behind or apart from a house. • There are various options for garden sheds, including stone, wood, metal and OSB. • You must consider any problems near the shed and guarantee the codes. • The guide provides seven steps to DIY a perfect garden shed. • You can choose Jackery Solar Generator 2000 Plus or 1000 Pro for outdoor professional work. • After DIYing a garden shed, something needs to be noticed, such as washing the outside, treating wood regularly and repairing holes. |
Garden Shed Basics
A garden shed is a tiny building that is usually tucked behind or behind a house. As a sturdy, wholly enclosed construction, it is incredibly adaptable. One of its main advantages is that, despite being unsuitable for storing animals, you can use it for almost any other storage you require. It can be used for a wide range of objectives.
These days, garden sheds come in a wide range of features and styles for purchase. They can have the appearance of a charming shed that adds aesthetic appeal to the property in addition to providing storage or a very functional workstation.
Additionally, you can select sheds with great aesthetic value, such as ones with windows, flower boxes, and seats or shelves within really sturdy buildings.
What Materials Needed for DIY Garden Shed?
Choosing the appropriate supplies for your shed construction is one of our key recommendations for do-it-yourself projects. Select materials that are appropriate for your shed's requirements and budget. They should ideally be strong, require little upkeep, and resist decay, rust, and pest infestation.
Use treated wood for a sturdy structure that won't decay over time if you plan to create a wooden shed. The supplies you need to make your shed can be found at any neighbourhood home and improvement store.
|
|
Stone |
|
Characteristics |
The name says it all: solid construction! |
|
Use |
Not very common, but quite interesting for the exterior masonry |
|
Pros & Cons |
Pros: Durable, storm-proof, warm in winter Cons: Much greater transport and construction effort |
|
Options |
l Traditional brick l Sand-lime brick l Aerated concrete l Lightweight building block, e.g. expanded clay |
*Stone materials for DIY garden shed
|
|
Wood |
|
Characteristics |
Stable, sturdy and long-lasting when adequately treated |
|
Use |
Very versatile, practically every conceivable construction can be realised |
|
Pros & Cons |
Pros: Great look and feel Cons: Maintenance required |
|
Options |
l Spruce l Pine l Larch |
*Wood materials for DIY garden shed
|
|
OSB (Oriented Strand Board) |
|
Characteristics |
Stable, robust, resilient |
|
Use |
All-purpose material for flooring, walls, etc. |
|
Pros & Cons |
Pros: Cheap and can be used universally Cons: Not that great looking |
|
Options |
Various qualities for interior finishing and damp areas |
*Oriented strand board materials for DIY garden shed
|
|
Metal |
|
Characteristics |
Unbreakable, lightweight |
|
Use |
Suitable for substructure and roof as well as façade |
|
Pros & Cons |
Pros: Cheap and easy to put up Cons: Cold and modern look |
|
Options |
Various sheet metals, such as zinc |
*Metal materials for DIY garden shed
|
|
WPC (Wood Polymer Composite) |
|
Characteristics |
Wood polymer composite combines the beauty of wood with the advantages of plastic or metal |
|
Use |
Versatile, also as boards and beams |
|
Pros & Cons |
Pros: Hard, easy to clean, sustainable (bio-material) Cons: Less sturdy than wood |
|
Options |
Many colours and shapes |
*Wood polymer composite materials for DIY garden shed
|
|
HPL Panels (High Pressure Laminate) |
|
Characteristics |
Material consisting of at least two layers bonded together over their entire surface |
|
Use |
Ideal for the façade |
|
Pros & Cons |
Pros: Very resilient Cons: Only available as panels |
|
Options |
Various thicknesses and colours |
*High-pressure laminate materials for DIY garden shed
This DIY garden shed is simple and inexpensive because it's made of cheap modules. A shed outside is a great way to make the yard or garden more helpful. A shed can store lawnmowers and other outdoor tools and equipment. You can even turn your shed into a tiny house for an extra living room. The following are the tools that will be used during the making process.
|
Tools for DIY Garden Shed |
|||
|
Air Hose |
Air Compressor |
Brad Nail Gun |
Caulk Gun |
|
Circular Saw |
Chalk Line |
Clamps |
Electric Drill |
|
Drill Bit Set |
Hammer |
Protection |
Jigsaw |
|
Level |
Pocket Hole Jig |
Router |
Sawhorses |
|
Speed Square |
Tape Measure |
Tin Snips |
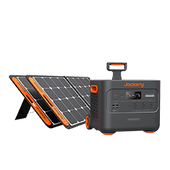
Jackery Solar Generator |
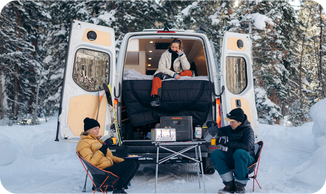
A battery backup generator is like having extra batteries at home in case your main ones are used. It lets you charge your electronics when doing things outside that need electricity. It's usually small, light, and movable and can charge most devices.

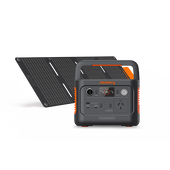
Jackery Solar Generators are reliable battery backup generators that keep the power going to the machines that are hooked up to them. They consist of Jackery Portable Power Stations and Jackery Solar Panels, so you will always have power while building your garden shed.
Considerations Before DIY Garden Shed
It takes a lot of work to build a shed yourself. Even if you've decided to make a new shed, you might need help figuring out where to start. The good news is that especially if you have internet access, finding practical advice, strategies, and other guidance is straightforward. When you're prepared to start making your DIY garden shed, here are some valuable procedures to adhere to.
Check Local Building Codes
Before you start building a shed, it's crucial to take the time to verify your local building codes. Consult your nearby chamber of commerce to ascertain the specific building regulations you must comply with while constructing your shed.
These codes may impact your shed's location, style, and construction. After building your shed, the last thing you want to happen is to discover that you did not adhere to local codes as required. Investigating local codes beforehand is far more straightforward.
Look for Any Problems Near the Construction Site
It's essential to keep an eye out for any issues around the construction site you've selected when building a shed. If your yard is overgrown with trees, consider if falling leaves or branches could damage your foundation or roof. Furthermore, tree roots could occasionally become an issue.
Take should be taken into account into consideration having a tree removed if you don't have an open space for the shed. Make sure your building site has adequate drainage and is level as well. Because of the poor drainage in the area, you don't want water to collect around your shed.
How to Build A DIY Garden Shed?
The steps for building a DIY garden shed are broken up into parts. A heading below each one will help you focus on a different part of the build.

Step 1: Plan Your Shed
Think about why you built your shed. Will it be a greenhouse, a workshop, or just storage? The features and size of your shed will depend on how you want to utilise it.
Depending on your needs, choose a location in your garden that is accessible and gets the ideal amount of shade and sunlight. Make sure there are no flood hazards and that the ground is level.
Then, you should select the shape and size of your shed. You can find some inspiration from the following DIY garden shed ideas.
- Inexpensive DIY Shed
This plan was created on a tight budget, but you wouldn't know it from the lovely layout with arched windows and a unique entryway. Perfect for a potting shed or gardening area, this shed's style is straight out of a fairy tale.
- Garden Closet Storage Shed
This is a free shed design for a little shed that is hardly bigger than a closet. This is a beautiful answer if you're looking for a cheap way to store gardening or essential lawn equipment.
- Gambrel Styly Free Storage Shed
You'll get a ten by-12-foot Gambrel storage shed that you may relocate if necessary after you're done with it. With enough room for lawn equipment and outdoor furniture, this shed has a traditional barn door appearance. It is simple to accomplish throughout a weekend when there is a comprehensive material list.

(Image Source: Unsplash)
Step 2: Check The Permit
Before determining whether you require a permit for your shed, you should be aware of the following:
The project's dimensions (height and total area), location on the site, size in square meters, total coverage of pre-existing buildings on the property, and total amount of pre-existing hard surfaces on the property are all important considerations.
Generally, you will only need permission if your shed is 30 square meters. Most authorities have comprehensive websites on building approval procedures, including those for garden sheds.
Step 3: Lay The Foundation
Build your shed on a sturdy base at least two inches above the ground. Any portion of the floor in contact with the ground will rot, provide rats easy access, and most likely will only stay straight if the dirt erodes and shifts after heavy rains.
These are the two choices:
Construct with horizontal 6x6s: The shed doesn't need to sit on deep footings. Two gravel-filled trenches covered with treated 6x6s are frequently sufficient in regions with well-drained soil. Once the 6x6s are squared and levelled, you can construct and fasten the joist system.
Construct your shed floor like a deck with footings, supports, and a plywood-covered wood structure if the land slows. Create a skirt to hide the gap between the shed floor and the ground if you don't like the opening beneath the shed.
Step 4: Build The Frame Flooring
If you still need to decide on a concrete floor, begin by framing the floor. Pressure-treated wood is more durable. Helpful directions for a timber-piled foundation can be found.
Frame the roof and walls to your design. While building it, be careful to check your framing frequently to make sure it remains straight. Torres uses a little string to accomplish this regularly.
Stretch a string along the rim joist or concrete forms starting at the floor, then adjust to straighten any deviations. After that, repeat the process at the top of the walls, and lastly, when you install the roof ridge or trusses.
Here's a tip: A line should be stretched between the ends of a top plate, leaving room between the line and the plate, and little blocks of leftover 1/2-inch plywood attached to each end.
Next, measure the distance between the line and the lumber using a third scrap of the same plywood. Adjust the top plate with bracing or a similar device until the gauge barely fits. Your dishes should now be precisely straight.
Step 5: Install Roofing & Cladding
Cladding: Install cladding over the framework walls. Oriented strand boards, or OSB, are popular options. The finest NZ timber options for a natural look are pine, Douglas fir, or macrocarpa. Depending on your desire and availability, these woods can be applied in tongue and groove, overlap, or shiplap methods.
Roofing: Put in the roofing components. Shingles, polycarbonate, corrugated iron, and other materials are available options. Guttering can be necessary, depending on the size of your roof.
Step 6: Install Windows & Doors
Depending on your expertise, you can install a pre-hung door or build a custom one. Pick out which of the different door styles you like best. You can pick from slab units with external gate-style hinges or already hung doors.
Place the door in the hole so that it is in the middle. If the door already has brick moulding, level the side with the opening and nail the moulding into the sheathing or siding (if you used T-111). Remove the moulding from the door and nail it off.
Then, shim or nail by following these steps. To keep the door plumb, shim behind the springs. Take out the screw that is closest to the door stop and put in a new one that is at least 1 inch longer and can go through the frame. Do this again for every hinge.
Step 7: Complete and Customise
You can put outer trim on the shed's corners, along the siding seams, around the door, and the windows if you want to. Use an outdoor wood paint or stain that won't chip or peel on the siding and trim to paint or finish them. If you wish, you can paint the trim differently from the walls.
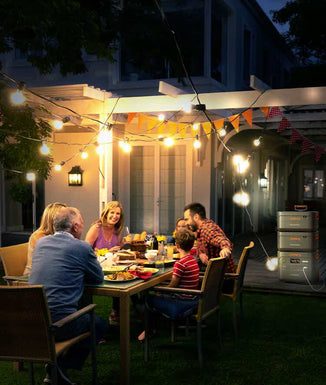
You could get wireless lights or have a plumber wire the shed for outlets and lights. Or plant flower beds and add window boxes to the outside of your DIY garden shed. When the job is done, you will have a shed or workshop outside built just as you want.
Before commencing any task, it is imperative to conduct research on the local construction rules and obtain the necessary licences. First, plan the shed based on its function, size, and cost. You don't need to be a skilled carpenter to build a shed. You can do it yourself. It would help if you had time and the right gear.
Jackery Solar Generators for DIY Garden Shed
Picture this: you're constructing a garden shed at home but can't find an outlet. Luckily, a portable power source will allow you to continue working outside, relieving some of your stress. Power consumption is an issue with several electrical tools:
|
Tools |
Amps |
Hours |
Power Needed |
|
Circular Saw |
10A |
3H |
30Ah |
|
Jig Saw |
6A |
2H |
12Ah |
|
Miter Saw |
7A |
2H |
14Ah |
|
Paint Sprayer |
3A |
4H |
12Ah |
|
Belt Sander |
8.3A |
3H |
24.9Ah |
|
Disc Grinder |
16.7A |
1.5H |
25.05Ah |
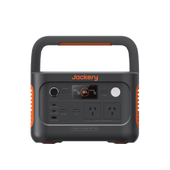
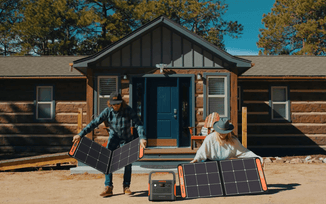
By connecting Jackery Solar Panels to Jackery Portable Power Stations, the Jackery Solar Generator maximises solar energy use. Jackery Portable Power Stations offer multiple power output options, such as AC outlets, DC connectors, and USB ports, to charge appliances and power electrical tools.
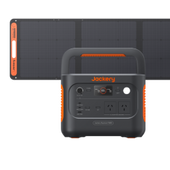
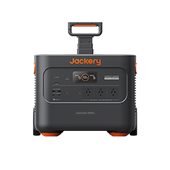
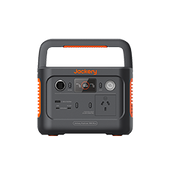
Jackery Solar Generator 2000 Plus
The Solar Generator 2000 Plus by Jackery significantly enhances the available choices for portable electricity with its exceptional performance. With its substantial capacity and formidable power output, this device can provide electricity for basic home needs.
Adding battery cells to the Jackery Solar Generator 2000 Plus enhances its capacity from 2 kWh to 12 kWh, significantly transforming it into providing backup power for households and professional tools.
The Explorer 2000 Plus has a maximum power output of 3000W, 30% greater than other 2 kWh models with similar specifications. The bulk of critical household appliances are powered gadgets. Although the Solar Generator 2000 Plus is commonly used, it can achieve a complete charge within 6 hours by utilising six SolarSaga 100W solar panels. The power source achieves self-sufficiency by harnessing solar energy rather than relying on the power grid for charging.
The supplementary battery pack can be recharged using solar panels, offering increased versatility while enhancing charging efficacy and reducing time consumption. Jackery Solar Panels have an impressive solar conversion efficiency of up to 25%, generating more energy during its lifespan.

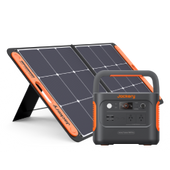
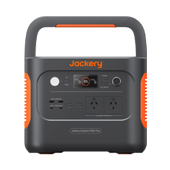
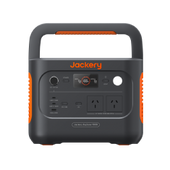
Jackery Solar Generator 1000 Pro
Jackery Solar Generator 1000 Pro combines SolarSaga 80W solar PV panels with the Explorer 1000 Pro power station. It is a remarkably quiet generator, with noise levels as low as 46 dB. It has a lifespan of over ten years and can be fully recharged in just 1.8 hours. This device's dual 100W PD design provides a consistent and reliable power supply, ensuring that all professional tools remain operational outdoors.
The Explorer 1000 Pro power station is a rechargeable device with a capacity of 1002Wh. This allows it to power various appliances, including a circular saw, jigsaw, electric drill, and other devices, covering around 93% of commonly used equipment.
In addition, it is equipped with two 100W PD connectors and two USB-C ports, ensuring reliable and fast charging for various devices such as smartphones, cameras, and more. The MPPT solar charge technology guarantees an efficiency of 99%. Furthermore, this system supports recharging techniques through walls, vehicles, and solar recharge.

What Should Notice After DIY Garden Shed?
Maintaining your DIY garden shed will take time and dedication, but the payoff ensures that you have a strong structure that will look as good as when you first had it installed or built.
If you need help maintaining a shed, we have a complete guide on the tips and tricks you'll need to carry out regularly to keep your shed in tip-top shape.
Wash The Outside: It doesn't matter what the shed is built from; you still need to take the time to keep it clean. Whether it's a composite shed, wood or metal, you want to clean the exterior regularly before stains become a permanent fixture and put a stopper to any mildew growth.
Treat Wood Regularly: If you have a wooden shed, you'll need to spend time each year treating the wood, ensuring it's protected particularly from cold and wet weather.
If you've bought a ready-made shed, the manufacturer will likely treat it. However, it's best to double-check; you'll want to treat the wood within the first six months. If not, adequate protection against the elements should be provided annually.
Repair Holes: While you're cleaning your shed, please give it a look over to ensure that there aren't any tiny holes forming. If you leave them and don't repair them immediately, it could cost you much more in the long run.
Maintain Metal Fittings: Not only do rusted metal fittings look untidy, but they need to perform better, so you must maintain them. If your shed is pre-built and comes with cheap fixtures, it's worth replacing them, in the first instance, with ones created with galvanised steel.
You'll want to ensure that your fittings are oiled a couple of times a year; look for one that doubles up as a rust suppressant to help prolong the life of your metal fixtures.
DIY Garden Shed FAQs
The following are the frequently asked questions about the DIY garden shed in Australia.
- What is the cheapest way to build a shed?
If you want to build a budget-friendly shed, a classic wooden structure with styrene-glazed windows, roofing felt, and panels will be the most affordable option. If you maintain it yearly and take good care, a cost-effective shed can be extremely long-lasting and durable.
- Should a garden shed have a window?
Without windows or other means of ventilation, your shed could become stuffy and humid, potentially damaging the items you store inside. Windows allows for cross-ventilation, which helps maintain a comfortable environment, especially during the hot summer.
- What is the life expectancy of a garden shed?
But generally speaking, for the most popular kinds of shed materials, anticipate the following: Wooden sheds: 20–25 years, such as those used to store wood. Vinyl storage sheds: over 25–30 years. Plastic or resin sheds: five to seven years.
Final Thoughts
A DIY garden shed adds some much-needed storage space to your house. It eventually helps you organise your home and keep your tools and equipment handy. We have discussed above how to DIY a shed and also how this shed is cost-effective and of much better quality. During the building process, you can use a Jackery Solar Generator to power your professional tools outdoors, such as your electric drill, circular saw, and more.


