


|
Key Takeaways: |
|
• A DIY bird feeder is An outdoor device that provides birds with food. • Material requirements vary depending on the kind of bird feeder. • Before making your bird feeder, consider the types of birds you wish to attract, whether hanging the feeder or not, and your local climate. • There are two types of bird feeder guides shown below - wooden and pine cone bird feeders. Follow the steps and make them quickly. • We highly recommend Jackery Solar Generator 500 and 300 Plus to charge the electrical tools while making the bird feeder outdoors. • Except for the wooden and pinecone bird feeders, there are also aluminium pie pans, muffins, and teacup bird feeders. |
What Is A DIY Bird Feeder?
A DIY bird feeder is an outdoor device that provides birds with food. Since various bird species have varied feeding preferences, it is vital to adequately prepare a bird feeder before attempting to build one on your own if you want it to attract birds successfully.
Some people even build their homes right next to bird feeders, so it's no surprise that many people utilise them as a means of bird watching.
What Materials and Tools Needed for DIY Bird Feeder?
The supplies required for your project may vary depending on the kind of DIY bird feeder you create. Whether you choose a suet feeder or something made from recycled materials, you should have a few supplies to simplify your DIY project.
Material requirements vary depending on the kind of bird feeder. However, in general, you will need:
|
DIY Bird Feeder Materials & Tools |
||
|
Craft Sticks |
Nontoxic Glue |
Twine |
|
Ribbon |
String |
Electric Saw |
|
Wood |
Mixing Bowls |
Measuring Cups |
|
Mesh Screen |
Jig Saw |
Spray Paint |
|
Pin Nailer |
Wood Glue |
Jackery Solar Generator |
|
Hammer |
Aluminum Screen |
Scissor |
These multipurpose poles are ideal for adding perches to your bird feeder. Unlike hummingbirds, most birds like a spot to settle and relax while eating. If you don't have craft sticks, use wooden spoons.

Not all glues are suitable for birds, so use nontoxic glues. If you need stronger adhesive for crafts like the teacup bird feeder, let it cure fully before adding birdseed.
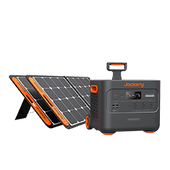
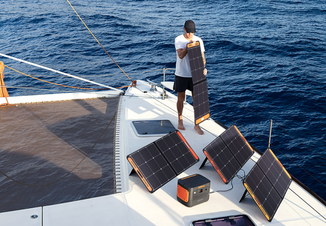
There is one item you will need for your DIY bird feeder: a portable power supply. While it is not a must-have, it is a lifesaver while working outside. The Jackery Solar Generator is a valuable tool for any DIY project. It combines solar panels with a portable power station to give a steady power source for any electrical instruments, such as a saw, drill, and more.
DIY Bird Feeder Guide: How to DIY A Bird Feeder?
You can create a DIY bird feeder from various items, including recyclables like empty soda bottles, milk cans, egg cartons, and tea cups. Fruits like apples, berries and pumpkins may be in the bird feeder.
However, these elements should be considered before you begin constructing your DIY bird feeder; they will help you choose the best design.
- Types of Birds: It's important to note that various birds have varying seed needs to ensure you get bird seed mixes suitable for the birds local to your region. Adding fresh fruits or flowers to your bird feeder is a good idea since certain birds like them.
- Hanging or Not: Making a hanging bird feeder is the way to go if your yard is abundant with trees, but if trees aren't an option, a ground-level design or one that can be fastened to a fence will work better.
- Climate: Where you now dwell, is it hot or cold? What kind of precipitation might we expect? Some bird feeders work better in cooler climates and others in warmer ones.
Now that you've asked yourself these questions, you can construct your bird feeder. Here, we'll go over the two main kinds of bird feeders: pine cones and wooden ones. A bird feeder is a simple woodworking project that takes little time but will provide enjoyable hours for years.
DIY Wooden Bird Feeder Guide
Building a primary DIY bird feeder may be a terrific hobby for youngsters as long as an adult cuts the wood pieces and oversees the process. You can find detailed instructions for constructing a wooden tray bird feeder here.

Step 1: Design The Frame
Use the wood pieces 1 inch by 2 inches by 10 inches to construct a square frame, following the figure's instructions. Ensure the two-inch side faces upwards on each piece of wood and the one-inch side rests flat.
Step 2: Cut The Wood
On cedar boards, use a ruler to measure out four pieces that are 1 x 2 x 10 inches. Utilise a pencil or marker to make markings. Mark four pieces on the cedar wood boards that measure 3/4 x 1 x 10 inches. Make the necessary cuts in the wood using a handsaw.
Additional choices include circular and mitre saws. Always remember to use safety gear, such as work gloves and goggles.
After that, using 3/4-by-1-by-10-inch timber pieces, construct an additional wooden framework. To ensure that the second frame is identical in size to the first, put each piece of wood on its 1-inch side. When you stack the two frames, make sure their sides are flush.
Step 3: Glue The Wood
Put the parts together in an L-shape using wood glue. This will form the first portion of the frame. Make another L-shaped piece using the other two pieces of wood and attach it with glue. So, the second half of the frame will be made.
Join the two L-shaped halves with adhesive, making sure the corners meet. Rinse off any surplus adhesive. Further reinforcement may be achieved by driving one 1/2-inch nails into all four frame corners.
Step 4: Cut The Aluminum Screen
After setting up the aluminium screen, set the wooden frame on top. Apply a permanent marker on the screen to trace the perimeter of the frame. Sharp scissors were used to cut off the aluminium screen square that had been traced. Top the frame with the square of the chopped screen. Put the bird seed in this hole at the base of the feeder.
Step 5: Nail The Frames Together
To stack the frames:
- Lay one on the other and put the aluminium screen in the middle.
- Put four 1-inch nails on each side into the first frame to attach the second frame and screen.
- Once the nails have been driven in, turn the feeder over.
A square hardwood tray with a bottom screen should be the appearance of the feeder.
Step 6: Finish
You may skip this step if you like the rustic appearance of the unfinished timber. You should know that wood stain and sealer may assist in keeping the wood protected from the elements. Use sandpaper or a sanding block to ensure the wood is completely smooth. Apply an external stain or paint that is water-based and harmless to the wood. You may add another coat if you like.
|
Notes from Experts* |
|
Various methods exist for hanging seed-filled bird feeders; you can either stand on the ground or hang it. l The bird feeder may be hung by threading loops of plastic string through each eye hook. Swap out the twine with lengths of chain. Thanks to the sturdy chain, you can suspend the bird feeder from only two eye hooks. l You can always construct a stand for it if you can't find a tree to suspend your feeder. Find a second, shorter section of similar pipe and use it to make a hanging arm for the bird feeder. |
DIY Pine Cones Bird Feeder Guide
You can whip together these pinecone bird feeders in little time at all. Any child, whatever age, may enjoy this entertaining project. No matter your age, you may always enjoy taking in some wildlife in your backyard.
Ten minutes at most is required to assemble each pinecone bird feeder. First, you have complete control over how much peanut butter and birdseed you put in.

Step 1: Find The Materials
You would start by collecting pine cones from the enormous trees in your backyard. Any old pine cone won't cut it. The correct pine cone has to be located. The ideal pine cone with completely expanded wooden scales or petals would be the biggest. Any pine cone of a reasonable size will do, although the most effective are digger pines and grey pine cones.
Feel free to use the crunchy or creamy peanut butter of your choice. Just get the most affordable peanut butter you can find. Invest in a large container of lard instead for those with food allergies.
The thread should be thick, white cotton. Because of its tiny diameter, the sewing thread cannot hold the seed-laden pine cones in place. Yarn might be used, although it's usually too elastic.
Step 2: Prepare The Pine Cones
To prevent injury to yourself or the birds, use sandpaper to roughen the sharp edges of the pine cones. Retain the woody scales; only smooth off the sharp tips so they won't stab you.
Secure the top with string. A grownup may use hot glue to bind the rope, or a child can knot it to the pine cone. Determine the desired hanging height of the pine cone from the tree and cut the thread accordingly.
Step 3: Add Peanut Butter & Seeds
Spread peanut butter generously over the pine cone, including in the spaces between its scales. Sometimes, you'd spread peanut butter on a pine cone to the point where it looked completely different.
After coating the pine cone with peanut butter, spread birdseed on a dish and roll it in the seeds. Another option is to sprinkle seeds onto the pinecone. To ensure that the seeds stay, stuff them into the spaces between the scales and press them down into the peanut butter.
Step 4: Finish
Toss your feeder outside and hang it from a tree. Find a spot close to a window or a porch swing to watch the hummingbirds come and go as they feed.
|
Notes from Experts* |
|
Making a DIY bird feeder with your kids is a good idea. There's more to making bird feeders than just having fun. It's also a great way to help your kids develop good character and creativity. It's going to teach your kids a lot more than school: • Problem-solving • Learn native wildlife • Observation skills • Patience |
Jackery Solar Generators for DIY Bird Feeder
Picture this: you're making a bird feeder from scratch but can't find any power outside. Luckily, a portable power source will allow you to operate outdoors, reducing stress. Power consumption is an issue with several electrical tools:
|
Tools |
Amps |
Hours |
Power Needed |
|
Circular Saw |
10A |
0.25H |
2.5Ah |
|
Jig Saw |
6A |
0.25H |
1.5Ah |
|
Miter Saw |
7A |
0.25H |
1.75Ah |
|
Paint Sprayer |
3A |
0.25H |
0.75Ah |
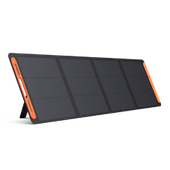
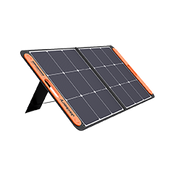
By connecting Jackery Solar Panels to Jackery Portable Power Stations, the Jackery Solar Generator maximises solar energy use. Jackery Portable Power Stations offer multiple power output options, such as AC outlets, DC connectors, and USB ports, to charge appliances and power electrical tools.

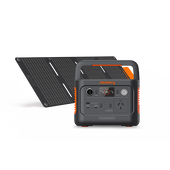
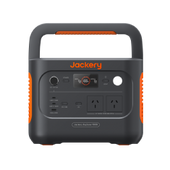
Jackery Solar Generator 500
A Jackery Solar Generator 500 combines SolarSaga 80W or 100W solar panels to turn sunlight into electricity with the Explorer 500 portable power station. It is easy to charge your electrical tools outdoors. For example, it can charge a 6A jig saw for 1.4 hours to help make a DIY bird feeder. The Jackery Explorer 500 Portable Power Station charges low to high-power equipment for extended lengths.
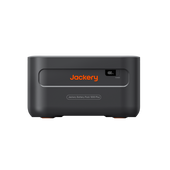
The power station's huge 518Wh battery capacity, portability, foldable handle, lower noise level (46dB, similar to a human whisper), lightweight (6.4 kg), and industry-leading BMS technology make it ideal for short-term outdoor adventures. The Jackery Explorer 500 Portable Power Station contains:
- Three USB-A connectors.
- One AC outlet.
- Two DC ports.
- A carport for charging essential appliances.
|
Product |
Jackery Solar Generator 500 |
|
Image |
 |
|
Capacity |
518Wh (21.6V/24Ah) |
|
Life Cycle |
800 cycles to 80%+ capacity |
|
Battery Cell |
NMC battery |
|
Dimension |
24.2x19.3x30cm |
|
Recharging Methods |
Explorer 500 + SolarSaga 100W: 9.5H; AC Adapter: 7.5H; 12V Car Adapter: 7.5H |
|
Output Ports |
1*AC Output: 240V, 500W (peak 1000W); 1*DC Output: 12V⎓7A; 3*USB-A: 5V⎓2.4A; 1*Carport: 12V⎓10A |
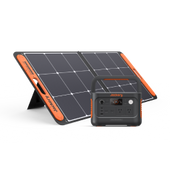
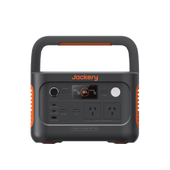
Jackery Solar Generator 300 Plus
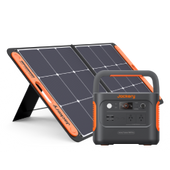
Due to its 288Wh capacity, 300W power output, two PD ports with a maximum output of 100W each, rapid charging for multiple devices simultaneously, and multiple charging options, the Jackery Solar Generator 300 Plus, which combines the SolarSaga 80W solar panel with the Explorer 300 Plus portable power station, is suitable for outdoor charging or home emergency.
The Jackery Explorer 300 Plus portable power station, which is powered by a Lithium Iron Phosphate (LiFePO4) battery and has a 10-year lifespan, protects the safety of all your electrical equipment by providing a consistent voltage and pure sine wave.
Furthermore, the unique ChargeShield technology and constant power delivery prevent equipment damage. Our enhanced charging mechanism ensures longer battery life and faster charging times. Keep your phone charged and connected while working outdoors, camping, RVing, or other activities!
|
Product |
Jackery Solar Generator 300 Plus |
|
Image |
 |
|
Capacity |
288Wh (12.8V/22.5Ah) |
|
Life Cycle |
3000 cycles to 80%+ capacity |
|
Battery Cell |
LiFePO4 battery |
|
Dimension |
16.7x15.5x23cm |
|
Recharging Methods |
Explorer 300 Plus + SolarSaga 80W: 6.3H; AC Adapter: 2H; 12V Car Adapter: 5.5H |
|
Output Ports |
1*AC Output: 230V, 50Hz, 300W Rated, 600W Surge Peak; 2*USB-C: 100W Max, 5V⎓3A (5V, 9V, 15V, 12V, 20V up to 5A); 1*Carport: 12V⎓10A |
DIY Bird Feeders Ideas
You can craft creative bird feeders with everyday household items and even some items you may otherwise throw away. Some suggestions for DIY bird feeders are as follows:
Aluminum Pie Pans Bird Feeder: To make a bird feeder, poke a hole in the top rim of the pan and two sides. As with the bowl feeder, string the rope, load it with food, and hang it up. A hanging hole is already a standard feature on many cookie sheets. Use these holes as a guide to string cookie sheets; then, slip another rope beneath the pan and secure it to the tree.
Muffin Bird Feeder: Making muffin bird feeders is a fun and straightforward way to get the kids involved in the kitchen while also helping the environment. This is an excellent alternative if you need access to a suitable location to hang bird feeders! Display these adorable little muffins on porch railings, in crooks of trees, window sills, or benches.
Tea Cup Bird Feeder: This upcycled tea cup and saucer is the most aesthetically pleasing do-it-yourself bird feeder I've ever seen. All you have to do is glue and hang it up; it's that simple. Pick out an old tea cup and saucer you're okay with giving away, or go out and get a new one just for this craft.
DIY Bird Feeder FAQs
The frequently asked questions about DIY bird feeders are listed below:
1. How to feed birds safely?
Be wary of felines. It is simple to kill birds while they are at a feeder. Ensure the feeder is hung close to trees and shrubs but not in dark places where cats may hide.
Pick for smooth bird feeders with no protrusions or rough corners; ideally, the shape will let the birds sit away from the food, preventing it from becoming dirty. Avoid crowding by setting up many feeders with plenty of space between them.
A plastic dome and a feeder with holes for drainage will protect the seed from becoming wet. Since they empty so rapidly, there is less time for seeds to get damp or damaged in smaller feeders.
2. Where is the best place to put bird feeders?
If you want to ensure you see every feathered guest:
- Put the feeders in open places visible from your favourite windows.
- Ensure they're easy to reach when cleaning or refilling them.
- Don't put them there to avoid a significant mess or spill beneath the feeders.
3. Why aren't the birds eating at my feeder?
If birds aren't flocking to your feeder, there might be a few different why. The seed may not be fresh anymore. Seeds have a 1-2 week shelf life in a feeder when exposed to humidity and sunshine. The seed will rot in a matter of days if water has seeped into the feeder.
Even while birds can see the food at a new feeder within seconds, it may take three to four weeks to start eating from it since they depend only on sight to find food. For a specialty feeder, it may be twice as long. Even if you replace an old feeder with a new, shiny one, the birds may need time to acclimate since they are naturally cautious of unfamiliar things.
Mould and germs thrive in unclean feeders, causing fresh seeds to decay quickly and harm birds. Wash the feeders once a month.
Many birds come to feeders at different times of the year, but the busiest times are during flight and breeding. Birds are less active in the fall because more natural food is available. After all, it rains a lot in the summer.
Birds may not come to feeders that are well-designed or that are in good shape. Check that the birds can quickly get the food and that the feeders function excellently.
4. How to maintain a bird feeder?
The bird feeder's longevity and continued appeal depend on its upkeep frequency.
Once a week, wipe off the area beneath the feeder. Pests may find the seeds that birds drop on the ground under the feeder appetising. Other unattractive signs of avian visits are also left behind. Please clean the area by sweeping the trash and spraying it with a hose.
Every week, give the birds a new seed. A damp weather might cause old seeds to mildew and harbour pests and germs.
Every two weeks, remove the feeder and wash it well with soap and hot water. To maintain the health of the birds who frequent your feeder, cleaning it often is essential. Wet weather or ill birds in the garden should prompt you to clean it more often.
Final Thoughts
Try making a bird feeder yourself to please a wide range of birds. Involve the whole family and make a note of the different types of guests. This DIY bird feeder is a charming and practical accessory for your balcony or backyard since birds also decrease garden bug populations. Make your bird feeders using the detailed instructions provided on this page. A Jackery Solar Generator is an excellent, reliable power source if you build your feeder outside.


