


|
Key Takeaways: |
|
• An outdoor pergola is a structure with four beams. Pergolas often provide shade or a roof, but they are not required to have one. • A DIY pergola may be constructed in various designs and materials, such as a walled pergola, a modern pergola, and a wildlife-friendly pergola. • Choosing suitable materials is vital for a DIY pergola to be successful and cost-effective. The DIY essentials are listed below. • There are seven steps to build a pergola in at least two days. • We suggest trying Jackery Solar Generator 2000 Plus and 1000 Pro for building the pergola and using electrical tools outdoors. • It is worth DIYing a pergola, especially considering the higher labour installation costs. |
What Is A DIY Pergola?
An outdoor pergola is a structure with four beams. Pergolas often provide shade or a roof, but they are not required to have one. Their design is based on Italian Renaissance stonework. Pergolas typically have two or four open sides, although their design may be flexible enough to accommodate open or covered sections for weather protection.
Common materials for DIY pergolas include wood, aluminium, and steel. Big enough to accommodate a big gathering or to span a broad area, these buildings may serve as an outdoor room, an extension of your house, or both. To create a covered path or walkway, you may also use them with trellises or latticework.
What Are The Types of DIY Pergolas?
A DIY pergola may be constructed in various designs and materials. You may choose from a wide variety of pergola styles to meet your specific requirements.
The best option is the one that satisfies your tastes while still being practical, affordable, and achievable. Here are a few examples of pergolas that are both common and stylish:
- Walled Pergola: Construct a basic framework out of wooden beams to place a sitting area underneath for outdoor dining. Inside, you'll find potted plants and a hanging basket supported by a beam; the design's three walls give further wind protection.
- Modern Pergola: A contemporary spin on the classic pergola may be achieved with a simple structure constructed from metal beams. The metal beams above are adorned with grapevines and summer jasmine that climb the supporting supports.
- Wildlife-Friendly Pergola: What could be more enjoyable for someone who loves nature than lounging under a pergola while watching birds and bees feed? Make sure there's enough room for birds to nest, cover the walls with beautiful plants, and then use the beams to hang bird feeders, bee hotels, and other animal habitats. Animals will congregate in the area, and you'll have a front-row seat to the excitement.
What Materials and Tools Needed for DIY Pergola?
Choosing suitable materials is essential for any do-it-yourself job to be successful and cost-effective. Choose materials that will last and can handle the weather where you live.

You can choose from redwood, cedar, pressure-treated wood, and plastic materials. They can withstand sun, rain, bugs, and rot and don't need much care. Pressure-worked wood is usually the least expensive option. Cedar and oak, on the other hand, cost more.
Composite materials may be pricey initially, but they last longer and need less maintenance. Redwood or pine might be a good choice if you want something simple. Aluminium or hybrid materials may be better for a more modern style. For a DIY pergola, you'll need more supplies and tools:
|
DIY Pergola Materials & Tools |
||
|
4-in-1 Screwdriver |
Hole Saw |
Wire Strippers |
|
Caulk Gun |
Putty Knife |
Wood |
|
Combination Square |
Router |
Cordless Drill |
|
Safety Glasses |
Digger |
Extension Cord |
|
Tool Belt |
Tape Measure |
Hammer |
|
Jig Saw |
Circular Saw |
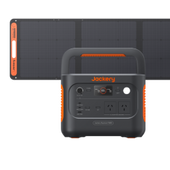
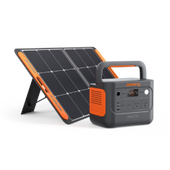
Jackery Solar Generator |
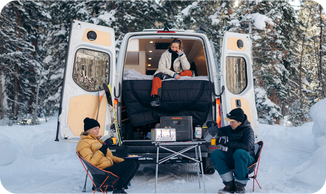
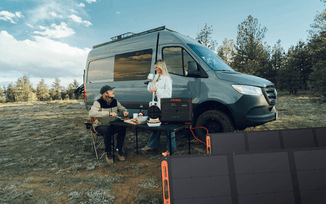
A battery backup generator is like having extra batteries at home in case your main ones used up. It lets you charge your electronics when doing things outside that need electricity. It's usually small, light, and movable, and it can charge most devices.
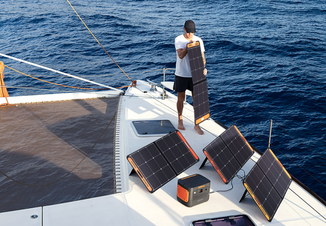
Jackery Solar Generators are reliable battery backup generators that keep the power going to the machines that are hooked up to them. They consist of Jackery Portable Power Stations and Jackery Solar Panels, so you will always have power while building your pergola.
DIY Pergola Guide: How to DIY A Pergola?
There are a few things to keep in mind before you begin. Whether you are planning a backyard makeover, outdoor remodel, or pergola installation and are wondering whether there are any restrictions, you should check with your city council.
The size and placement of the pergola should be deliberated in light of the local wind and solar patterns. Before you cut down any posts or purchase any supplies, measure the available area and think about the finish it will have when finished. After that, establish a long-term strategy and stick to it.
Consider getting a pergola house construction kit for even more ease and less money. With these tailor-made kits, you can assemble a steel pergola in your home with little preparation and work. Here are the specifics you need to build a DIY pergola.

Step 1: Choose The Proper Location
You can put this DIY pergola project right next to your house like we did, or leave it adrift in the yard. It's not attached to the house in any way. You could use dirt or wood chips as a floor or pour a concrete block below.
Instead of attaching it, leaving it off will save you the trouble of changing gutters and matching eaves. You don't have to deal with frost footing, either. But if you have rocky soil, you should dig your footings to frost depth to avoid frost heave.
|
Notes from Experts* |
|
Instead of making a new pergola, you can put a gazebo over an old one. This will save you a lot of time, money, and work. If you plan to add a patio later, ensure all the footings are poured at the same height as the pergola. |
Step 2: Ensure No Buried Cables
If you want to label any underground gas or cable lines before you dig, you should contact your local utility company. Use a hand-held posthole digger or a rented power auger to dig your holes once you've confirmed no underground utilities are nearby. To make the hole more comprehensive, you'll also want a shovel. Keep digging until you reach a depth of 24 inches.
Step 3: Measure The Building
Get a good measurement of the projection of your eaves if your pergola plans call for construction near your home. To properly place the column centres near the house, but not too close, keep the centre of the posts closest to the home at least 7 inches further away than this measurement. To ensure proper alignment, drive distant pegs consistently from the house and use a thread to mark their positions.
Secure the post sites with string-reaching stakes to maintain post alignment. After driving the stakes outside the work area, you may remove the string to dig and reconnect it to check for alignment. Measure the distance from one of the farthest stakes and record the result on a notepad to verify that the placement is parallel to the house from left to right.
Step 4: Install The Posts
Level the ground and clear the area where the pergola will be placed. Fix the 4x4 posts to the concrete footings after trimming them to the correct height. Check that they are perfectly level and plumb. Use nuts and bolts to attach the beams and posts, then use a wrench to tighten the bolts.
For a more natural, tailored appearance, we aimed for the DIY pergola's roof to meet the house's fascia. It is essential to trim each post precisely so the pergola roof remains flat and even across the whole topside.
Transfer your mark around the post using a combination square set from the bottom. For the post, use a jigsaw blade with ten teeth per inch. Each post you cut requires a new blade.
|
Notes from Experts* |
|
Place the columns on top of sandbags or mulch bags to prevent them from moving around as you cut. |
Step 5: Prepare The Crossbeams
The beams will be built next. To do this, cut 2x4s to the length you want and nail them to the top of the frames. Crossbeams can then be put between the rafters to make your pergola. The last step is to cover your pergola with a deck or a roof.
This will keep the frame safe from the weather and help it stay in place. Measuring the deck and finding any structural problems before you start the fitting process is essential. If necessary, you can change the pergola's support posts and bars to fit these limits.
Then, take down any railings or supports that are already there and use lag bolts to attach them to the ground. Next, use a mitre saw or a handsaw to cut the wood for the pergola. Once you have everything, use lag bolts and nuts to put the pergola braces in place. Self-drilling screws can also be used to hold these pieces together.
Also, lag bolts and nuts are used to connect the gazebo pieces. Finally, finish the pergola and seal it the way you want.
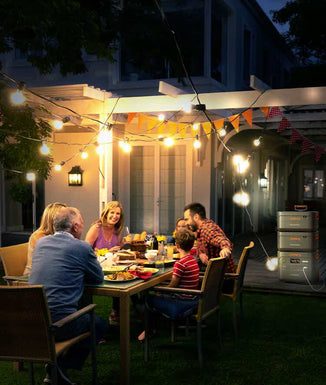
Step 6: Place Decorations
Hang some objects from your pergola to ensure they are stable once you've connected all the posts. A beautiful way to adorn your outside area is with hanging plants and other things.
A well-admised pergola is a lovely sight. The top of the building may be decorated with plant hangers or fairy lights. A hot tub, a sophisticated dining table, or anything in between are all possible additions.
The pergola posts may be used to support climbing plants and vines, which adds to its exquisite appearance. Lastly, you may paint the pergola's sides with colourful or elegant colours to add colour to your lovely structure.
Step 7: Final Touches
Your new, lovely gazebo will feel like an extra room. This is why it's crucial to put the style of the lessons first when making specific plans. Here are some good things to consider when choosing a grille style!
If you want to use the building for outdoor meals, ensure it has built-in seats or an outdoor cooking slab. You should add shade features like a dome or roof panels based on where you plan to put your pergola. This might make the trellis more useful on hot days.
If you want to use the pergola at night, add lights to make it more valuable and appealing.
Jackery Solar Generators for DIY Pergola
Picture this: you're constructing a pergola at home but can't find an outlet. Luckily, a portable power source will allow you to continue working outside, relieving some of your stress. Power consumption is an issue with several electrical tools:
|
Tools |
Amps |
Hours |
Power Needed |
|
Circular Saw |
10A |
3H |
30Ah |
|
Jig Saw |
6A |
2H |
12Ah |
|
Miter Saw |
7A |
2H |
14Ah |
|
Paint Sprayer |
3A |
4H |
12Ah |
|
Belt Sander |
8.3A |
3H |
24.9Ah |
|
Disc Grinder |
16.7A |
1.5H |
25.05Ah |
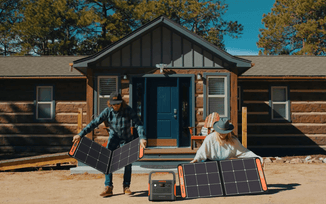
By connecting Jackery Solar Panels to Jackery Portable Power Stations, the Jackery Solar Generator maximises solar energy use. Jackery Portable Power Stations offer multiple power output options, such as AC outlets, DC connectors, and USB ports, to charge appliances and power electrical tools.

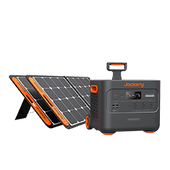
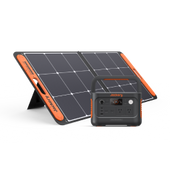
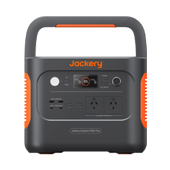
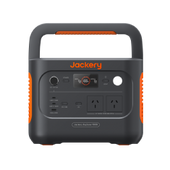
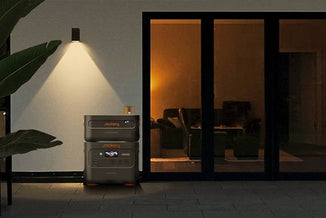
Jackery Solar Generator 2000 Plus
The introduction of the high-performance Solar Generator 2000 Plus by Jackery represents a notable progression in portable power alternatives. As a result of its substantial capacity and exceptional power output, it can supply energy for standard van utilities for multiple weeks and meet the power requirements of outdoor exploration or home backup power supply.
Incorporating battery cells into the Jackery Solar Generator 2000 Plus substantially increases the capacity from 2 kWh to 12 kWh, bringing about a paradigm shift in supplying residential reserve power. Capable of expanding to 3000W, this product exhibits a 30% increase in rated power compared to rival 2 kWh products. Powered devices make up an overwhelming majority of fundamental residential appliances. Despite its consistent daily use, the advanced LiFePO4 battery has ten years of protracted operational expectancy.
|
Product |
Jackery Solar Generator 2000 Plus |
|
Image |
 |
|
Capacity |
2042.8Wh (13A/638.4Ah) |
|
Life Cycle |
4000 cycles to 70%+ capacity |
|
Battery Cell |
LiFePO4 battery |
|
Dimension |
37.36x35.94x47.3cm |
|
Recharging Methods |
Explorer 2000 Plus + 6*SolarSaga 100W: 6H; AC Adapter: 1.7H; 12V Car Adapter: 25H |
|
Output Ports |
3*AC Output: 230V~ 50Hz, 3000W Max, 6000W surge peak; 2*USB-A: Quick Charge 3.0, 18W Max; 2*USB-C: 100W Max, (5V, 12V, 9V, 15V, 20V up to 5A); 1*Carport: 12V⎓10A |
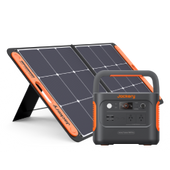
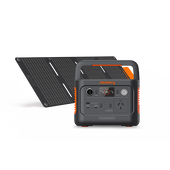
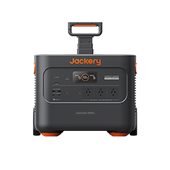
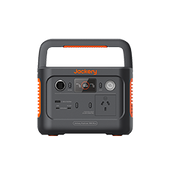
Jackery Solar Generator 1000 Pro
Jackery Solar Generator 1000 Pro is your go-to answer for portable electricity that exceeds expectations. With an incredible 1002Wh capacity and 1000W output power, this solar generator is more than just a device; it's a dependable energy source designed for your mobile lifestyle. Imagine a flawless wall charge in just 1.8 hours due to a thousand charge cycles, a game changer for individuals who value efficiency and convenience.
Designed Explorer 1000 Pro with mobility in mind, the foldable handle adds ease, making storage and transporting a breeze. Its tiny size and excellent 1000-charge cycle life ensure that this power source will keep up with your adventure. Experience the silent power of a pure sine wave inverter, which produces steady energy while emitting only 46 decibels of noise. The integrated battery management system (BMS) monitors and protects battery life, assuring long-lasting and dependable performance with each charge.
Multiple connectors provide versatility and performance, including two 1000W AC output connections, two USB A ports, and a DC vehicle port. The Explorer 1000 Pro power station is a multipurpose hub for camping equipment, powering everything from portable fans to movie projectors. In a world where adventure has no bounds, let the Jackery Solar Generator 1000 Pro be your loyal companion, offering power and the ability to explore without restriction.
|
Product |
Jackery Solar Generator 1000 Pro |
|
Image |
 |
|
Capacity |
1002Wh (43.2V/23.2Ah) |
|
Life Cycle |
1000 cycles to 80%+ capacity |
|
Battery Cell |
NMC battery |
|
Dimension |
25.5x26.2x34cm |
|
Recharging Methods |
Explorer 1000 Pro + 2*SolarSaga 80W: 9H; AC Adapter: 1.8H; 12V Car Adapter: 12H |
|
Output Ports |
2*AC Output: 230V, 1000W (peak 2000W); 2*USB-A: Quick Charge 3.0x2, 18W Max; 2*USB-C: 100W Max, (5V, 12V, 9V, 15V, 20V up to 5A); 1*Carport: 12V⎓10A |
|
Working Hours |
Fan(70W): 11.5H, TV(60W): 13.4H, Camera(100W): 8H, Lighting(25W): 32.1H, Fridge(700W): 1.1H, Projector(300W): 2.7H |
Is A DIY Pergola Worth It?
The most significant advantage of constructing your DIY pergola is the money you'll save on labour costs. Cutting the columns, stringers, and louvres to size according to the do-it-yourself blueprints will take much effort, but the payoff is worth it if you build the pergola from scratch without paying someone.
Free help from loved ones is also required to raise the pergola structure. While it's true that you may save money in the long run by building your pergola, this is only a project for those who have experience.
On top of all the physical labour, there are a lot of state and municipal construction rules to follow, which may be complex. You'll also need the required permits from various entities, such as homeowners' organisations, building departments, and city halls.
An additional perk of building your wooden pergola is the certainty of knowing where you'll spend a whole weekend each spring. Pergolas made of wood on the Golden Coast need yearly maintenance to prevent decay and sun damage. Repairing damaged areas may need resealing, painting, or even replacing them entirely. Damaged tiles near the pergola floor may also need repair if an appropriate gutter system is not installed.
Choosing between an independent pergola and one linked to the home is essential when constructing your own pergola. The latter provides dedicated shade, particularly on terraces or open yards, while the former expands inside areas. The two options both need help for DIYers. Your house and foundation might be at risk from a poorly placed connected pergola, which could lead to drainage problems.
DIY Pergola FAQs
The frequently asked questions about DIY pergola are listed below:
1. What size of solar generator do I need for a DIY pergola?
To select the correct size solar generator for your needs, consider your energy demand, the efficiency of your solar panels, battery storage capacity, and the specific needs of your equipment. Choosing the right size solar generator involves balancing energy needs, setup efficiency, mobility, and cost.
Users can select a Jackery Solar Generator with capacities ranging from 12 kWh to 300Wh for a portable solar system based on their energy requirements. The formula for estimating Jackery Solar Generator-powered appliances' operational hours is below.
Working Hours (H) = [Jackery Solar Generator Capacity (Wh)*0.85] / Appliance's Wattage (W)
Hence, if you want to use a Jackery Solar Generator 2000 Pro to charge a 320W Jig saw, it will work 5.7 hours. You can use this formula to find out more working hours you want to figure out.
|
Electrical Tools |
Working Hours |
|
|
Solar Generator 2000 Pro (2160Wh) |
Solar Generator 2000 Plus (12 kWh) |
|
|
Circular Saw (1200W) |
1.53H |
8.5H |
|
Jig Saw (720W) |
2.55H |
14.2H |
|
Miter Saw (840W) |
2.2H |
12.1H |
|
Paint Sprayer (360W) |
5.1H |
28.3H |
|
Belt Sander (1000W) |
1.8H |
10.2H |
|
Disc Grinder (2000W) |
1H |
5.1H |
2. Is it cheaper to build your pergola?
What makes a pergola expensive is its size, what it's made of, and something else. Most of the time, a big, hand-built gazebo will cost between $2,000 and $12,000, or $100 to $500 per square metre. The price may increase if you need more work done on your gazebo.
How much a pergola costs is mainly based on the materials used and the amount of work that goes into making it. The price of your pergola will depend on what kind of materials you use and whether it has a roof. Also, if you want a plan made just for you, it will cost more.
An average pergola will cost between $2,000 and $5,000 to put up. The price will depend on how fancy it is. One example is a $5,000 trellis made totally by hand with walls for shade.
|
Materials |
Costs |
|
Concrete |
$5-10 |
|
Timber |
$5-25 |
|
Stone |
$10-15 |
|
Brick |
$10-20 |
|
Metal |
$10-30 |
(Data Source: Hipages)
3. Can you put a pergola on an existing deck?
An existing deck or concrete patio may be a foundation for a pergola. If your deck is smaller, you may find ideal pergola kits. Pergolas built onto decks are a great way to make the most of limited outdoor living space, such as in compact yards where a standalone building would be too big.
4. Can you build a pergola in a day?
A homeowner may quickly build a pergola by themselves; if determined, they can accomplish the project in only a few days. A pergola is a great way to upgrade your outdoor area without spending a fortune. In addition, this is a great project to begin with if you have little experience constructing with wood since you'll learn many valuable skills that you can use for future projects.
Final Thoughts
Building a DIY pergola on your own may give you and your loved ones more space to unwind and enjoy peace. Take pleasure in doing things yourself; doing so might help you become more patient and skilled with your hands. You may construct your pergola outside with a Jackery Solar Generator, eliminating the need to hunt for extension cables to power your equipment or give up access to electricity altogether.