


|
Key Takeaways: |
|
• It's crucial to verify your local laws before you even start to plan a fence. There can be strict regulations in your county or city regarding the kind, height, and placement of fences you can erect. • Three types of fence materials are covered in this guide: metal, timber, and picket fencing. Following these five steps, you can rapidly make your fence. • You should clean your fence regularly and keep debris out since maintenance is vital. • We recommend the Jackery Solar Generator 1000 Plus or 600 Plus to help you charge DIY tools outdoors. |
How to Prepare for DIY a Fence?
Even though building a fence can appear simple at first, it can quickly become complex if you don't plan and prepare correctly. The crucial actions listed below will help you get ready to build a fence, prevent typical blunders, and guarantee a successful (and easier) job.

Step 1: Check Local Regulations
Reviewing your local laws before you even start planning a fence is crucial. There can be strict regulations in your county or city regarding the kind, height, and placement of fences you can erect. Considerations for construction codes or zoning rules could also exist. If you don't follow these rules, you can be fined or have your fence removed. It is thus wise to review these guidelines in advance to save time and money.
Step 2: Determine Your Property Boundaries
Determining your property's borders is another crucial step before erecting a fence. Both you and your neighbour want to inadvertently build on the other's land while building a fence. You might employ a surveyor to assist you in finding your property lines if you are unsure where they are.
Step 3: Compare Fence Styles
After figuring out the rules and your property's limits, it's time to choose the type of fence you want to create. Which type of fence—a chain link fence, a vinyl fence, a traditional picket fence, or anything in between—do you prefer? When choosing your choice, consider the function of your fence and the overall look of your property.
Step 4: Consider Fence Materials
Based on the height and length of your fence, determine how much material you will need before you visit the home improvement store. This will assist you in preventing material over- or underpurchases.
Picket Walls: A white picket fence is a traditional fencing material and a standard homeowner's dream! Because of its curved top, picket fencing complements conventional or federation-style homes well and stands out from the crowd. It can be stained or painted in various hues for a more rustic or distinctive appearance.
Timber Fence: Because of its low cost, adaptability, durability, and contemporary style, it is a popular fencing material in Australia. The adaptable appearance of timber fences goes well with various houses, incredibly modern and late 20th-century residences. Hardwood or treated pine are typically used to make it. Timber fences are significantly more resilient than other fencing materials to Australia's severe and erratic weather, including strong winds, because of their sturdy structure.
Metal fencing is the best option for a contemporary, strong, and safe fence to safeguard your property. It requires very little maintenance, is simple to build, and has a sleek and elegant appearance.
Metal fencing works well as a dividing barrier if your property shares borders with an adjacent one. You may also use it to make a modest yet safe fence for the front of your house. Many metal fences are pre-engineered, making installation quick and easy. A metal fence is simple to install, saving labour expenses that are passed on to you.
Step 5: Tools Used for DIY Fence
You will use the following tools and equipment to DIY the fence.
A. Measuring and Planning Tools
Tape Measure: A high-quality, retractable tape measure (at least 25 feet long) is required to measure the distances between posts and guarantee uniform spacing.
Chalk Line: Use a chalk line to draw straight lines between posts. You can maintain your fence upright and straight by doing this.
Marking Paint: This is used to identify the spots on the ground where posts will be erected. It's helpful in expansive places.
B. Digging Tools
Post Hole Digger: A manual post hole digger works great when digging for fence posts. It makes digging deep, narrow holes relatively simple.
Auger: A power drill may save time and labour for larger jobs. Two-man and one-person versions are available.
Shovels and spades help clear debris and finish hole depth modifications.
C. Safety Gear
Wear gloves to protect your hands from wounds, splinters, and blisters.
Wear safety glasses to protect your eyes from flying particles, dust, and debris.
Earmuffs or earplugs are a good way to protect your hearing from the loud noises produced by power equipment.
When cutting materials, primarily, protect your lungs from inhaled dust and other particles.
D. Power Supply
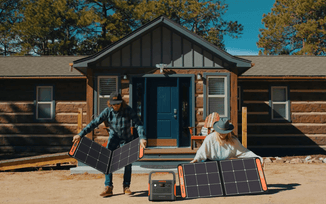
When DIYing fence, you need electricity to power your tools. At this time, a portable power supply is a must. Due to the sufficient sunlight in Australia, a solar generator is suitable for charging professional tools and appliances.
We highly recommend the Jackery Solar Generator, which combines Jackery Solar Panels with a Portable Power Station to exploit solar energy fully. With the superior BMS (battery management system) and protection technology, Jackery Solar Generators are safe to use outdoors or at home.
Step 6: Other Considerations
Australia's summers may be scorching, particularly in the north. Plan to work early or late in the afternoon to avoid the warmest part of the day, as working in intense heat might be difficult. Autumn is a great season for outdoor work like fencing because of its mild temperatures.
Investigating and abiding by local laws, ordinances, or codes is essential. Certain towns, cities, and neighbourhoods have laws governing fences' kinds, materials, height, and separation from property lines. Give yourself enough time to complete the permission procedure if you need one to build your fence. It's advisable to start as soon as you have your permission because most rules have stringent deadlines.
Although installing a wire fence may be a do-it-yourself activity, speaking with or employing specialists for more complicated configurations might be best. They can offer insightful advice on the finest installation methods and materials for your requirements.
How to DIY a Fence in 5 Simple Steps?
Ready to tackle a fulfilling and enjoyable do-it-yourself project? Building your DIY fence may add curb appeal and improve the appearance of your house. These easy steps will help you make a beautiful, strong yard fence.

Step 1: Dig the Post Holes
At this point, you've already drawn up your fence layout and noted the locations of the fence posts. Post-hole excavation is the next stage in the fence-constructing process. This step is crucial to having strong, long-lasting posts that sustain your fence if done correctly.
Use the proper safety equipment, such as gloves and a hard helmet, to protect yourself when digging. Large roots that might touch your posts should be removed first since they could compromise their stability after installation. Before excavating, you should also find underground utilities to prevent damage or safety issues.
Step 2: Position Posts in Concrete
When building a robust fence, posts must be placed in concrete for the most secure construction. It's crucial to correctly install the posts to guarantee that the fence will last many years. When you've finished digging the post holes, ensure they have the proper width and depth.
When everything is prepared, fill each hole with a small amount of quick-drying cement and dilute it with water until a thick paste-like consistency develops. After the posts are set, pouring the concrete is time. To eliminate any air pockets, fill the hole surrounding the post with concrete, pressing it firmly.
Step 3: Mark and Attach Rails to Posts
Use a square or level as the initial step to ensure the post is perfectly straight. Masonry lines or batter boards can also ensure everything is level. After creating the marks, it's time to fasten the brackets to the posts. The brackets will hold the rails in position and keep them straight and level.
The rails must then be fastened to the brackets. To do this, insert the rails into the brackets and tighten the screws to attach them firmly. Work up to the top rail by beginning at the bottom rails.
Step 4: Install Panels or Pickets to the Rails
The next stage in the procedure is to add panels or pickets to the rails, depending on the style of fence you are making.
Finding the ideal location for each panel or picket is the first step in installing them. Measure the space between each rail and mark the posts regularly to do this. This will serve as the launch pad for your initial panel or picket.
After that, position the first picket or panel, carefully keeping it straight and level. Next, fasten the panel or picket to the rail using screws. To ensure that the panel or picket is firmly fixed, make sure the screws are uniformly spaced and hammered straight into the rail. Make sure every panel or picket is straight and level before fastening it in place by repeating this procedure for each one.
Step 5: Attach Post Caps
Post caps are crucial for shielding your posts from weather and moisture, making them one of the process's most vital—and sometimes forgotten—steps. Putting post caps is one of the last details to give your fence a polished and expert appearance.
Before attaching post caps, use a tape measure to gauge the post top's outer diameter. Next, purchase post caps based on these dimensions. Post caps come in various forms, from straightforward flat caps to intricate patterns with scrollwork and finials.
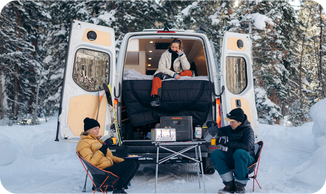
Jackery Solar Generators for DIY Fence
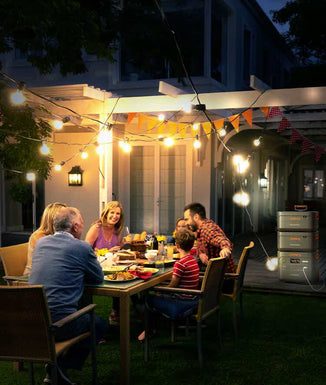
A strong and fashionable fence can transform your outside area, and Jackery Solar Generators can help you power through the building process. Jackery ensures that an electricity shortage never constrains you, whether using power tools or setting up illumination for late-night work sessions.

After your DIY fence is constructed, you can use Jackery Solar Generators to add security or decorative lighting to your property, completing a sustainable and valuable do-it-yourself project. With Jackery, your entire fence-building process will be eco-friendly and seamless.
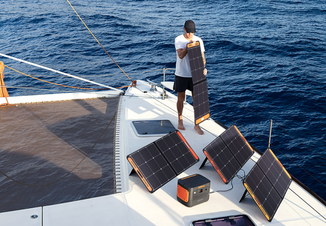
The Portable Power Station maximises solar energy capture and storage when used with Jackery Solar Panels, guaranteeing you will always have electricity available. Its numerous output connections enable different devices to be charged simultaneously, making it suitable for indoor and outdoor use.
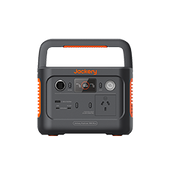
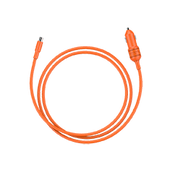
Jackery Solar Generator 1000 Plus
The Jackery Solar Generator 1000 Plus combines a compact design with remarkable performance. This portable generator, which weighs only 14.5 kg, is perfect for professionals and outdoor lovers who are constantly on the go. Despite its small size, its 1264Wh capacity and 2000W power output guarantee that you can run necessary appliances and gadgets wherever you are. The expandable capacity of 5 kWh makes it easier to charge appliances outdoors.
Thanks to its many charging options, you can recharge the Explorer 1000 Plus using solar panels, a household outlet, or even a car adaptor. You can return to work immediately with an AC charge period of only 1.7 hours. Whether making your fence or seating outside, this generator offers efficiency and versatility.
The Jackery Solar Generator 1000 Plus offers unparalleled simplicity and performance for those looking for a portable yet potent energy solution. Its durable engineering and ChargeShield technology improve safety and extend battery life.

|
*Review from Our User |
|
We needed to purchase a few additional items to connect these with the two solar panels I already had and integrate them into our home system, but it was a minor issue. It functions as promised and is quieter than a large generator, although we rely on the more significant generator during overcast or rainy conditions. |
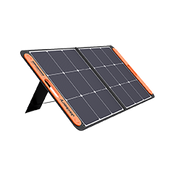
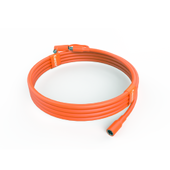
Jackery Solar Generator 600 Plus
The Jackery Solar Generator 1000 Pro will prepare you for any power outage.
Equipped with a 632Wh battery capacity and an 800W output, it quickly powers everything from cameras to drones. Weighing just 7.3kg and featuring a foldable handle, this compact powerhouse is designed for maximum portability, ensuring you stay connected no matter where your adventures take you.
Pair it with the high-efficiency 100W Bifacial Solar Panel for sustainable, on-the-go charging. With a solar efficiency rate of 23%, it ensures a fast and eco-friendly power source for your devices. Whether wildlife photography or street photography, the Solar Generator 600 Plus ensures reliable energy throughout your journey.
Built with a robust LiFePO4 battery, the Solar Generator 600 Plus offers 4000 charge cycles and retains 70%+ capacity for long-term durability. It's perfect for weekend warriors and seasoned explorers, providing dependable power for years of outdoor fun.

|
*Review from Our User |
|
I've been considering buying a Jackery Solar Generator for a while now. This will mainly serve for camping purposes, but I might also use it at home when I need a remote power source or help during a power outage. Initially, I considered the 500, but I was sold once I came across the 600 Plus! |
Maintenance Tips for Your Fence
To maintain the modern look of your DIY fence, you don't have to purchase costly materials. All you need is a little imagination and a proactive mindset. These are the top three do-it-yourself fence maintenance ideas to assist you.
Clean Your Fence Regularly
Different cleaning techniques are needed for various types of fences. Generally speaking, all you need is soap and access to clean water.
Regular cleaning is unnecessary if your fence is made of steel, aluminium, or chain link. If there's a powerful storm, you can spray off your fences only once a year or more. Except in the case of really resistant places, soapy water and a soft brush are not required.
Wooden or vinyl fences require different maintenance. Use soapy water or a specialised vinyl cleaning solution to remove stains from vinyl fences. Your vinyl fence should be thoroughly cleaned every three to six months. Due to its chemical makeup, avoid exposing your vinyl fence to direct smoke from grilled barbeques or other similar sources. Also, avoid attempting to repaint the fence on your own.
To remove stubborn stains or rough patches from your wood fence, scrape the area with a one-part bleach to two-part water or wood cleaning solution. If there are any discolourations, select wood stains that complement the colour of your wood fence.
Keep Debris Out
Always watch for anything that might harm the foundation of your fences, such as concrete, rocks, tree roots, and other impediments. Tree roots can distort the security fence's construction, necessitating costly repairs.
Ensure that any material trapped between the boards and rails is removed. Tree limbs, blown debris, and leaves can all do significant harm.
Smart Fencing Habits
Certain habits might not have occurred to you, even if they seem obvious. To properly maintain your fences, consider your options carefully before fastening attachments. These might compromise your fences' structural integrity, mainly with vinyl fencing.
Avoid hanging bulky objects from your fences. Your chain wire fencing may become ineffective as a result of them warping. Make sure to keep an eye out for any indications of damage to the screws and hinges on your fencing, particularly following a downpour. Taking care of your fences before they get severely damaged is best.

DIY Fence Ideas
Building a fence on your own can be very fulfilling. It allows homeowners to customise their outside area and learn applicable building and design skills. This do-it-yourself solution turns a basic border into a multipurpose asset that improves outdoor living rooms' seclusion and enjoyment by including benches for practical sitting.
The fence will keep out predators you would not want in your area, such as dogs, deer, hens, and rats. Depending on the style of DIY fence you choose, your garden will be protected from a particular insect population.
Simple Pallet Fence
Pallet fencing is a simple, affordable alternative that can be assembled in hours. The actual construction is easy: pallets are assembled one at a time, and to keep the fence solid and erect, T-posts are hammered into the ground and placed in the spaces between the pallet boards. Screws are used to hold the pallets together when more are added.
Wattle Fence
Wattle construction is a basic method that dates back at least 6,000 years. You will need thicker, older wood for the posts in a wattle fence. These are hammered one to two feet apart into the earth to a depth of one foot.
Your finished fence will be more substantial the closer they are together. The young, green wood known as weaver branches, one to two inches in diameter, are braided between the supports. Flexible branches, like those of willow and hazel, are the ideal timber for this. Branches have to be at least three posts long or four to six feet long.
Hedging
Hedges are living barriers that provide seclusion, function as windbreaks, and shelter beneficial insects and birds. They are both aesthetically beautiful and environmentally sound.
Selecting the right hedge plants for your needs and environment can help you plant them successfully. Many varieties of hedge plants are quickly grown from cuttings; however, you may buy young plants from the nursery. Growing your hedge plants may save you significant money with patience and time.
Split Rail Fence
Split rail fences are a classic choice for a pastoral appearance, particularly well-liked by early settlers in the New World. Logs that are resistant to decay and were cut into quarters or eighths are all needed for the original design, which doesn't call for any extra hardware or equipment.
Fence posts are drilled all the way through to allow the rails to be put into the slots for a more contemporary look. To increase the enclosure's security, add some wire mesh.
Dry Stone Wall
Another traditional technique for constructing freestanding or retaining walls out of stones of different sizes is dry stone. Dry stone holds together stones without the need for cement. Larger, flatter stones are meticulously arranged in an interlocking pattern, using smaller stones to fill the spaces between. All the stones are taken from the quarry or field.
Dry stone walls are visually pleasing and have a broader base and a tapering top. They are also very sturdy and long-lasting. Although it's not difficult to learn, becoming an expert will take some time. Dry stone wall construction is a labour of love that calls for much creativity on the builder's side.
DIY Fence FAQs
The following are the frequently asked questions about the DIY fences.
1. What is the cheapest fence to build?
Vinyl fence. The most affordable option is to construct a PVC fence for your house. These fences provide privacy and security from the outside world instead of wooden pegs and pickets. PVC sleeves save labour and material costs by increasing the stability of wooden fence posts.
2. How long does it take to build a fence by yourself?
Building a fence usually takes two to four days for a typical-sized yard. But, a local fence installer can finish the job in a single day if your yard is tiny. If you decide to do it yourself, erecting your fence will probably take longer—up to a week or longer if your yard is big.
3. Does painting a fence extend its life?
Painting a wood fence may extend its lifespan by protecting it from bugs, moisture, and UV rays. Painting is a valuable investment in prolonging the life of your wood fence, even while it's not a cure-all. But it's crucial to remember that upkeep doesn't end after painting.
Final Thoughts
A fence may significantly improve the use and appearance of your property, making it a worthwhile endeavour. Following the instructions, you can install a long-lasting, visually appealing DIY fence that will serve you well. Also, when making your fence, you need electricity to power your professional tools and other appliances. We think Jackery Solar Generator is suitable for your requirement.