


|
Key Takeaways: |
|
• DIY photo booth is an excellent way to keep visitors entertained during the day's inevitable downtime and to provide them with a beautiful keepsake from the event. • Camera, lighting, backdrop, decors, props, and power supply are vital for DIY photo booths. • There are seven main steps to building your photo booth: choosing the right location, considering the event theme, and selecting a camera to prepare the props, lighting setup, decorations, and final touch. • We highly recommend Jackery Solar Generator 1000 Pro and 500 as the power sources to charge the photo booth equipment with solar energy. |
Why You Need A DIY Photo Booth?
Thanks to picture booths, disposable cameras are a thing of the past. Imagine a wedding night with candid moments captured by a photo booth: your grandma in a pink wig, your best friend kissing your brother, and thirty of your first cousins squeezed into one photograph!
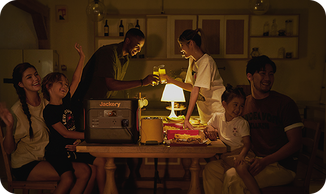
In recent years, photo booths have risen to the status of essential event entertainment. And with good cause. They're an excellent way to keep visitors entertained during the day's inevitable downtime and to provide them with a beautiful keepsake from the event.
Guests may even utilise the photo booth as a makeshift guest book by glueing an empty scrapbook next to the booth and writing a note to themselves in the margins. Some businesses focus on picture booths, but you may build your DIY photo booth to save time, money, and work.
What Are The Materials & Tools Needed for A DIY Photo Booth?
Photo booths are popular at all events, from birthday parties to wedding receptions. Instead of renting a booth, make your unique booth for your next party with props and a background.
A simple digital point-and-shoot camera is all you need for a DIY picture booth. You'll also need a tripod that can be extended to eye level and a camera shutter release that you can get online or at a camera store.
There will be a background for every great picture taken in your do-it-yourself photo booth. You can add your touch to the party items and make the background yourself. You can also buy a backdrop stand and hang a cloth with a design, texture, or pattern to use as the background for your pictures.
The following are the materials and tools that are needed for a DIY photo booth:
|
DIY Photo Booth Materials & Tools |
||
|
Camera |
Tripod |
Remote Shutter |
|
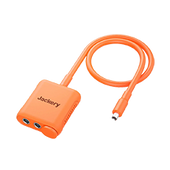
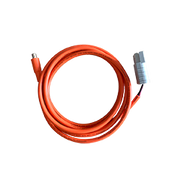
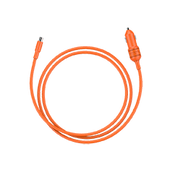
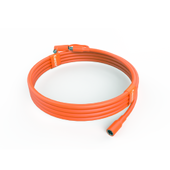
Cables |
Lighting |
Camera Flash |
|
Backdrop |
Props |
Decorations |
|
Tape |
Lighting Umbrella |
Hammer |
|
Nails |
Large Clamps |
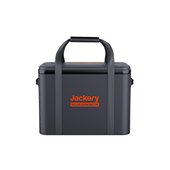
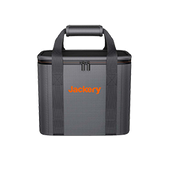
Jackery Solar Generator |
When it comes to picture booths, good lighting is a must. A photography cover and flashlight, which you can buy online or at camera supply stores, spread the light and make your friends look better. If you don't want to use lighting, you can turn on the flash on your camera or put a floor lamp next to the camera so that it faces the background.
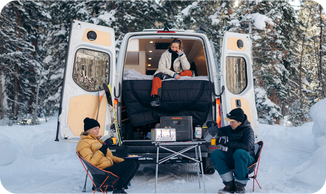
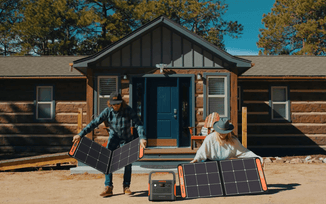
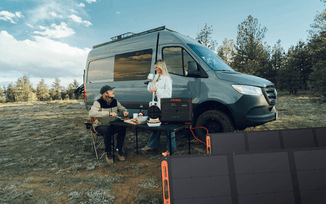
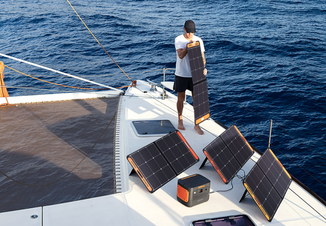
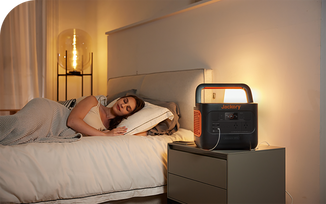
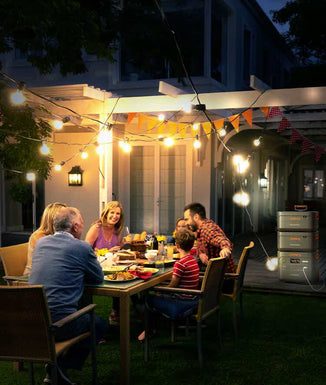
It would help to remember the power supply, especially for events held outside. A movable power source like a solar generator can work well and make less noise and pollution than fuel engines.
Battery backup generators from Jackery are reliable and keep the power going to the camera gear or decorating supplies. The Jackery Solar Generators can store power from the sun or the grid, so you'll always have power, even at night or when it rains.
DIY Photo Booth Guide: How to Make Your Photo Booth?
You may make your cost-effective photo booth if you believe having one at your wedding or celebration will make it more memorable and enjoyable for guests. Fortunately, artistic prowess and a mountain of time are prerequisites.
Everyone loves taking pictures at parties, but your guests will love them even more during your wedding. A DIY photo booth is the perfect way to let them remember the big day. Detailed instructions for building your photo booth are as follows:

Step 1: Choose The Proper Location
Be realistic and prepare before you search for awesome backdrop ideas for your photo booth. Is there room at your wedding site to set up a photo booth? If yes, where would be the ideal spot?
The ideal location for a photo booth is close to the activity but not so close that attendees feel awkward or like everyone is staring at them.
- Instead of attaching it, leaving it off will save you the effort of altering gutters and matching eaves. Frost footing is also acceptable for you. However, to prevent frost heave, you should dig your footings to the frost depth if your soil is rocky.
- You could position your booth in a nook or corner of the reception area, or a little space off the side would be perfect.
- Having your DIY photo boothoutside in a horse box, antique caravan, gazebo, or patio area is an excellent idea for a summer wedding.
It would be a waste of time and energy if the location isn't conveniently accessible and customers have a long way to go to get back to the bar, so select wisely. After you've decided on a spot to set up your DIY photo booth, take precise measurements of the area; this information will be crucial in the next step!
|
Notes from Experts* |
|
If you need help determining where to put your photo booth, contact the owner or planner of the venue; they'll likely have experience with couples who have used them for their wedding entertainment. |
Step 2: Think About A Theme of Backdrop
It will be fun to pick out a pattern for your photo booth backdrop now that you know how much room you have. Think about the theme of your wedding. Could you make something that goes with it?
A palm leaf wall would look great for a tropical wedding, a flower wall would look great for a country garden wedding, and a cute tipi or hay bales would look great as a setting for a festival wedding.
Stay calm, though. Sometimes, it's best to keep things simple. Think about how much time you have to work on this and how creative you are. If you need help, find someone creative to work with you.
Additionally, it would be best if you considered how to get the background of the place. You'll need clarification if you only have a small car and built an 8-foot beauty! Here are some DIY photo booth ideas you can use as models in the following part.
Step 3: Choose Photo Booth Camera
Now that you've found the ideal setting, it's time to plan the best way to photograph both the background and your guests.
Don't spend hundreds of dollars on a new camera to build your photo booth on a tight budget. Instead, use what you already have or borrow one.
Polaroid Camera: The most basic choice is to use a Polaroid camera. Guests may snap instantaneous photos of each other with it set up on a table next to the photo booth background. Just because you have or can borrow a Polaroid doesn't mean you won't have to pay for the film. Your visitors should only be allowed to take a few pictures.
Selfie Sticks: Another simple idea is to set up a selfie station and use a selfie stick, which you can buy or bring out from storage. Guests may use their phones to take selfies and share them on Instagram or Facebook with a specific hashtag or via a specialised photo booth app; alternatively, you can offer a phone with the selfie stick and save all the photographs to your device.
Photo Printer: Another option is to purchase or rent a portable photo printer that produces photographs rapidly, appealing to those who like that method. The device is a tiny printer that can be wirelessly linked to a phone using Bluetooth, enabling instantaneous image printing.
DSLR Camera: A DSLR camera on a tripod is your best bet to get the most out of a do-it-yourself photo booth. Consider this option if you already own a camera or have a buddy who is a photographer; otherwise, it would be more cost-effective to rent a photo booth.
Guests may use a remote control to snap their photos, or you can have the ushers or friends switch roles occasionally at night.

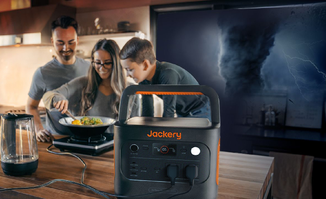
The photo booth's power source is one item to consider when designing it. The Jackery Solar Generator uses a Portable Power Station with Jackery Solar Panels to convert solar energy into electricity. Quickly charge your outdoor gadgets by grabbing one and placing it near your photo booth. Plus, it would be a classy addition to any gathering because of its small size.
|
Notes from Experts* |
|
If you aren't comfortable adjusting your camera's settings, have someone else do it so you don't get blinding flash or very dark photos. If you plan on utilising the photo booth at different times of day, you'll also need to adjust the settings to account for the various lighting conditions. |
Step 4: Prepare The Props
You can only have a photo booth with costumes and props. Guests will love the booth the most when they are in the mood to have a good time, so make sure it's entertaining.
Hats, huge spectacles, stupid placards, wigs, feather boas, cheap, ridiculous stuff, and easy-to-pull-on clothes should be your goal. You could construct your own or get a kit to create them from a card. Since you will only use them briefly, they need not be very durable.
In addition to guest props, consider adorning your photo booth with theme-appropriate things such as retro luggage, an amusing chair, or a neon sign. Another option is to have visitors pose within a large picture frame that you can purchase or create yourself. The frame may have your names and the wedding date.
Lastly, have a glitter or face painting station at the booth's door to take it to the next level. Visitors may adorn their faces with glitter or paint instead of using props.
Step 5: Consider The Lighting
Not only should you think about the lighting on the camera you want to use, but you should also think about the lighting in the camera itself. Most couples choose to set it up at night because that's when people are less shy and more likely to have fun. The lights will not only help people find the photo booth, but they will also make the room look nice.
Fairy, festoon, and hurricane lamps are all tried and true wedding decorations that will look great. You can also make your friends look their best with a ring light. On the other hand, candles can be hazardous if you have drunk friends dressed up in cheap, flammable costumes.
Zona pieces are also joined together with lag bolts and nuts. Finish the trellis and fix it the way you want.
Step 6: Place Decorations
The worst thing that may happen is if your visitors don't take advantage of your painstakingly constructed DIY photo booth because you must remember to place a sign indicating its presence, or the directions are too hard after a few drinks.
Nobody likes to use their brain at a wedding, so make sure everything is easy to understand and straightforward for those who may be inebriated or otherwise not tech-savvy.
If you're concerned that visitors won't be able to locate your DIY photo booth, you can either create or purchase signs with clear directions. Another option is strategically placing generic picture booth arrow signs about the venue. Guests may utilise photos taken in the photo booth to add to the guest book. Ensure clear instructions and a table with the book and adhesive are nearby.
Step 7: Share The Happy Moment
You will be eager to see the results of your do-it-yourself photo booth session after the wedding or other even since, as a VIP, you were probably too occupied dancing, conversing, and generally enjoying yourself to pay much attention to your guests while they posed for pictures.
Ensure your visitors utilise your hashtag if you let them use their phones for selfies. That way, you can access the photographs on social media.
Look at photo booth apps; these may be fantastic places to save all the booth pictures and provide plenty of possibilities for sharing and printing them in various fashions.
Printing up all the pictures of your guests posing and using them as thank you cards is another great alternative to the traditional wedding photo card that is all the rage these days.
Jackery Solar Generators for DIY Photo Booth
Solar generators can help you get enough power to run your wedding party electronics. During the picture-taking, you don't want the camera to turn off. Here are some facts about how much power photo booth equipment usually needs:
|
Tools |
Amps |
Hours |
Power Needed |
|
Camera |
0.5A |
4H |
2Ah |
|
Polaroid |
0.2A |
5H |
1Ah |
|
Photo Printer |
1.5-3.3A |
4H |
6-13.2Ah |
|
Light |
0.4A |
4H |
1.6Ah |
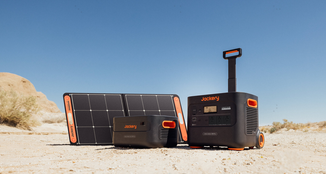
By connecting Jackery Solar Panels to Jackery Portable Power Stations, the Jackery Solar Generator maximises solar energy use. Jackery Portable Power Stations offer multiple power output options, such as AC outlets, DC connectors, and USB ports, to charge appliances and power electrical tools.
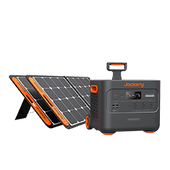
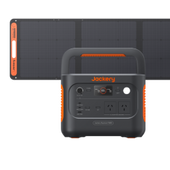
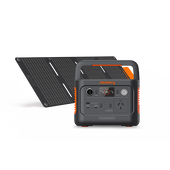
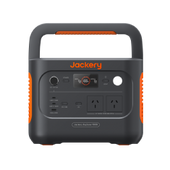
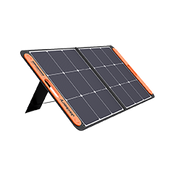
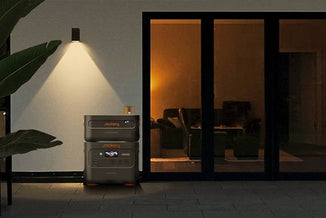
Jackery Solar Generator 1000 Pro
The Jackery Solar Generator 1000 Pro is an advanced, versatile, and highly portable solution for your power needs, especially suitable for outdoor activities such as weddings, birthday parties, or other events.
This model boasts a substantial battery capacity of 1002Wh, which enables it to power multiple devices simultaneously without any hassle. The portability is enhanced by its lightweight design, weighing only 25.4 lbs, and featuring a foldable handle for easy transportation.
One of the most notable features of the Jackery Explorer 1000 Pro is its use of pure sine wave technology, which ensures that the power output is stable and safe, mimicking the electricity supplied by an outlet in your home. This makes it ideal for powering electronic devices without risking damage due to power fluctuations.

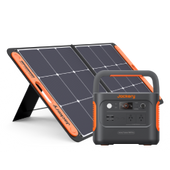
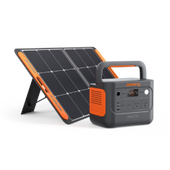
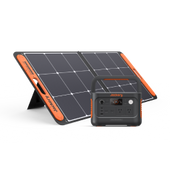
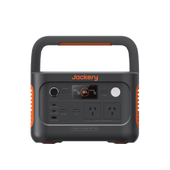
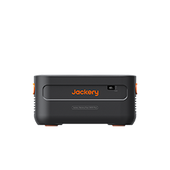
Jackery Solar Generator 500
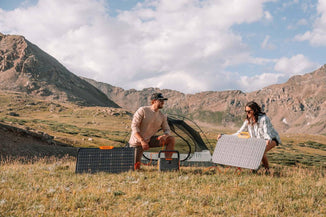
A Jackery Solar Generator 500 combines SolarSaga 80W or 100W solar panels to turn sunlight into electricity with the Explorer 500 portable power station. It is easy to charge your electrical tools outdoors. For example, it can charge a 6A jig saw for 1.4 hours to help make a DIY photo booth. The Jackery Explorer 500 Portable Power Station charges low to high-power equipment for extended lengths.
The power station's huge 518Wh battery capacity, portability, foldable handle, lower noise level (46dB, similar to a human whisper), lightweight (6.4 kg), and industry-leading BMS technology make it ideal for short-term outdoor adventures. The Jackery Explorer 500 Portable Power Station contains:
- Three USB-A connectors.
- One AC outlet.
- Two DC ports.
- A carport for charging essential appliances.

DIY Photo Booth Ideas
Now, it's time to use your imagination and look for ideas. And, of course, we couldn't leave you without some of our favourite DIY photo booth ideas. These photo booth setups are great for bachelorette parties, wedding receptions, guest book tables, and any other event you want to remember.
Flower Wall
Incorporating a flower wall into a photograph is a sure way to make it more visually appealing and vibrant. However, if you want authentic flowers, this trendy background might be expensive if created by an expert. On the other hand, you may save money and time by constructing one on your own. Invest in genuine flowers and foliage if you can, or save money by using fakes. That's the first decision to make.
The next step is to get a piece of plywood or foam board and cut it to the size you want. Lastly, stick the flowers you like to your board while keeping an image in your head. You should set them out in advance for a good look at them. While flower boards with plenty of flowers are lovely, sometimes less is more, especially when wood shows.
Life-Sized Polaroid Picture
Vintage photography is making a strong resurgence. Jump on the bandwagon and construct a photo booth frame reminiscent of Polaroid image borders. To make the border, all you need is a big enough piece of plywood, foam core board, poster board, a ruler, a writing implement (pen or pencil), and a tool for cutting.
Use a ruler to ensure your lines are straight and your measurements are correct, then cut out the shape. After that, garnish your border any way you choose.
Comfy Lounge Space
Even though it's a little more work, this photo booth concept will surely wow visitors and provide stunning images. Take advantage of your reception room as a picture backdrop and relax by bringing a few comfortable chairs or a small sofa if you have one.
Put a rug and throw cushions in the wedding colours to make the room more inviting. With this setup, striking a variety of positions will be second nature.
DIY Photo Booth FAQs
The frequently asked questions about DIY photo booths are listed below:
1. What size frame for the DIY photo booth?
Since you might be making the frame for one to two people, keep the size at 36 inches by 24 inches if you make it for two or more. For the same reason, a frame that fits three to four people should be at least 48 inches by 36 inches. The lines you draw in the frame must be clear to make cutting easy.

(Data Source: Pinterest)
2. How to make a budget for a photo booth?
Setting a budget for your photo booth should be your first order of business. You should control your spending and remain within your means by creating a budget beforehand.
Just because a photo booth is inexpensive doesn't mean it has to skimp on quality or functionality. It boils down to being frugal with your spending.
Using disposable cameras is the most cost-effective way to recreate a photo booth experience. For the picture-perfect session, arrange them on tables or set up a specific area next to an entertaining background. Everyone at the wedding may take photographs of each other, and you can see the finished product after the reception.
3. Is a DIY photo booth worth it?
A DIY photo booth is an excellent choice if you are on a budget and are okay with spending a little time and work. Moving and setting them up is straightforward, and you don't need to spend much on tools or money.
It might make sense to make your picture booth if you only have a few private events a year, like a birthday party or wedding. It takes some work, but a DIY photo booth is a fun way to record memories and give your friends photos they can easily share. Just make sure you don't expect it to look thoroughly professional.
Final Thoughts
In conclusion, DIY photo booths are a great way to let attendees capture moments and make memories at any event. Ensuring the setup is easy to use and the equipment is dependable is crucial for ensuring everyone has a good experience. Also, remember to bring your trusty Jackery Solar Generator to keep your electronics charged during a wedding or any event.


