


|
Key Takeaways: |
|
• This guide provides a detailed essential list for DIYing outdoor tables, and you can choose the most appropriate materials, the suitable woods and proper clothing. • Before DIYing the outdoor table, you need to clean the wood, do repairs, and make a quick sanding. • The guide provides six steps to DIY a perfect outdoor table. • You can choose Solar Generator 2000 Plus or 1000 Pro for outdoor professional work. • There are some tips you should notice after DIY an outdoor table, such as keeping your table clean or maintaining the wooden table. |
What Materials Needed for DIY Garden Shed?
It feels so different this year as summer starts. We will eat many meals at home instead of at the poolside like every summer. But if we DIY an outdoor table, we will have much more time to enjoy the fresh air and sunshine while eating. The following are the materials needed for DIY outdoor tables.
DIY Outdoor Table Materials
- Two boards: At least 30 cm wide; length varies depending on the needed length of the table) for the tabletop. A piece of wood with bark about 20 cm in diameter was removed regarding the legs.
- Struts: As for the struts, a log (diameter of around 10 cm; bark removed; length determined by the necessary table length).
- Sixteen wood screws
- Waterproof wood glue
- Exterior wood stain
|
Expert Tips |
|
Use a debarking iron to remove the bark from logs and tree trunks. If you don't have one, you may purchase wood that has already had the bark removed. |
- Protective clothing: while operating a chainsaw, you must always follow the safety procedures and wear the proper PPE.
Put on safety glasses and use earplugs or other personal noise-cancelling devices to reduce background noise. Wearing sturdy work gloves, cut-protection pants, and boots with cut-protection inserts can help keep your hands, legs, and feet safe.
How to Choose Wood for Table
You must choose the best wood for your DIY outdoor table before building. The following queries may be helpful:
Where will your garden table be placed precisely? In the open or concealed?
Which shade of wood will work best in your garden?
How much do you want to put into regular wood maintenance?
What size do you want your homemade table to be?
How much money do you have?
Every kind of wood has benefits and drawbacks. For instance, even though many softwoods are very resistant to weather, they also often release resin and need special care. Therefore, if you choose pine, you must ensure that the wood is weatherproofed and protected as soon as possible against fungus and discolouration.
Conversely, hardwoods like Robinia are less sensitive and need less maintenance. The best wood types for a Douglas fir, Robinia, pine, and larch outdoor table are ideal.
Teak: It's the Rolls-Royce of exterior woods, easy on the eyes, straight-grained, sturdy, waterproof, and long-lasting. Teak is as near-perfect as it gets, so we'd be sorry to overlook it, even if it's pricey!
It may be kept outside in even the worst weather conditions since it repels dirt and is bug-resistant. All the information you want should be evident because teak is a classic wood used in boat construction. DIY outdoor table enthusiasts will find the wood very machine-friendly and enjoyable to work with.
Iroko: This tropical African hardwood has exceptional resistance to scratches and a high inherent resilience against moisture and insect damage. Iroko, which is slowly grown on the Ivory Coast and has a high natural oil content, is quite similar to teak in that it requires little upkeep and is solid and durable.
Another factor is its stunning, exotic look. Iroko wood might begin as a yellow-golden brown, but it can eventually become a gorgeous, rich, darker brown or bronze. It is unquestionably a species to choose for creating an opulent outdoor statement.
DIY Outdoor Table Tools
An outstanding feature of this outdoor table is its remarkable ability to endure even the most severe weather conditions. You can spend time with nature and take a break from your busy life at the table in your yard.
|
Tools for DIY Outdoor Table |
|||
|
Kreg Jig |
Miter Saw |
Drill |
Tape Measure |
|
Speed Square |
Clamps |
Hole Saw Bit |
Pocket Hole Jig |
|
Hand Saw |
Sander |
Safety Protections |
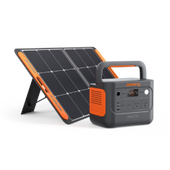
Jackery Solar Generator |
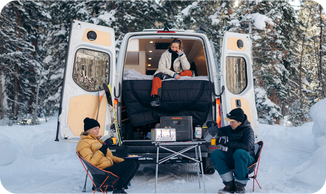
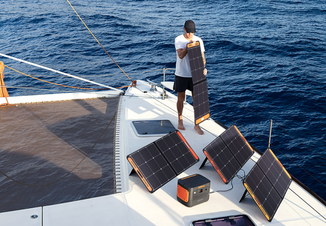
Electricity is essential when making outdoor tables, especially outdoors. A dependable power supply is far more critical for outdoor charging DIY tools.

Jackery Solar Generators are reliable battery backup generators that keep the power going to the machines that are hooked up to them. They consist of Jackery Portable Power Stations and Jackery Solar Panels, so you will always have power while building your outdoor table.
Preparations Before DIY Outdoor Table
Beginning with a level, clean, and dry surface is crucial. Wipe out any cobwebs and grime from your tables first.
Sand back the wood to reopen the grain, level off any dis-colouration, and remove imperfections or scratches. To finish, use fine-grit sandpaper after using medium-grit one. An electrical sander may be used to save time.
Clean
You want your surface to be as clear of dust and debris. We advise using a diluted dish soap or TSP (trisodium phosphate) solution to aid in it.
Make Repairs
This step is only necessary if your object has damage that requires repair. Fixing minor wear and damage on older pieces is only sometimes essential since they often give character. Where the board is coming loose, glue down the edges and use wood putty to fill any gaps. You may omit this step if your work has been in excellent form from the beginning.
Sanding
Quick sanding can help improve the bond between the surface you're working with and the finish you'll apply once cleaned and mended. Make sure all sawdust is removed before proceeding to the DIY outdoor table.
How to Build A DIY Outdoor Table?
A table for outside use should be sturdy. It must endure summer BBQ spills, toy car races, pebbles from the yard, and anything else your family puts on it - after all, it is left outside in the elements.
This straightforward design is made of weather- and rot-resistant wood and sturdy, low-maintenance PVC. Here is a list of essential actions for a DIY outdoor table.

Step 1: Get The Table Legs Ready
The legs consist of many log pieces layered on top of each other. The number of logs you need will depend on your desired table height.
Use your chainsaw to cut flat sides so the parts fit together correctly and provide sturdy support. A tensioning belt, such as a metal support, may secure an upright log to a firm object. Using your chainsaw, cut as straight and vertically as possible while starting from the top to remove a tiny piece of wood on each of its two opposing sides.
Do not cut to the end of the log to prevent your chainsaw from touching the ground.
Step 2: Cut The Table Legs
After placing the ready-made logs on the ground, secure them with many wedges to prevent them from rolling away. If needed, slide your chainsaw down the flat face to balance out the lengthy cuts you have previously made.
Now chop the trunk into small lengths, which you will use to construct the garden table's legs. After marking and measuring the necessary lengths, I saw them off the log.
|
Expert Tips |
|
Avoid letting your chainsaw contact the ground while cutting wood to length, as this might result in damage. After cutting through the log about 75% of the way, flip it over and continue cutting from the other side to meet the first cut. |
Three wood pieces of varying lengths were piled on each side to create the legs of this homemade garden table: Two 60-cm-long pieces, two 55-cm-long pieces, and two 50-cm-long pieces.
We have used varying lengths for aesthetic reasons; using six pieces of similar size is equally acceptable. Of course, another great thing about do-it-yourself projects is that they allow you to use your imagination and create unique table designs.
Step 3: Assemble The Struts & Tabletop
Two identically sized boards are used to construct the tabletop. If they need to be cut to length, secure one of the planks to the sawhorse with a tensioning belt, measure and mark with chalk, then use a chainsaw to trim off the extra length. Do the same with the other plank.
We also advise adding a strut between the legs to make your homemade wooden table more solid. You may cut this strut to a similar length, around the same length as the tabletop.
Step 4: Create The Strut's Notches
The lower leg components need to be adjusted to make room for the strut.
Mark the bottom two logs with the width and location of the strut before laying the strut over top of them on the ground. Set aside the strut and make a notch in both logs between the marks with your chainsaw.
To ensure the strut is firmly fixed, round out the notch as much as possible.
Verify the strut's fit. Please proceed to the next layer of logs and continue the operation until it fits the notch perfectly.
Step 5: Fix The Logs Together
Wood screws are now required to secure the components of your homemade garden table. You may need first to use a significant wood drill bit to drill into the log to ensure that your screws reach the piece below.
Begin by fastening the middle logs to the bottom ones, followed by the top logs to the middle ones, as you work your way up the legs from the base.
Step 6: Install The Tabletop
The tabletop must be secured to the legs at the end. We advise fastening each board with two wood screws on each side for stability.
Jackery Solar Generators for DIY Outdoor Table
Picture this: you're constructing an outdoor table in your backyard but can't find an outlet. Luckily, a portable power source will allow you to continue working outside, relieving some of your stress. Power consumption is an issue with several electrical tools:
|
Tools |
Amps |
Hours |
Power Needed |
|
Circular Saw |
10A |
3H |
30Ah |
|
Jig Saw |
6A |
2H |
12Ah |
|
Miter Saw |
7A |
2H |
14Ah |
|
Paint Sprayer |
3A |
4H |
12Ah |
|
Belt Sander |
8.3A |
3H |
24.9Ah |
|
Drill |
16.7A |
1.5H |
25.05Ah |
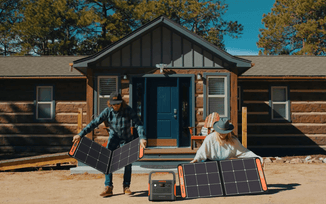
By connecting Jackery Solar Panels to Jackery Portable Power Stations, the Jackery Solar Generator maximises solar energy use. Jackery Portable Power Stations offer multiple power output options, such as AC outlets, DC connectors, and USB ports, to charge appliances and power electrical tools.
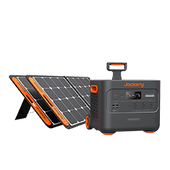
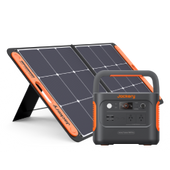
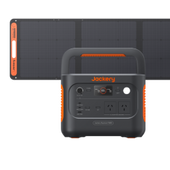
We recommend Jackery Solar Generator 2000 Plus and 1000 Pro to charge your professional tools outdoors and make your DIY process successful.
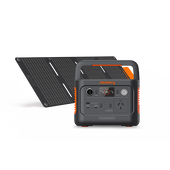
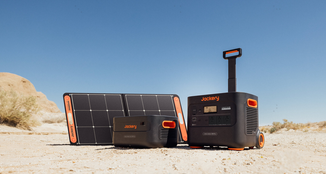
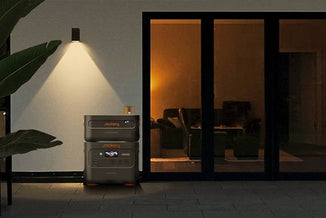
Jackery Solar Generator 2000 Plus
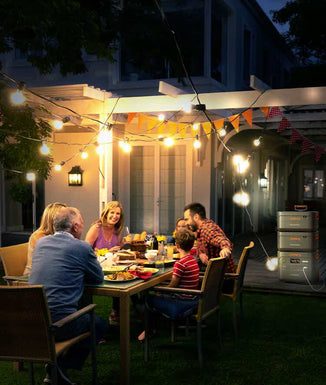
The Solar Generator 2000 Plus by Jackery significantly enhances the available choices for portable electricity with its exceptional performance. With its substantial capacity and formidable power output, this device can provide electricity for basic home needs.
Adding battery cells to the Jackery Solar Generator 2000 Plus enhances its capacity from 2 kWh to 12 kWh, significantly transforming it into providing backup power for households and professional tools.
|
Professional Tools |
Working Hours |
|
Circular Saw (1200W) |
1.4-8.5H |
|
Jig Saw (720W) |
2.4-14.2H |
|
Miter Saw (840W) |
2.1-12.1H |
|
Paint Sprayer (360W) |
4.8-28.3H |
|
Belt Sander (1000W) |
1.7-10.2H |
|
Drill (720W) |
2.4-14.2H |
The Explorer 2000 Plus has a maximum power output of 3000W, 30% greater than other 2 kWh models with similar specifications. The bulk of critical household appliances are powered gadgets. Although the Solar Generator 2000 Plus is commonly used, it can achieve a complete charge within 6 hours by utilising six SolarSaga 100W solar panels. The power source achieves self-sufficiency by harnessing solar energy rather than relying on the power grid for charging.
The supplementary battery pack can be recharged using solar panels, offering increased versatility while enhancing charging efficacy and reducing time consumption. Jackery Solar Panels have an impressive solar conversion efficiency of up to 25%, generating more energy during its lifespan.

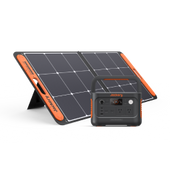
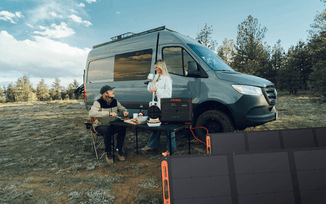
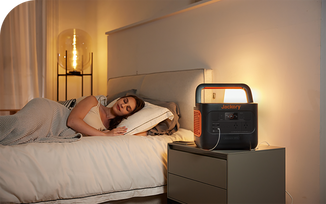
Jackery Solar Generator 1000 Pro
Jackery Solar Generator 1000 Pro combines SolarSaga 80W solar PV panels with the Explorer 1000 Pro power station. It is a remarkably quiet generator, with noise levels as low as 46 dB. It has a lifespan of over ten years and can be fully recharged in just 1.8 hours. This device's dual 100W PD design provides a consistent and reliable power supply, ensuring that all professional tools remain operational outdoors.
The Explorer 1000 Pro power station is a rechargeable device with a capacity of 1002Wh. This allows it to power various appliances, including a circular saw, jigsaw, electric drill, and other devices, covering around 93% of commonly used equipment.
|
Professional Tools |
Working Hours |
|
Circular Saw (1200W) |
0.8H |
|
Jig Saw (720W) |
1.4H |
|
Miter Saw (840W) |
1.2H |
|
Paint Sprayer (360W) |
2.8H |
|
Belt Sander (1000W) |
1H |
|
Drill (720W) |
1.4H |
In addition, it is equipped with two 100W PD connectors and two USB-C ports, ensuring reliable and fast charging for various devices such as smartphones, cameras, and more. The MPPT solar charge technology guarantees an efficiency of 99%. Furthermore, this system supports recharging techniques through walls, vehicles, and solar recharge.

What Should Notice After DIY Outdoor Table?
Many outdoor tables include wood, metal, plastic, and rattan. Each material requires a particular level of maintenance.
This section will assist you in maintaining the material of your outdoor tables. It discusses how to keep your DIY outdoor tables clean and in good condition and offers some best practices.
How to Keep Your Outdoor Table Clean
Frequent cleaning is required to keep outdoor tables looking tremendous and extend their lifespan. Depending on what material your chairs, tables, and benches are constructed of, here are some cleaning suggestions:
|
Materials |
Cleaning |
|
Wood |
Using a brush with soft bristles, scrub with hot, soapy water. A pressure washer may also clean teak and other hardwoods, except eucalyptus. |
|
Metal |
Use a gentle towel to wash in hot, soapy water. As an alternative, try utilising a low-pressure pressure washer; however, avoid using one on glass tabletops. |
|
Rattan Phenomenon |
Use warm, soapy water and a sponge to clean. |
|
Polymer |
Use a garden hose or pressure washer, or wash your hands using soapy water and a cleaning sponge. Either baking soda or white distilled vinegar may be used to remove stubborn stains. |
Cleaning outdoor tables is advised twice a year, once at the beginning of the spring/summer season and once again at its conclusion. Avoid using strong chemicals to prevent discolouration.
Outdoor tables may sustain significant harm from the weather over time. For instance, continuous rain may damage wood and corrode metal. Furthermore, sunshine may degrade colours. It must thus be shielded from the weather.
The use of outdoor table coverings is the most effective method for this. From tiny coffee tables to enormous dining sets, they come in various forms and sizes to fit every table style.
How to Maintain Your Outdoor Table
The same procedures should be followed to take care of wooden outdoor tables. First, Clean it often with a gentle brush or cloth to remove dirt and debris. Avoid using strong chemicals and abrasive cleaners as they might damage the wood.
Apply a preservative coating, such as oil or varnish, to prevent moisture infiltration into the wood, preventing its decay or deformation (read on for more information on protection). Stow or cover your tables during inclement weather, such as intense heat, snow, or rain, to avoid damage.
Finally, to extend the life of your tables, periodically check them for indications of wear and tear and make the required repairs.
DIY Outdoor Table Ideas
The list has many DIY outdoor table ideas, from simple patio tables made from recycled materials to complex tables you can build yourself. Or add a creative tabletop to an old table to make it look new again.

Outdoor Dining Table
This free outdoor table creates a contemporary farmhouse dining table that looks great on a porch or deck. This straightforward table's design aims to comfortably accommodate as many people as possible, making it functional and visually striking.
Outdoor Bar Table
Although it is designed to function as an outside bar, you could also use this table as a side table and place almost anything on it. The open shelf for storage and the lovely concrete surface make it easy to prepare meals or drinks.
Outdoor Herringbone Dining Table
This outdoor layout can make a stunning dining room table with a herringbone top and X-brace legs. It is so beautiful that you would want to use it inside rather than outside. This comprehensive blueprint includes everything you need to get started constructing.
Outdoor Pallet Coffee Table
Your neighbours will envy you if you add this outdoor coffee table to your collection of patio tables. Because it's constructed of pallets, this table is an excellent low-cost project. You may place your preferred beverages on ice by cutting off the middle of the table.
Outdoor Octagon Coffee Table
This magnificent outdoor coffee table would complement some outdoor seats, allowing everyone to come together and enjoy a meal or game. It is distinctive because of its lattice legs and unusual octagon form.
DIY Outdoor Table FAQs
The following are the frequently asked questions about the DIY garden shed in Australia.
- What do you build an outdoor table out of?
For projects including outdoor tables, cedar and redwood work well, although pine will also work. The table's legs are large and thick, so I cut the 2x4 boards to a length just an inch or so longer than required and adhered two of them to each leg.
- What material can you use for an outdoor table top?
Teak, poly lumber, stainless steel, and resin are materials resistant to the damaging effects of sun and storm. Look through our resin or poly timber alternatives for an almost maintenance-free table top that is available in various shapes and finishes. Or think about stainless steel or aluminium for a sleek, contemporary appearance.
- What is the cheapest wood to build a table?
Although several kinds of wood may be reasonably priced, softwoods - pine, spruce, and fir - are the least-priced option. These woods are great for various uses, including building tables, since they are readily available, easy to harvest, and adaptable.
Final Thoughts
In conclusion, anybody wishing to improve their outdoor living area may find that taking on a DIY outdoor table project is gratifying. Making your table allows you to personalise it to your tastes and ensure it precisely fits your demands, style, and price range.
Any taste or ability level may find a DIY outdoor table alternative among the many materials, styles, and building methods available. Making your outdoor table may be a rewarding and enjoyable endeavour, regardless of your level of expertise with do-it-yourself projects.